

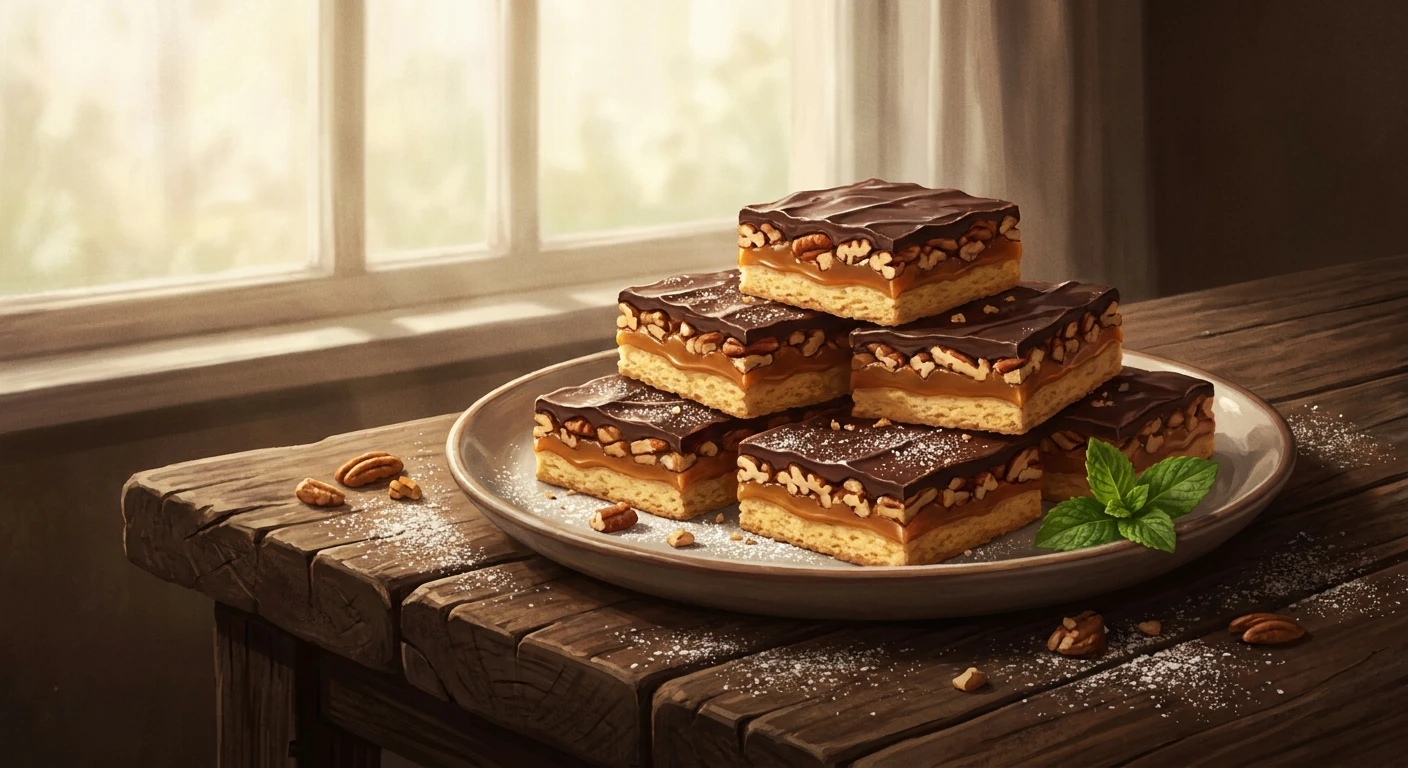
Why You Absolutely Need This Turtle Bars Recipe
Look, I’ll be completely upfront with you—finding the perfect turtle bars recipe was basically my main obsession this past winter. Just last week, I was sitting in my kitchen here in Kyiv, watching the snow fall over the golden domes outside my window, and I realized I desperately needed a foolproof comfort bake. My babusya usually insists on baking her traditional apple sharlotka when the weather gets cold, but I wanted something richer, something completely indulgent. I wanted that classic American combination of salty, nutty, and sweet.
When I finally perfected these squares and served them with some strong Carpathian herbal tea, even my grandmother had to admit they were legendary. She completely switched sides and now asks for these buttery treats every weekend. This dessert is the ultimate comfort food, fusing crunchy toasted pecans, molten gooey caramel, and rich semi-sweet chocolate into a thick shortbread base that absolutely nobody can resist. Seriously, if you are looking for a crowd-pleaser, you just found it.
I am writing this to you like a friend sending a text message because you genuinely need this in your life. We are skipping the overly complicated pastry chef nonsense and focusing strictly on massive flavor, reliable textures, and a baking process that feels totally natural. Grab your favorite mixing bowl, preheat your oven, and let me talk you through the exact method to make the absolute best sweet squares you will ever pull out of your kitchen.
Why Everyone is Obsessed with this Dessert
Listen, making a tray of these is not just about throwing sugar and flour into a pan. It is about engineering the perfect bite. The secret to why everyone goes completely wild for this specific treat lies in the structural contrast of the layers. You get a dense, buttery shortbread crust that holds up to the heavy toppings without crumbling into a mess. Then you have the middle layer, which is a sticky, chewy, salted caramel loaded with roasted nuts. Finally, a thick blanket of smooth chocolate seals the whole thing together. It is a masterpiece of textural design.
To really understand what goes into this pan of pure joy, look at how the primary components break down:
| Layer | Key Ingredients | Function and Taste Profile |
|---|---|---|
| The Base Layer | Butter, Flour, Brown Sugar | Provides a sturdy, slightly crumbly shortbread foundation that balances the sweetness above. |
| The Caramel Center | Heavy Cream, Brown Sugar, Pecans | Creates a gooey, chewy, nutty bridge that offers massive rich flavor and satisfying crunch. |
| The Chocolate Roof | High-Quality Chocolate Chips | Melts into a smooth, glossy top layer that snaps slightly when bitten, adding deep cocoa notes. |
There are a couple of massive reasons why you should make this your go-to bake. First, they are absolutely perfect for bake sales or charity events. I brought a batch to a local volunteer gathering here in town, and they vanished within ten minutes. People were literally chasing me down for the details. Second, they are the ultimate holiday gifting item. You can slice them neatly, wrap them in wax paper, tie them with a rustic string, and suddenly you have a gourmet gift that looks incredibly expensive.
Before you start, you are going to need a few specific tools to make the magic happen smoothly. Trust me, getting organized first saves you so much stress later. Here is what you need to gather:
- A heavy-bottomed saucepan to ensure your caramel cooks evenly without scorching on the bottom.
- A standard 9×13 inch metal baking pan, completely lined with parchment paper for a flawless release.
- A reliable offset spatula to spread that warm, melted chocolate into a perfectly even, beautiful layer.
- A sharp, heavy chef’s knife for cutting the chilled block into neat, professional-looking squares.
The Origins of the “Turtle” Flavor Profile
If you are anything like me, you probably wonder where the name for these treats actually comes from. The story starts way back in 1918 in Chicago, Illinois. A candy maker at the DeMet’s Candy Company started dropping clusters of pecans onto wax paper, coating them in rich caramel, and completely enrobing them in milk chocolate. When the workers looked at the finished candies sitting on the cooling racks, they realized the distinct shape—a large chocolate shell with four pecan pieces sticking out as legs—looked exactly like tiny turtles.
The name stuck immediately. Those original candies became a massive cultural phenomenon, defining the exact flavor trio of nuts, caramel, and chocolate for generations of sweet tooths. People realized very quickly that this flavor combination was basically invincible.
The Evolution of Bar Cookies
As the decades rolled on, home bakers in the 1950s and 1960s wanted a way to replicate that iconic candy flavor without the tedious work of hand-dipping individual nut clusters. Hand-dipping takes forever, and honestly, who has the time? The ingenious solution was the traybake. By pressing a crust into a large pan, pouring the filling over the top, and baking the whole thing at once, housewives created a high-yield dessert that captured the exact essence of the candy but required a fraction of the manual labor.
This method revolutionized how people brought desserts to potlucks and family reunions. The bar format meant you could feed twenty people from a single pan, making it the undisputed champion of large-scale social events.
The Modern State of Decadent Desserts
Fast forward to today. It is 2026, and our approach to these nostalgic desserts has matured dramatically. We are no longer satisfied with overly processed, cloyingly sweet versions. The modern interpretation is all about elevating the raw ingredients. We are using cultured European-style butter for the crust. We are adding generous pinches of flaky Maldon sea salt to the caramel to cut through the sugar. We are seeking out dark, single-origin chocolate chips to provide a slightly bitter contrast to the sweet filling.
We want comfort, yes, but we want high-quality comfort. The recipe I am sharing with you embraces this modern philosophy entirely. It respects the vintage roots of the original candy while upgrading the flavor profile to satisfy adult palates. It is exactly what you want to eat right now.
The Science Behind the Perfect Caramel Set
Okay, let’s talk a little bit of kitchen science, because understanding what happens in your pan guarantees you will not mess this up. The biggest anxiety people have when baking these bars is the caramel layer. Making caramel is basically a process of controlled water evaporation and sugar breakdown. When you boil the butter and brown sugar together, you are forcing the water content to cook off. As the temperature rises, the sugar molecules break apart and form entirely new flavor compounds—this is what gives caramel its deep, complex, almost buttery taste.
The key to keeping the caramel chewy rather than hard is the fat content from the butter and the precise boiling time. If you boil it for exactly one minute as the recipe usually dictates, you reach the “soft ball” stage. Any longer, and you risk making a brittle candy that will break your teeth.
Maillard Reaction and Pecan Roasting
You might be tempted to skip toasting the nuts. Do not do it! Toasting the nuts triggers the Maillard reaction, a chemical reaction between amino acids and reducing sugars that gives browned food its distinctive, savory flavor. Raw nuts taste completely flat compared to toasted ones. Here are a few solid scientific facts to keep in mind while you bake:
- Butter Temperature: Using cold butter in the crust prevents the flour proteins from forming too much gluten, ensuring the base stays tender and crumbly like a good shortbread should.
- Sugar Crystallization: The acidity in brown sugar helps prevent the boiling caramel from crystallizing and turning grainy, ensuring a completely smooth, glossy texture.
- Chocolate Emulsion: Residual heat from the hot caramel is the gentlest way to melt the chocolate chips. Direct heat would cause the cocoa solids and cocoa butter to separate, making the chocolate look dull and chalky.
- Resting Time: Letting the bars cool entirely allows the fat molecules in the caramel and chocolate to stabilize, making them possible to cut cleanly without the layers sliding apart.
Step 1: Prep the Oven and Pan Properly
First things first. You need to preheat your oven to 350 degrees Fahrenheit (about 175 degrees Celsius). Do not put your pan in until the oven is fully heated. Take your 9×13 inch metal pan and line it with two overlapping sheets of parchment paper. Make sure you leave an overhang on the sides. This overhang acts like a pair of handles, allowing you to lift the entire solid block of dessert out of the pan later. If you just grease the pan, you will be digging the bars out with a spoon and ruining the beautiful layers.
Step 2: Mix the Buttery Shortbread Base
In your biggest mixing bowl, combine two cups of all-purpose flour, one cup of packed light brown sugar, and a half cup of softened butter. You want to mix this until it resembles coarse, damp sand. You can use a pastry blender, or honestly, just wash your hands and use your fingers to rub the butter into the dry ingredients. Once the mixture holds together when you squeeze a handful of it, press it firmly and evenly into the bottom of your prepared pan.
Step 3: The First Bake (Crust Perfection)
Slide the pan into the oven and bake the crust by itself for about 15 minutes. You are looking for the edges to turn a very light golden brown. Baking the crust first, before adding the wet ingredients, is called blind baking. If you skip this, the caramel will soak right into the raw flour, and you will end up with a soggy, messy bottom instead of a crisp, cookie-like foundation.
Step 4: Toasting the Pecans for Maximum Flavor
While the crust is doing its thing in the oven, take one and a half cups of chopped pecans and toast them lightly in a dry skillet over medium heat for about five minutes. Shake the pan constantly so they do not burn. The moment you smell that rich, nutty aroma hitting your nose, take them off the heat and transfer them to a cool bowl immediately.
Step 5: Crafting the Molten Caramel Layer
In your heavy saucepan, combine one cup of butter and half a cup of tightly packed brown sugar. Turn the heat to medium and stir constantly until the butter melts and the mixture comes to a full, rolling boil. Let it boil undisturbed for exactly one minute. Take it off the heat immediately. Pull your hot crust out of the oven, scatter the toasted pecans evenly over the top, and carefully pour the hot caramel mixture over the nuts, spreading it gently with a spatula.
Step 6: The Final Bake and Chocolate Melting
Put the whole pan back into the oven for another 15 to 20 minutes until the caramel layer is bubbling vigorously all over the surface. Carefully take the pan out of the oven. Immediately sprinkle two cups of semi-sweet chocolate chips evenly across the bubbling hot caramel. Let the pan sit undisturbed for about five minutes. The radiant heat will soften the chocolate. Grab your offset spatula and smooth the melted chocolate into a flawless, glossy layer.
Step 7: Cooling, Chilling, and Slicing Cleanly
This is the hardest part. You must wait. Let the pan cool completely at room temperature for at least two hours, then transfer it to the refrigerator for another hour. Chilling sets the caramel and firms up the chocolate. Once fully chilled, use your parchment handles to lift the block onto a cutting board. Run your heavy chef’s knife under hot water, wipe it dry, and press straight down to slice perfect, clean squares.
Myth: Making caramel from scratch is too hard for beginners
Reality: People get really intimidated by caramel, thinking they need candy thermometers and years of pastry experience. For these specific bars, the caramel is actually just a simple butter and brown sugar reduction. Because we are not aiming for a spun-sugar consistency, boiling it for exactly sixty seconds is literally all it takes. It is practically foolproof.
Myth: You can use any type of nut if you don’t have pecans
Reality: While you technically can throw walnuts or almonds into the pan, you are fundamentally changing the DNA of the dessert. Pecans have a specific buttery, sweet profile that harmonizes perfectly with brown sugar. Walnuts can introduce a bitter, tannic note that clashes with the caramel. Stick to pecans if you want that authentic, nostalgic flavor.
Myth: These bars need to be eaten immediately
Reality: Actually, these bars age remarkably well. They taste significantly better on day two after the flavors have had time to meld together and the shortbread has softened slightly from the caramel’s moisture. They are the ultimate make-ahead dessert for busy weekends.
Can I freeze these bars?
Absolutely. Wrap the fully cooled, uncut block tightly in a double layer of plastic wrap, then foil. They freeze beautifully for up to three months. Thaw overnight in the fridge before cutting.
Salted or unsalted butter?
I highly recommend using unsalted butter so you have complete control over the sodium level. Add your own half teaspoon of kosher salt to the crust to balance the sweetness perfectly.
Milk chocolate or dark chocolate?
Semi-sweet is the traditional sweet spot. Milk chocolate makes the entire bar way too aggressively sweet, while ultra-dark chocolate can sometimes overpower the delicate buttery notes of the pecans.
Why did my crust crumble?
You likely did not pack the shortbread mixture firmly enough into the pan before baking. Use the flat bottom of a drinking glass to really compress the crumbs into a solid layer.
Can I use store-bought caramel sauce?
Please do not. Store-bought ice cream caramel sauce has way too much water content. It will never set up properly and your dessert will literally fall apart into a soupy mess when you try to slice it.
How long do they stay fresh?
Store them in an airtight container at room temperature, and they will stay exceptionally fresh and chewy for up to five days. Keep them away from direct sunlight so the chocolate does not bloom.
Do I really need to toast the pecans?
Yes, a hundred times yes. Raw nuts lack the crisp texture and deep, roasted flavor required to stand up to the heavy chocolate and thick caramel. It takes five minutes and changes everything.
Honestly, you are now completely equipped to bake the greatest dessert of your life. This recipe is a massive win every single time I make it, whether for my family here in Ukraine or for friends dropping by for coffee. Do not overthink the process, just trust the steps, watch your oven times, and enjoy the incredible aroma filling your kitchen. Go bake a batch right now, and share the link to this guide with anyone who asks for the secret!



Leave a Reply