

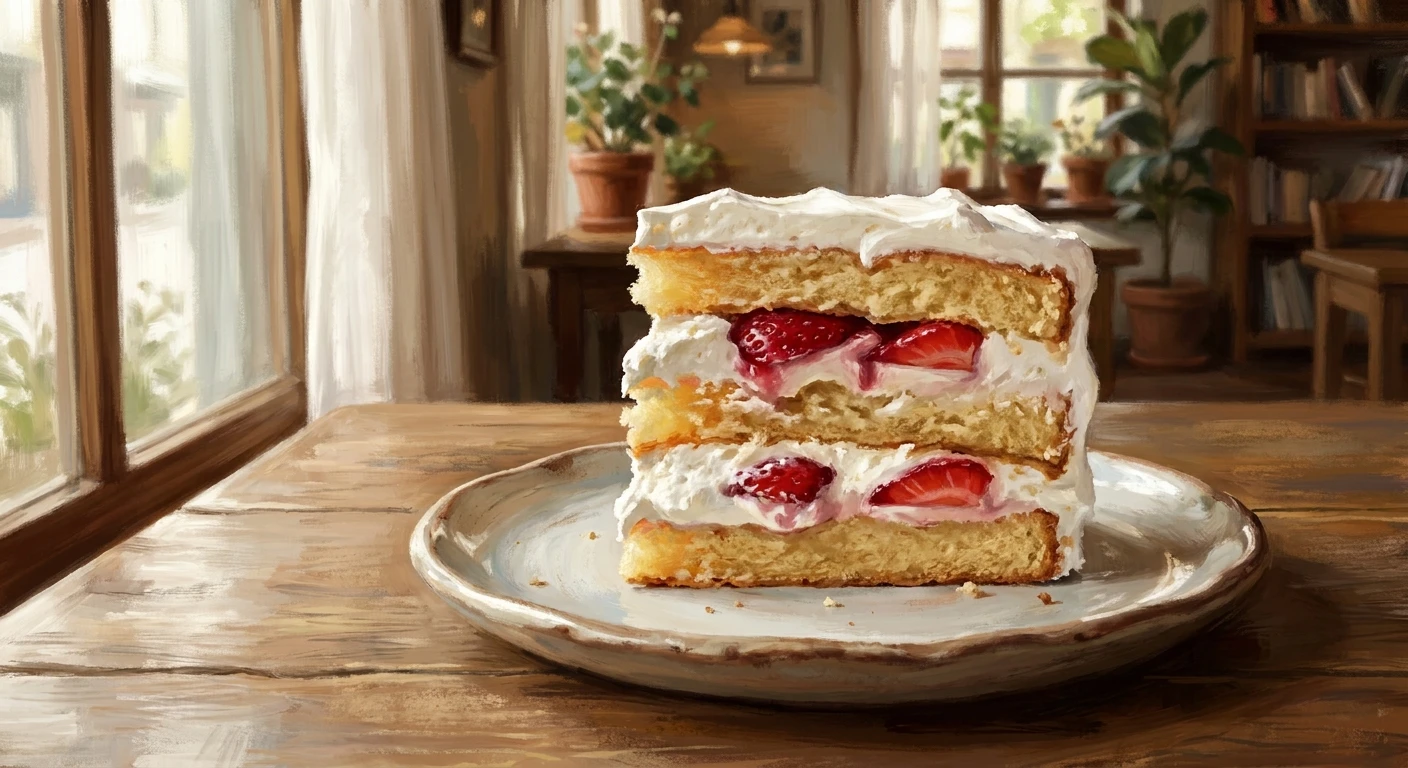
Mastering the Perfect Strawberry Cream Cake
There is nothing quite like a freshly assembled strawberry cream cake resting on a kitchen counter, promising a flawless harmony of textures and seasonal flavors. This iconic dessert captures the essence of baking elegance, combining the feather-light crumb of a well-aerated sponge, the rich indulgence of cold dairy, and the bright, acidic burst of fresh fruit. Building a masterpiece requires more than simply throwing ingredients into a bowl; it demands an understanding of temperature control, structural mechanics, and flavor balance. While the component list remains remarkably brief, the technique applied to those ingredients determines whether you end up with a dense, weeping mess or a towering, bakery-quality showstopper. Mastering this bake grants you access to a foundational pastry skill set that translates across countless other culinary endeavors. We are going to explore the precise methodology required to construct this classic dessert from scratch. By breaking down the individual elements and treating each layer with deliberate care, you can consistently produce a dessert that commands attention and satisfies every craving.
Anatomy of the Base Structure
Every exceptional dessert begins with a solid foundation, and choosing the right base dictates the entire eating experience. The sponge acts as the structural scaffolding, absorbing moisture while providing a soft bite that yields instantly to a fork. Bakers must choose a base that balances lightness with enough strength to support heavy layers of fruit and frosting. Traditional heavy batters often crush the delicate interior layers, while overly dry bases refuse to meld with the filling. Evaluating the options reveals clear distinctions in how different formulas perform under pressure.
Read also: The Ultimate Brown Sugar Cake Recipe Guide; Easy Strawberry Rhubarb Freezer Jam Recipe.
| Sponge Variety | Fat Content Source | Texture and Best Use Case |
|---|---|---|
| Classic Genoise | Low (Melted butter folded late) | Slightly dry, highly absorbent; ideal for heavy syrups |
| Chiffon Base | High (Liquid vegetable oil) | Ultra-soft, moist, bouncy; perfect for tall, airy tiers |
| Victoria Sponge | High (Creamed solid butter) | Dense, sturdy, rich; suited for rustic, heavy layered bakes |
Selecting the optimal components provides tremendous value. For example, brushing a classic Genoise with a simple syrup not only prevents the crumb from drying out in the refrigerator but also introduces a subtle, infused flavor profile that complements the fresh produce. Similarly, choosing a stabilized frosting ensures the exterior design remains sharp and defined, rather than melting into a puddle after thirty minutes on a serving table. To guarantee success, you must adhere strictly to these core rules of assembly:
- Absolute Temperature Control: Keep your mixing bowls, beaters, and heavy dairy completely chilled before aeration to maximize volume and stability.
- Structural Integrity: Slice your fruit into uniform, flat pieces to create level interior tiers that will not destabilize the upper sections of the dessert.
- The Essential Resting Period: Allow the fully assembled structure to sit in a chilled environment for at least eight hours before slicing, allowing the moisture to equalize and the crumb to firm up.
The Origins of Fruit and Cream Desserts
The marriage of fresh produce, rich dairy, and baked dough spans centuries of culinary tradition. Early European recipes featured primitive variations of fruit fools and trifles, where stale bread or biscuits were soaked in sweet wine and layered with thick custards and seasonal harvests. As oven technology improved and chemical leaveners became widely available, bakers began experimenting with lighter, specialized cakes designed specifically to carry these delicate toppings without turning into mush.
Evolution Across Continents
The concept evolved rapidly as it crossed borders. In the United Kingdom, the Victoria Sponge became a teatime staple, featuring a hefty, butter-rich crumb sandwiched with thick jams and clotted dairy. However, the most profound refinement occurred in East Asia following the Second World War. As ingredients like sugar and white flour became accessible during post-war economic recovery, Japanese pastry chefs adapted the Western concept into the famously delicate Kurisumasu Keki (Christmas Cake). They discarded the heavy, dense batters in favor of cloud-like, egg-foam bases, drastically reducing the overall sweetness to highlight the natural flavor of premium produce.
The Modern State of Berry Cakes
Today, the landscape of layered fruit pastries emphasizes minimalism, high-quality sourcing, and refined aesthetics. The naked cake trend frequently leaves the sides of the dessert unfrosted, exposing the vibrant interior layers and demonstrating the baker’s precision. Furthermore, the farm-to-table movement has elevated the dessert by encouraging bakers to seek out specific, localized fruit varietals that offer superior sweetness and acidity, moving away from the watery, mass-produced crops of the past.
The Chemistry of Whipped Cream Aeration
Achieving the perfect fluffy frosting is an exercise in physical chemistry. Heavy dairy contains fat globules suspended in water. When you introduce mechanical shear force via a whisk, you strip away the protective membranes surrounding these fat globules, causing them to smash into one another and partially coalesce. This process creates a microscopic three-dimensional network of fat that traps air bubbles and liquid, forming a stable foam. Temperature plays a critical role here; if the mixture rises above 10 degrees Celsius, the fat becomes too soft to hold the air pockets, resulting in a greasy, collapsed liquid. Pushing the mechanical force too far will completely break the emulsion, separating the mixture into solid butter and liquid buttermilk.
Strawberry Osmosis and Pectin Mechanics
Handling the fresh produce requires an understanding of cellular biology. When you coat cut fruit in granulated sugar, you trigger osmosis. The sugar acts hygroscopically, drawing water out of the plant cells and creating a vibrant, naturally vibrant syrup without the need for applied heat. This process, known as maceration, concentrates the flavor and softens the texture.
- Fat Percentage Requirements: Dairy must contain a minimum of 35 percent fat to properly trap air and maintain structural integrity over time.
- Protein Denaturation: During the baking phase, egg proteins unfold and coagulate, forming the rigid microscopic walls that keep the sponge from collapsing.
- Moisture Migration Dynamics: A protective barrier of fat (from frosting) prevents the wet fruit from directly touching the crumb, stopping the dough from turning soggy.
- Thermal Regulation: Ingredients like eggs and milk must be brought to room temperature before mixing to ensure a smooth, unbroken batter emulsion.
Step 1: Meticulous Ingredient Sourcing and Preparation
Begin by securing the freshest, most fragrant produce available, as the entire flavor profile relies on the quality of your berries. Wash them gently, dry them thoroughly with paper towels to remove excess surface water, and hull the stems. Bring your eggs and milk out of the refrigerator an hour before you plan to start, allowing them to reach ambient temperature for optimal volume during mixing. Prepare your baking tins by greasing the sides and lining the bottoms with precision-cut parchment paper.
Step 2: Mixing the Highly Aerated Sponge Batter
Crack your room-temperature eggs into a stand mixer bowl and gradually rain in the granulated sugar. Beat this mixture on high speed until it reaches the ribbon stage, meaning the batter falls from the whisk in thick, slowly dissolving trails. This mechanical aeration is crucial for a light texture. Sift your cake flour multiple times to remove any lumps, then fold it into the egg foam using a wide spatula. Execute this folding motion gently, scooping from the bottom of the bowl and turning the mixture over to retain as many trapped air bubbles as possible.
Step 3: Precision Baking and Controlled Cooling
Pour the aerated batter evenly into your prepared tins and smooth the tops. Bake in a fully preheated oven until the tops spring back when gently pressed and a wooden skewer inserted into the center emerges clean. Avoid opening the oven door during the first twenty minutes, as the sudden drop in temperature can cause the rising dough to collapse. Once baked, remove the tins and drop them once on the counter to release trapped steam, then turn them out onto a wire rack to cool completely. Cooling upside down prevents gravity from compressing the delicate crumb.
Step 4: Crafting the Infused Strawberry Syrup
While the layers cool, utilize your fruit scraps and stems by simmering them in a small saucepan with equal parts sugar and water. This extracts every last bit of flavor and color, resulting in a bright, fragrant syrup. Strain the liquid and allow it to cool completely. Before assembling, use a pastry brush to generously dab this syrup across the cut surface of your cooled sponge layers. This technique replaces any moisture lost during baking and dramatically enhances the overall eating experience.
Step 5: Whipping the Stabilized Dairy Frosting
Place your mixing bowl and whisk attachment in the freezer for fifteen minutes. Pour in your cold, high-fat dairy, a touch of powdered sugar, and a splash of vanilla extract. For guaranteed stability, especially in warm climates, add a spoonful of mascarpone cheese or a tablespoon of skim milk powder. Whip the mixture on medium speed until stiff peaks form. The frosting should hold its shape firmly when the whisk is inverted but still look smooth and glossy. Stop immediately to avoid churning it into butter.
Step 6: Strategic Layering and Crumb Coating
Place your first layer on a sturdy cake board. Pipe a thick dam of frosting around the outer perimeter to hold the filling in place. Spread an even layer of chopped, macerated fruit inside the dam, then cover the fruit with a thin layer of frosting to act as a glue. Place the second sponge layer on top and press down gently to level the structure. Apply a thin layer of frosting over the entire exterior to trap any loose crumbs, creating a smooth canvas for the final coat.
Step 7: Final Decoration and the Essential Resting Phase
Apply the final, thicker coat of frosting, using an offset spatula and a bench scraper to achieve perfectly smooth sides and sharp top edges. Pipe decorative rosettes along the top border and arrange whole, glazed berries in the center for visual impact. Crucially, transfer the finished dessert to the refrigerator and allow it to rest overnight. This chilling period firms up the fat in the frosting and allows the moisture from the syrup to permeate the crumb, resulting in a structurally sound dessert that slices beautifully.
Myths & Reality
Myth: You need commercial gelatin powder to make the dairy frosting hold its shape for a party.
Reality: Incorporating a small amount of mascarpone cheese or simply keeping the ingredients exceptionally cold provides enough structural stability for display without introducing a rubbery texture.
Myth: The dessert must be eaten immediately after frosting to taste fresh.
Reality: An overnight rest in the refrigerator allows the internal moisture to equalize, dramatically improving both the depth of flavor and the physical slicing mechanics.
Myth: Frozen fruit works just as well as fresh produce when baking out of season.
Reality: Thawed berries release massive amounts of excess cellular moisture that will break down the delicate dairy structure and turn the bottom sponge into a soggy, unappetizing mess.
Myth: Commercial boxed mixes cannot be used to create a professional-level base layer.
Reality: With a few strategic additions, like substituting whole milk for water, adding an extra egg yolk, and incorporating melted butter, a commercial mix performs admirably and saves significant preparation time.
Can I bake the sponge base a day ahead of time?
Yes, baking the sponge a day early is highly recommended. Wrap the completely cooled layers tightly in plastic wrap and store them at room temperature. This allows the crumb to settle, making it much easier to slice and handle during the assembly process.
Why did my dairy frosting curdle during mixing?
Curdling happens when the mixture is over-whipped, pushing the fat globules to completely separate from the liquid. Always whip on medium speed and stop the moment stiff peaks form. If it begins to look grainy, you have gone too far.
How do I properly store the assembled leftovers?
Store any remaining slices in an airtight container in the refrigerator. The dairy and fresh fruit are highly perishable and will spoil quickly at ambient temperatures. Consume the leftovers within three days for the best quality.
What is the absolute best fruit variety to use here?
Look for medium-sized, locally grown varieties like Albion or Seascape, which offer a dense, meaty texture and a superior balance of tartness and sugar. Avoid oversized, hollow, pale berries often found in off-season supermarkets.
Can I substitute the heavy dairy with a plant-based alternative?
Yes, but you must choose a high-fat vegan alternative, such as full-fat coconut cream or a commercial oat-based whipping product specifically formulated to hold air. Standard almond or soy milk will not whip into a stable foam.
Why did my sponge sink in the middle after baking?
Sinking usually indicates underbaking, allowing the raw center to collapse, or opening the oven door too early, which disrupts the delicate expansion of trapped air. Always ensure the center registers a slight resistance before removing the pan.
Can I freeze the fully assembled dessert for later?
Freezing the fully assembled dessert is not recommended. While the sponge freezes beautifully, the fresh fruit will turn mushy upon thawing, and the whipped dairy may weep liquid and lose its fluffy texture. It is best enjoyed fresh. Now that you have the complete methodology at your fingertips, clear off your counter, grab your whisk, and start baking your masterpiece today!


Leave a Reply