

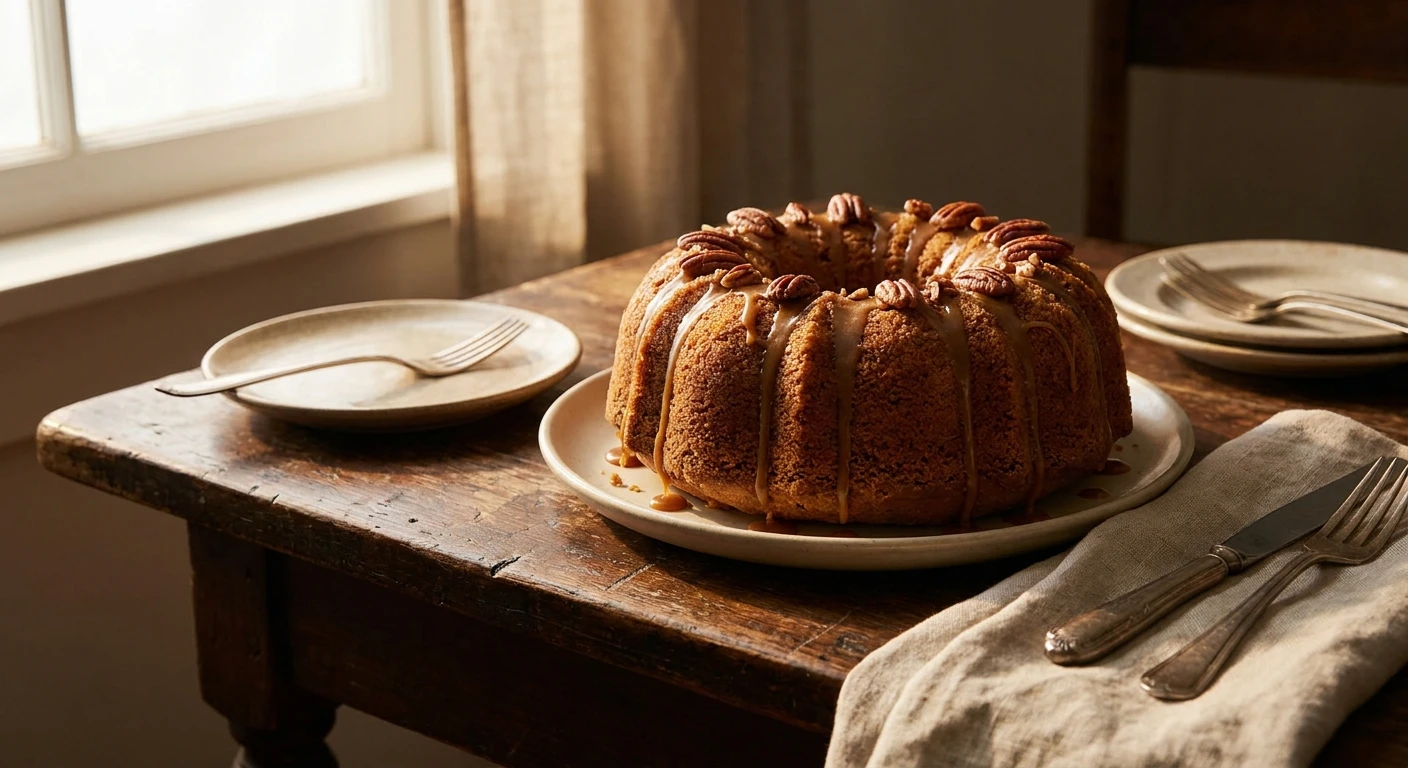
Mastering the Classic Brown Sugar Cake
Baking a flawless brown sugar cake is all about understanding the delicate balance of moisture, acidity, and rich molasses flavors. You want a dessert that delivers a deep caramel profile without becoming overly dense or cloying on the palate. Baking relies heavily on precision chemistry, and when you introduce unrefined or partially refined cane sweeteners into a batter, you fundamentally change the entire chemical structure of the crumb. There is a distinct difference between a standard vanilla sponge and one heavily relying on the complex, earthy notes of molasses. These specific sweeteners do not just add flavor; they actively provide structural integrity, retain vital moisture, and dictate the final texture of your dessert.
By choosing the highest quality ingredients, measuring them meticulously with a digital scale, and following a sound technique, you ensure a consistent and spectacular bake every single time. Proper technique guarantees a light, fluffy crumb that carries the robust sweetness you expect from premium ingredients. As you work through the fundamentals of batter aeration, temperature control, and oven spring, you will realize that achieving bakery-level results at home is entirely possible. Getting this foundational knowledge right is the absolute best way to produce a reliable, crowd-pleasing dessert that stands out on any dining table.
Read also: Easy Cinnamon Pinwheels Recipe to Bake Today; Mastering the Ultimate crimp and crumb at Home.
Understanding the Ingredients and Core Benefits
When you set out to create a dessert masterpiece, knowing exactly how your individual ingredients behave is absolutely crucial. The primary benefit of adding molasses-rich sweeteners to your batter is the incredible moisture retention they provide over time. A standard white sponge can dry out quickly within twenty-four hours, but a properly baked brown sugar cake stays perfectly tender for days. Let us look at the exact breakdown of how different varieties impact your final product. You have several options available in the baking aisle, and each brings a specific characteristic to the table. Choosing the right one dictates whether your dessert leans toward a light toffee profile or a dense, spiced gingerbread aesthetic.
| Sugar Type | Flavor Profile | Best Used For |
|---|---|---|
| Light Brown | Subtle caramel, mild sweetness, delicate notes | Everyday baking, fruit pairings, light frostings |
| Dark Brown | Rich molasses, deep earthiness, robust aroma | Heavy batters, spiced desserts, autumn recipes |
| Muscovado | Intense, slightly bitter, highly complex | Gourmet treats, rich frostings, artisanal baking |
These specific ingredients act as powerful hygroscopic agents, meaning they actively draw and trap moisture from the surrounding air. This constant hydration cycle keeps the crumb remarkably soft and pliable. Consider two popular examples: a standard birthday sponge and a traditional sticky toffee pudding. The latter relies entirely on this moisture-binding property to maintain its signature gooey texture without collapsing. To get the best results in your own kitchen, you need a solid preparation routine that maximizes these benefits.
- Always weigh your ingredients using a highly accurate digital kitchen scale rather than relying on volume-based measuring cups, ensuring you get the exact ratio of molasses to flour.
- Bring all dairy components and eggs to an exact room temperature to guarantee the delicate emulsion does not break when you mix them with the aerated butter.
- Sift your dry ingredients at least twice to eliminate any dense clumps of flour, baking soda, or baking powder that could cause uneven rising during the bake.
- Scrape down the sides and bottom of your mixing bowl frequently to ensure no dense pockets of fat remain unincorporated in the final batter.
The History and Evolution of Molasses Sweets
Origins of Molasses Sweets
The history of using partially refined cane products in baking dates back centuries, long before highly processed, snow-white crystals became the absolute standard in household kitchens. Early historical bakers relied heavily on whatever forms of sweetening were most accessible and affordable in their region, which usually meant raw or minimally processed cane extracts shipped from warmer climates. These early sweeteners contained a naturally high percentage of raw molasses, giving historical baked goods a notoriously dark color and an incredibly heavy, dense texture. Early recipes were not the light, airy sponges we expect to eat today; rather, they were dense, nutrient-heavy provisions designed to last during long oceanic journeys or harsh, isolating winters without spoiling or turning completely stale.
Evolution in Commercial Baking
As milling and refining technology drastically improved during the height of the Industrial Revolution, professional bakers and sugar refiners began to separate the dark molasses from the raw cane completely. This mechanical advancement allowed them to create uniform, bright white crystals, which quickly became a coveted symbol of purity, wealth, and luxury among the upper classes. However, professional bakers soon realized that stripping away all the molasses meant losing vital moisture, shelf life, and complex flavor. To combat this, they started intentionally adding precise amounts of the dark syrup back into the refined white crystals to create a standardized, commercial product. This ingenious process allowed for absolute consistency. The commercialization of these standardized ingredients meant home cooks could finally achieve predictable, repeatable results, creating the foundation for the classic, nostalgic recipes we still use on a daily basis.
The Modern State of Baking
Fast forward to the year 2026, and the global culinary appreciation for unrefined and historically accurate ingredients has reached an entirely new peak. Bakers are no longer satisfied with hyper-processed ingredients that offer only one-dimensional sweetness. Today, there is a massive, industry-wide resurgence in using artisanal, minimally processed sweeteners like muscovado, turbinado, and demerara in high-end culinary applications. Modern pastry chefs and enthusiastic home bakers alike understand that a true brown sugar cake requires complex, layered flavor profiles rather than just empty, sugary sweetness. The current landscape of dessert creation heavily favors these deep, earthy, slightly bitter profiles, moving far away from overly sweet, basic vanilla sponges. The intense focus is entirely on perfecting texture, maximizing moisture retention, and delivering rich, nostalgic flavor profiles that resonate with the palate.
The Science Behind the Crumb
The Maillard Reaction Explained
Baking is simply applied chemistry, and understanding the complex chemical reactions occurring inside your hot oven gives you complete creative control over the final product. The most critical process in developing profound flavor is known as the Maillard reaction. When amino acids from the proteins in your flour and eggs react with reducing sugars under high heat, they rapidly create hundreds of different, highly complex flavor compounds. Because our chosen molasses-rich sweetener already contains complex flavor compounds right out of the bag, the Maillard reaction is significantly accelerated and enhanced during the baking process. This results in an outer crust that is deeply aromatic, wonderfully golden, and slightly caramelized. Additionally, the natural acidity present in the molasses reacts dynamically and instantly with alkaline leavening agents like baking soda. This rapid acid-base reaction produces tiny bubbles of carbon dioxide gas, which get trapped in the developing gluten network, pushing the batter upward and creating a spectacularly tender crumb.
Moisture Retention and Hygroscopy
The precise physical properties of your raw ingredients dictate exactly how long the baked dessert remains palatable before staling. Molasses is an incredibly highly hygroscopic substance. This scientific term simply means it has an intense, natural ability to attract and hold onto water molecules from its surrounding environment, effectively locking hydration inside the baked matrix.
- The pH level of dark sweetener varieties typically hovers around 5.5 to 6.5, providing the exact necessary acidic environment to activate baking soda efficiently without leaving a harsh, soapy metallic aftertaste on the tongue.
- Hygroscopic ingredients physically slow down the retrogradation of starches inside the flour, which is the scientific term for the staling process, thereby keeping the internal texture softer for significantly longer than entirely refined, white-sugar alternatives.
- The naturally occurring invert sugars present in molasses actively prevent the unwanted crystallization of sucrose molecules as the dessert cools, ensuring the crumb remains perfectly smooth and velvety rather than gritty or dry.
- The inherently higher water content found in these unrefined ingredients requires a slight, calculated adjustment in the overall liquid ratios of standard recipes to prevent structural collapse or dense streaks during the baking phase.
Actionable 7-Step Preparation Guide
Creating the absolute perfect dessert requires a methodical, organized approach to your kitchen prep. Follow this strict seven-step protocol for flawless execution every single time.
Step 1: Ingredient Temperature Harmonization
Before you even touch a mixing bowl or turn on your oven, every single refrigerated ingredient must reach exactly 68°F to 70°F. Cold eggs or stiff butter will instantly break your delicate emulsion, resulting in a dense, greasy, and heavy texture. Leave your dairy and eggs out on the counter for at least two full hours prior to mixing to ensure complete thermal harmony.
Step 2: The Creaming Process
Combine your perfectly softened butter and your chosen sweetener in the bowl of a heavy-duty stand mixer fitted with a paddle attachment. You need to beat this mixture on medium-high speed for no less than five full minutes. The ultimate goal here is to forcefully punch thousands of microscopic air pockets into the fat, which will later expand in the heat of the oven, providing essential physical lift.
Step 3: Egg Emulsification
Add your room-temperature eggs strictly one at a time. Wait patiently until the first egg is completely absorbed and the mixture looks perfectly smooth and homogenous before adding the next one. If you rush this critical step by dumping all the eggs in at once, the high water content in the egg whites will violently separate from the whipped fat, ruining the structure.
Step 4: Dry Ingredient Sifting
In a separate, large bowl, vigorously whisk together your all-purpose flour, baking powder, baking soda, and fine sea salt. Sifting or aggressive whisking is entirely non-negotiable. It removes hard lumps and evenly distributes the potent leavening agents so you do not end up with large, unsightly air tunnels or bitter baking soda pockets running through your baked goods.
Step 5: Alternating Wet and Dry
Turn your stand mixer down to the absolute lowest speed setting. Add exactly one-third of your dry flour mixture, followed immediately by half of your liquid dairy, such as milk or cultured buttermilk. Repeat this gentle process, making sure to end with the final third of the dry ingredients. Overmixing at this fragile stage activates the gluten proteins in the flour, which will inevitably make the final product tough and rubbery.
Step 6: Panning and Leveling
Divide the finished batter evenly into heavily greased baking tins lined with high-quality parchment paper. Use your digital kitchen scale to ensure each pan contains the exact same gram weight of batter. Gently smooth the tops with an offset metal spatula to encourage an even, flat rise in the oven, preventing an extreme dome shape.
Step 7: The Cooling Protocol
Bake on the center rack until a wooden skewer inserted into the dead center comes out completely clean with no wet batter attached. Once removed from the hot oven, let the tins rest undisturbed on a wire cooling rack for exactly ten minutes before gently inverting them. Cooling too quickly in the pan leads to a soggy, wet bottom, while removing them immediately causes structural collapse.
Myths and Realities
Baking is a science, yet it remains heavily surrounded by old wives’ tales and persistent misinformation. Let us clear up some of the most common misunderstandings regarding these specific ingredients.
Myth: You can simply swap white crystals and molasses-based sweeteners at a strictly 1:1 ratio without changing anything else in the recipe.
Reality: Molasses contains significantly more water weight and natural acid. If you make a direct swap, you must critically adjust your leavening agents and slightly reduce your liquid dairy volume to prevent a soggy, collapsed center.
Myth: Darker varieties will always make your baked goods hopelessly dense and heavy like a fruitcake.
Reality: Density comes entirely from poor aeration during the initial creaming phase or brutally overmixing the flour, not the color or type of the sweetener. Proper creaming technique ensures a beautifully light crumb regardless of the intense molasses content.
Myth: You do not need to add any vanilla extract if you are already using intensely flavored, dark sweeteners.
Reality: Pure vanilla extract acts as a crucial background flavor enhancer. Just like a pinch of salt, it elevates and perfectly balances the earthy, deep caramel notes, making them taste much more pronounced, rounded, and complex on the palate.
Myth: Baking soda and baking powder do the exact same thing, so you only ever need to use one of them.
Reality: Baking soda actively requires the natural acid from the molasses to activate and neutralize, while baking powder provides an additional, completely independent thermal lift when it hits the heat of the oven.
Frequently Asked Questions & Conclusion
Can I use muscovado instead of standard dark varieties?
Yes, absolutely. However, you should expect a much stronger, slightly bitter, and highly robust molasses flavor that significantly alters the overall profile.
Why did my batter severely curdle when adding the eggs?
Your eggs or butter were most likely far too cold, which immediately broke the fragile fat-and-water emulsion you built during the creaming stage.
How do I properly store the leftover slices?
Keep the slices tightly sealed in an airtight container at stable room temperature for up to four days to preserve the moisture content.
Can I freeze the baked layers before applying frosting?
Absolutely. Wrap each cooled layer incredibly tightly in double layers of plastic wrap and store them flat in the freezer for up to three months.
Why did my dessert dramatically sink in the dead center?
This structural failure is usually caused by opening the oven door too early, causing a temperature drop, or using severely expired leavening agents.
Does the specific type of flour actually matter?
Yes. Cake flour yields a much lighter, finer crumb due to lower protein, while all-purpose flour provides significantly more structural integrity for heavy layers.
Can I safely reduce the overall sweetness to save calories?
Reducing the total volume by more than 10% can severely affect moisture retention, structural stability, and the shelf life of the final product.
Is using cultured buttermilk actually necessary?
The specific lactic acid found in buttermilk reacts perfectly with the baking soda, ensuring a much lighter, fluffier texture than standard whole milk.
Should I use dark-colored metal baking pans or light-colored ones?
Always opt for light-colored aluminum pans. Dark metal absorbs heat far too aggressively, which leads to burnt, overly crispy edges before the center finishes baking.
Creating the absolute perfect brown sugar cake is an incredibly rewarding exercise in culinary precision, applied chemistry, and patience. By fully understanding exactly how moisture, acidity, and temperature interact within your mixing bowl and your oven, you can easily elevate your home baking to elite, professional levels. Do not let the science intimidate you; instead, use it to guarantee your success. Grab your digital scale, gather your premium ingredients, ensure everything is at room temperature, and start baking today!



Leave a Reply