
The Ultimate Guide to Perfect Ginger Sparkle Cookies
You haven’t truly experienced baking bliss until you’ve pulled a fresh batch of ginger sparkle cookies straight from the oven. Listen, I get it. Baking can sometimes feel intimidating, with all the precise measurements and confusing techniques. But honestly, this particular recipe is incredibly forgiving and delivers massive flavor payloads every single time. It is exactly what you need when the weather turns crisp or when you just want something comforting with your afternoon coffee.
Growing up in Kyiv, the winters could get brutally cold. Back when the power would occasionally flicker during heavy snowstorms, my grandmother used to rely on her old, sturdy gas oven to bake these incredibly aromatic spiced biscuits. They weren’t a traditional Ukrainian recipe by any means, but somehow, they became our little family secret weapon against the freezing snow outside. I vividly remember sitting by the frosty, ice-covered window in our tiny Podil apartment, clutching a warm cup of herbal Carpathian mountain tea, and dunking a freshly baked, warm cookie. It was pure magic. The sharp bite of the spice mixed with the sweet, crackling sugar crust created memories I still cherish. I want to share that exact magic with you today. You just need a few basic pantry staples, a little bit of patience, and a serious love for bold flavors.
Why This Recipe is an Absolute Game-Changer
Let me tell you exactly why these ginger sparkle cookies completely dominate the dessert table. It all comes down to the aggressive contrast in textures and flavor profiles. You get an incredibly chewy, almost fudgy center that perfectly contrasts with the deeply caramelized, crispy, sugary edges. This isn’t just a boring, flat biscuit. It is an experience. Think about the value proposition here: you are taking cheap, basic ingredients and turning them into bakery-tier luxury goods.
For instance, these cookies make the absolute best holiday gifts. I pack them in little tin boxes, and my friends literally beg me for them every single December. As another example, they are the undisputed champion of morning snacks. Pair one with a strong, dark roast espresso, and the sharp spice absolutely sings against the bitter coffee notes. It is a match made in culinary heaven.
Let’s look at the core components that make the magic happen:
| Ingredient | Function in the Cookie | Best Possible Alternative |
|---|---|---|
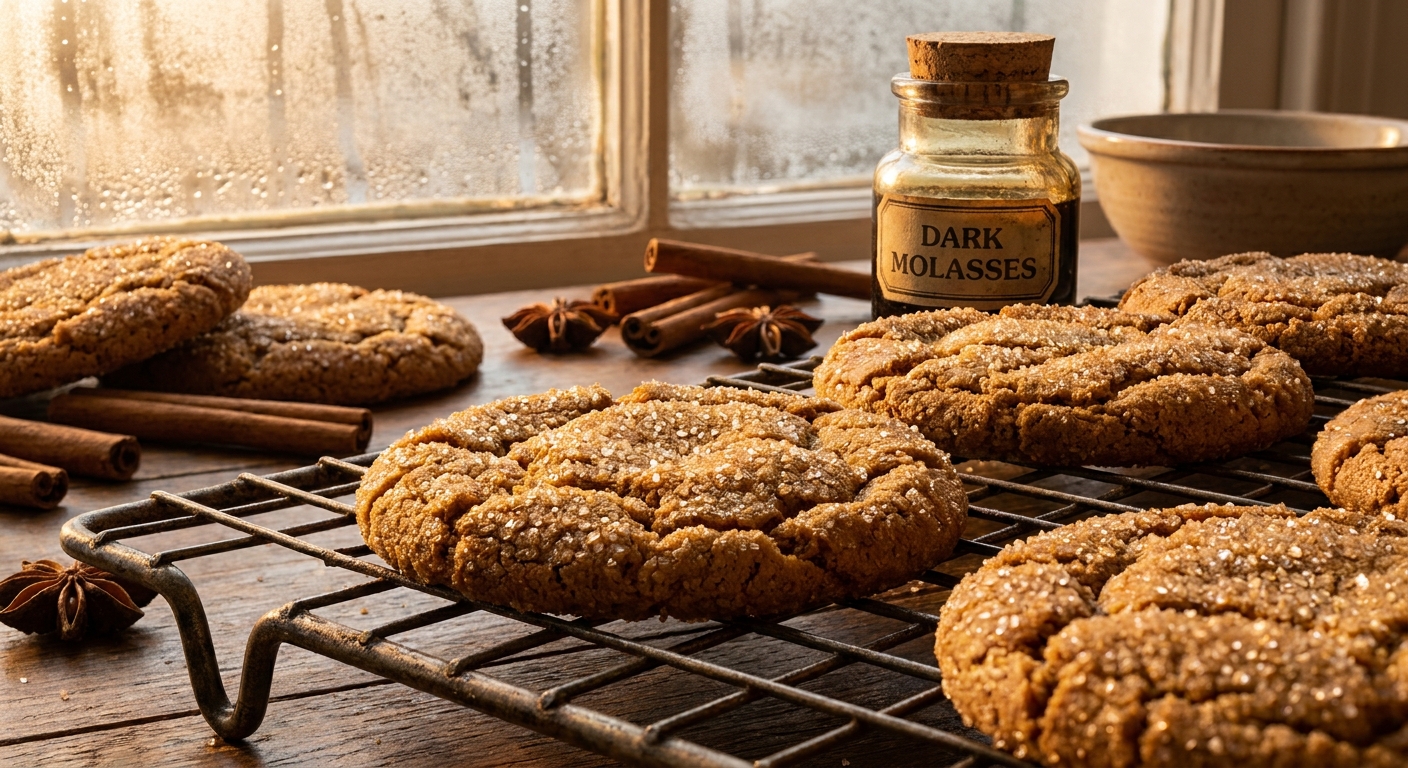
| Dark Molasses | Provides chewy texture and deep, earthy sweetness | Fancy molasses (lighter flavor) or dark corn syrup in an emergency |
| Ground Ginger | Delivers the aggressive, warm, spicy kick | Freshly grated ginger (adjust moisture) or extra cinnamon/cloves |
| Coarse Sanding Sugar | Creates the signature visual sparkle and crunchy exterior | Standard white granulated sugar or raw turbinado sugar |
| Unsalted Butter | Adds richness, fat content, and promotes spreading | Vegan butter sticks or refined coconut oil for dairy-free |
If you want to achieve the absolute perfect texture, you cannot just throw everything in a bowl and hope for the best. Follow my exact process:
- Cream the butter properly: Beat your softened butter and brown sugar together for a minimum of four whole minutes until it looks light, fluffy, and significantly paler in color.
- Do not skip the chill: You absolutely must chill the mixed dough in the refrigerator for at least two hours. This firms up the fat and prevents your cookies from turning into sad, thin puddles on the baking sheet.
- Execute the sugar roll technique: Scoop generous balls of dough, roll them aggressively between your palms to make them perfectly round, and then toss them in a bowl of coarse sparkling sugar until completely encrusted.
The Origins of Spiced Baking
Have you ever wondered where this brilliant concept actually started? Spiced baking goes all the way back to medieval Europe, heavily influenced by the early spice trades along the Silk Road. Traders would bring back wildly expensive roots like ginger from the East, and European bakers began incorporating them into dense, heavily preserved breads. These early iterations were tough, meant to survive long journeys, and heavily reliant on honey as a sweetener. The concept of a soft, chewy spiced cookie was basically nonexistent back then.
The Evolution of Sugar-Coated Treats
As time marched on, refined sugar and molasses became far more accessible to the average household. By the 1800s, bakers realized that molasses wasn’t just a cheap sweetener; it was a miraculous ingredient that retained moisture. This completely changed the game. Suddenly, we moved from rock-hard gingerbread snaps to soft, pliable molasses cookies. The brilliant addition of rolling the dough balls in granulated sugar before baking—creating that beautiful, crackled, sparkling finish—likely evolved as a way to add an extra layer of textural crunch without drying out the interior of the cookie.
The Modern State of Cookie Crafting
Fast forward to the present day. Now, as we navigate our busy lives in 2026, home bakers are craving nostalgic, comforting foods more than ever. We want recipes that feel authentic and grounded. The ginger sparkle cookie has enjoyed a massive resurgence in artisan bakeries around the world. Modern pastry chefs are elevating the classic formula by adding ingredients like crystallized ginger pieces, smoked sea salt flakes, or even a dash of black pepper to amplify the heat. The basic premise remains the same, but the execution has reached an incredible level of sophistication.
The Maillard Reaction Explained Simply
Let’s talk about the actual science happening inside your oven. When you bake these cookies, the intense heat triggers something called the Maillard reaction. This is a complex chemical reaction between amino acids and reducing sugars that gives browned food its distinctive, incredible flavor. It is the exact same process that makes a seared steak taste amazing or gives toast its golden crust. In our cookies, the molasses and brown sugar undergo this reaction rapidly, creating hundreds of brand-new flavor compounds that taste like caramel, toffee, and roasted nuts.
Baking Soda vs. Acidic Molasses
Another crucial chemical event is the leavening process. Baking soda is a base, and molasses is surprisingly acidic. When you combine them in the dough, they react to create tiny bubbles of carbon dioxide gas. This gas forces the dough to puff up dramatically in the oven. But because the dough is coated in coarse sugar, the exterior sets quickly. As the cookie continues to expand and eventually collapses slightly while cooling, that set crust fractures, giving you those gorgeous, signature crinkles and cracks on top.
- Hydration of flour: Letting the dough rest allows the flour proteins to fully absorb the moisture from the eggs and butter, resulting in a significantly chewier bite.
- Crystallization of sugar: The coarse sugar on the outside doesn’t melt entirely in the oven, acting as a structural barrier that protects the soft inner core.
- Gingerol compounds: The chemical compound that gives ginger its spicy heat, called gingerol, actually becomes slightly sweeter and more complex when exposed to sustained baking temperatures.
Day 1: Sourcing Quality Spices
If you want to treat this like a true artisan project, stretch it out. Dedicate your first day entirely to acquiring the best possible ingredients. Do not use that sad, dusty jar of ground ginger that has been sitting in the back of your pantry since 2019. Go to a specialty spice shop or a high-end grocery store and buy fresh ground ginger, fresh cinnamon, and premium dark molasses. The quality of your raw materials dictates the final outcome.
Day 2: Preparing the Molasses Base
Take time to understand your wet ingredients. Whisk your molasses, room-temperature eggs, and vanilla extract together in a dedicated bowl. Letting these sit together for just a few minutes before incorporating them into the butter helps the flavors meld. Molasses can be incredibly sticky and stubborn, so having it pre-mixed makes the actual dough-making process significantly smoother and less stressful.
Day 3: Perfecting the Dough Mix
This is the main event. Cream your butter and brown sugar until wildly fluffy. Add your wet ingredients slowly. Then, gently fold in your dry ingredients. Do not overmix! Overmixing develops the gluten in the flour, which will leave you with tough, bread-like cookies instead of tender, melt-in-your-mouth delights. Stop mixing the very second you no longer see dry streaks of flour.
Day 4: The Crucial Chilling Phase
Wrap your dough tightly in plastic wrap and banish it to the refrigerator. Yes, an overnight chill is ideal. This is not just about firming up the butter; it is about flavor hydration. The spices need time to bloom and permeate every single molecule of the dough. Rushing this step is the most common mistake impatient bakers make.
Day 5: Rolling and Sparkle Coating
Set up your workstation. You need a baking sheet lined with parchment paper, your chilled dough, and a wide, shallow bowl filled with high-quality coarse sanding sugar. Scoop out perfectly uniform balls—about two tablespoons each. Roll them quickly in your warm hands so the surface becomes slightly tacky, then drop them directly into the sugar bowl. Coat them generously. Do not be shy with the sparkle.
Day 6: The Bake and Cool Process
Preheat your oven properly. You need a solid 350 degrees Fahrenheit (175 degrees Celsius). Bake the cookies for exactly 10 to 12 minutes. They will look slightly underbaked and puffy in the center when you pull them out. That is exactly what you want! Let them cool on the hot baking sheet for five minutes to gently finish cooking before transferring them to a wire cooling rack.
Day 7: Storage and Tasting
Finally, the reward. Wait until they are completely cooled to room temperature before taking your first bite. The texture needs time to set. Store the leftovers in an airtight container with a small slice of sandwich bread. The cookies will absorb the moisture from the bread, staying incredibly soft and chewy for up to a full week.
Debunking Common Baking Myths
There is a lot of bad advice floating around on the internet. Let’s clear up some nonsense right now.
Myth: You can completely skip chilling the dough if you are in a rush.
Reality: Absolutely not. Skipping the chill phase guarantees your cookies will spread uncontrollably, resulting in flat, greasy, sad puddles that burn on the edges.
Myth: Freshly grated ginger always works better than dried ground ginger.
Reality: While fresh ginger is amazing in savory cooking, ground ginger actually provides the concentrated, dry heat needed to achieve the classic bakery texture. Fresh ginger adds too much unpredictable moisture to the dough.
Myth: You can use any type of sugar for the rolling process.
Reality: Standard powdered sugar will melt and disappear, while regular table sugar provides very little crunch. Coarse sparkling sugar or turbinado sugar is mandatory for that distinct, satisfying exterior crunch.
Frequently Asked Questions
Can I freeze the raw dough?
Yes, absolutely. Roll the dough into balls, freeze them on a tray, and then transfer to a ziplock bag. Roll them in sugar right before baking straight from frozen, adding an extra minute to the bake time.
Why did my cookies not crack on top?
This is almost always due to expired baking soda. Check your expiration dates! If your leavening agent is dead, the cookie won’t puff and collapse to create those crinkles.
Is dark or light molasses better?
Dark molasses provides a much deeper, more robust, and slightly bitter flavor profile which balances the massive amount of sugar perfectly. Light molasses makes them taste too sweet.
Can I substitute the butter for a vegan alternative?
Yes, high-quality vegan butter blocks work very well. Avoid the tub spreads, as they contain far too much water and will ruin the texture.
How long do they actually stay fresh?
If kept in a truly airtight container at room temperature, they will maintain their perfect chewy texture for about 5 to 7 days.
Can I add chocolate chips to the dough?
Definitely. While unconventional, adding a handful of premium white chocolate chips provides a creamy, sweet contrast to the sharp ginger spice.
What if I don’t have coarse sanding sugar?
If you are truly desperate, you can roll them in standard granulated white sugar. They will still taste fantastic, but they just won’t have that dramatic, bakery-style sparkle and thick crunch.
Now that you possess all this knowledge, there is literally nothing stopping you. Grab your favorite apron, double-check your spice cabinet, and start prepping your ingredients. Bake a fresh batch of ginger sparkle cookies today, fill your entire house with that incredible spicy aroma, and enjoy the ultimate homemade treat!

Leave a Reply