
Why friselle Are the Ultimate Pantry Staple You Have Been Missing
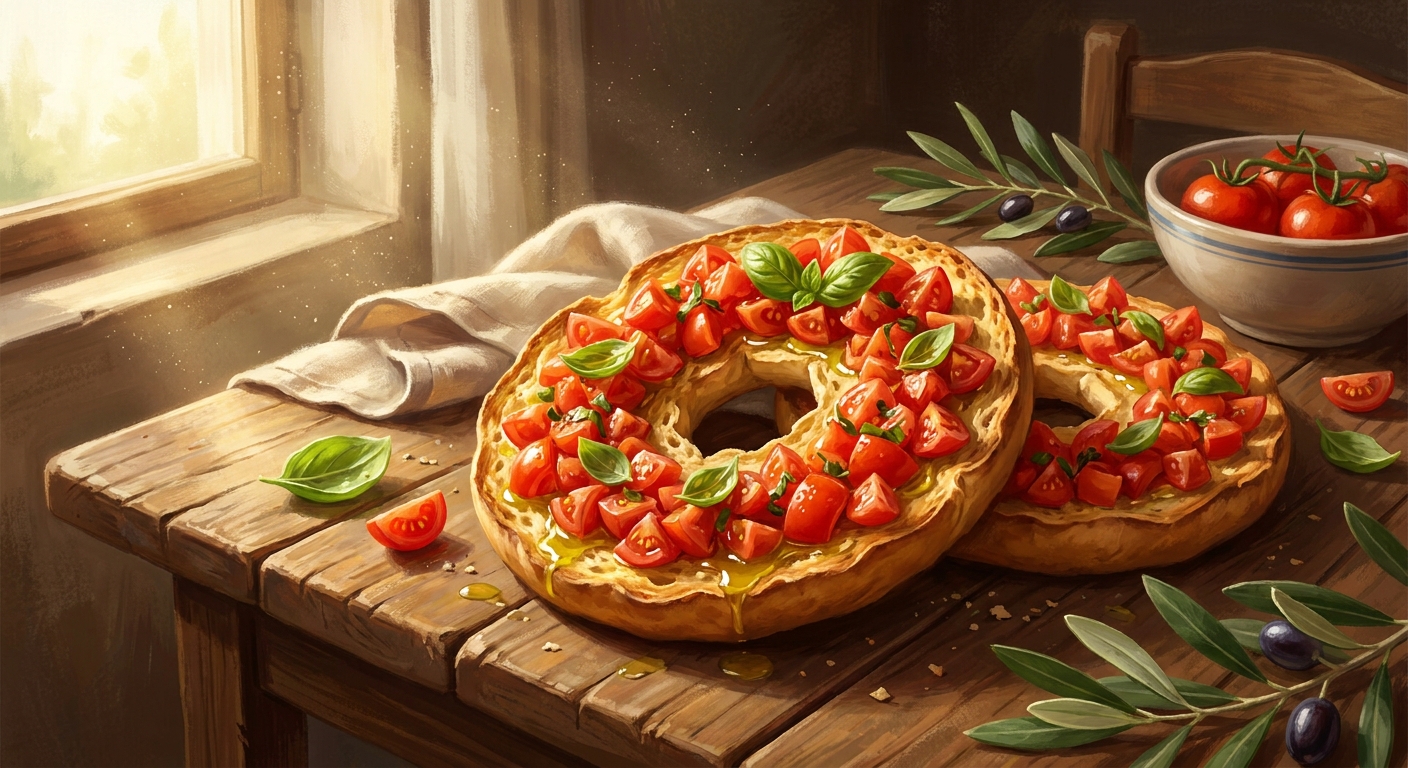
If you haven’t stacked your pantry with friselle yet, you are seriously missing out on the best bread hack known to humanity. Honestly, I used to think all hard, twice-baked pieces of dough were just glorified croutons destined to scrape the roof of my mouth. I was totally wrong. These authentic Southern Italian bread rings are a complete game changer for quick, delicious meals at home. I remember sitting in a cozy little kitchen here in Kyiv during the rolling blackouts earlier in 2026. Fresh bread was scarce, the fridge was off, but I had a stash of these incredibly hard, golden Italian dough rings on the shelf. Splash a little filtered water on them, rub them with fresh garlic, top them with crushed tomatoes and a generous glug of olive oil, and suddenly, you’re eating like absolute royalty in the dark. It felt like magic.
This genius bread is a miracle of food preservation, satisfying texture, and rustic simplicity. I am going to walk you through exactly what this baked phenomenon is, how the hydration mechanics work, and why it beats standard store-bought crackers every single time. Look, I get it. The idea of intentionally eating stale-looking, rock-hard bread sounds a bit strange at first. But trust me on this one. Once you understand how to treat the bread, how to dress it, and how to snap it perfectly in half, you will never want to be without a bag of it in your cupboard. It is essentially a blank canvas for the boldest, brightest flavors you can throw at it.
The Core Mechanics: Benefits, Uses, and Preparation
So, what makes this specific twice-baked treat so vastly superior to a regular slice of toasted sourdough? The secret lies in its structural integrity. When you bake bread twice to remove almost all its moisture, you create an incredibly dense, porous network of starches that acts exactly like a sponge. But unlike regular bread that turns into pathetic mush the second it touches liquid, this specific dough retains a satisfying crunch in the center while yielding beautifully on the edges.
Check out how it compares to other common bread products you might already have sitting in your kitchen:
| Bread Type | Average Shelf Life | Best Culinary Use |
|---|---|---|
| Standard Loaf | 3 to 5 days | Sandwiches, toast, garlic bread |
| Store-Bought Croutons | 2 to 3 months | Salad topping, soup garnish |
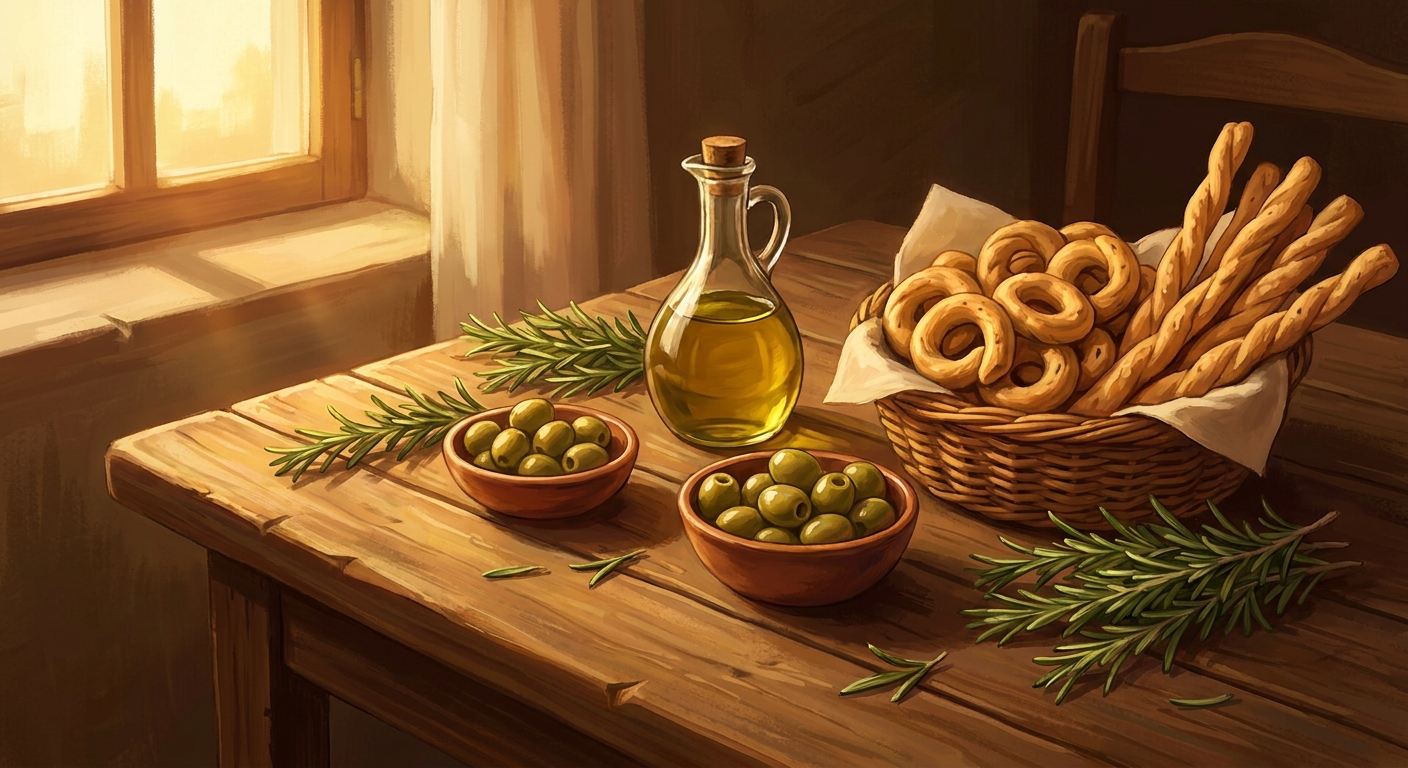
| Traditional Friselle | Up to 12 months | Bruschetta-style meals, hearty tomato salads |
The value proposition here is absolutely huge. You get a long-lasting base for incredibly fast meals that require zero cooking. Let me give you two of my favorite examples of how to serve them. First, you have the classic Pugliese style: you run the bread under cold water for exactly five seconds, put it on a plate, rub a raw garlic clove over the rough surface, and pile on a massive heap of diced cherry tomatoes, fresh basil, coarse sea salt, and extra virgin olive oil. Second, I love doing a modern fusion twist: I hydrate the base, spread a thin layer of sharp mustard, layer on some paper-thin Ukrainian salo (cured fatback), and top it with finely chopped pickled cucumbers and dill. It is ridiculously good.
To get that perfect texture, you absolutely must follow the proper hydration protocol. Do not just bite into it dry, or you will literally chip a tooth. Here is exactly how to prep it:
- The Quick Dip: Hold the bread ring and submerge it completely in a bowl of cold or room-temperature water for three to five seconds. Count out loud. Do not leave it floating.
- The Plating Phase: Immediately transfer the damp ring to your serving plate. The surface will still feel somewhat hard, but the water is already doing its work.
- The Resting Period: Add your juicy toppings—like crushed tomatoes and oil—and let the whole thing sit undisturbed for at least five to ten minutes. The bread will absorb the juices and soften into a perfect, chewy, flavor-packed base.
The Seafaring Origins of the Ultimate Rusk
To fully appreciate what you are eating, you have to look back at the shores of Apulia (Puglia) in Southern Italy. Hundreds of years ago, baking was a communal, massive effort, not a daily chore. People needed sustenance that could last through brutal winters and long journeys. That is where the genius of the double-bake came in. By completely drying out the dough, the local bakers practically invented one of the earliest forms of long-term food storage. But the real legends surrounding this food revolve around sailors, fishermen, and the Crusaders.
Evolution from Poor Man’s Food to Delicacy
When sailors went out to sea for weeks or months at a time, fresh provisions rotted quickly. They needed something robust. The distinctive shape of this bread—a round ring with a hole in the middle—was not just for aesthetics. Fishermen would loop a string through the holes of dozens of these hard rings, wearing them like an edible necklace or hanging them from the rafters of their boats to keep them away from rats and dampness. When it was time to eat, they didn’t have fresh tap water, so they did what any resourceful sailor would do: they simply dunked the bread directly into the salty seawater to soften it up, topping it with whatever preserved fish or olive oil they had on hand. It was the ultimate survival food. Slowly, it transitioned from a strictly poor man’s maritime ration into a celebrated summer dish for everyone on land, especially during the hot months when nobody wanted to turn on an oven.
The Modern State of the Twice-Baked Ring
Fast forward to the year 2026, and this ancient sailor’s ration has reached absolute gourmet status worldwide. You can find artisanal bakeries from Brooklyn to Tokyo selling them infused with squid ink, wildly expensive fennel pollen, or ancient heritage grains. Yet, despite the modern culinary hype, the traditional, rustic version remains incredibly cheap and easy to produce. It proves that the best foods don’t need fancy technological interventions; they just need time, heat, and a brilliant understanding of dough mechanics.
The Maillard Reaction and Double Baking Mechanics
Let’s get mildly technical for a second, because the science behind why this bread tastes so good is fascinating. The first bake is just like baking a normal loaf. The yeast consumes sugars, produces carbon dioxide, and inflates the gluten network. But the magic happens during the second bake. When you slice the semi-baked bread horizontally and put it back into the oven at a low temperature, you are executing a controlled dehydration. As the moisture content drops, the Maillard reaction continues slowly on the exposed crumb. This chemical reaction between amino acids and reducing sugars creates hundreds of new flavor compounds, giving the bread that distinct toasted, nutty, almost caramelized profile that fresh bread simply does not possess.
Hydration Mechanics of Stale Crumb
When you finally introduce water back to the dry crumb, you are relying on capillary action. The tiny air pockets left behind by the yeast act like millions of microscopic straws. However, because the starches have undergone retrogradation (they crystallized and hardened during the cooling and drying phase), they don’t dissolve into a paste. Instead, they swell, retaining their structural boundaries. This is why you can drench it in oil and tomato juice, and it still requires a satisfying chew.
- Moisture Content: Proper double-baking drops the internal moisture level below 10%, effectively halting any enzymatic degradation.
- Microbial Inhibition: Because the water activity (Aw) is drastically reduced, mold spores and bacteria simply cannot survive or multiply on the surface.
- Gelatinization Resistance: The crystallized starches provide rigid structural integrity, preventing the total collapse of the crumb when wet.
- Emulsion Absorption: The rough, porous surface, especially on the sliced side, creates optimal surface area to bind and hold oil-and-water emulsions (like vinaigrettes or tomato juices).
Step 1: Mixing the Semolina Dough
If you want to master this at home, it starts with the right flour. You need a mix of standard bread flour and durum wheat semolina. The semolina gives it that gorgeous yellow tint and earthy flavor. Mix 300g of semolina, 200g of bread flour, 10g of salt, 5g of active dry yeast, and about 320ml of lukewarm water. Knead it aggressively for 10 minutes until you have a smooth, elastic dough ball.
Step 2: The First Rise
Place your dough in a lightly oiled bowl, cover it with a damp kitchen towel, and let it hang out at room temperature. You want it to double in size. Depending on how warm your kitchen is, this usually takes about 90 minutes to two hours. Patience is key here; you want those yeast cultures developing deep flavors.
Step 3: Shaping the Classic Rings
Punch the dough down to degas it. Divide it into equal pieces, about 100g each. Roll each piece into a short rope, about 8 inches long, and pinch the ends together aggressively to form a ring, much like a bagel. Place these rings on a parchment-lined baking sheet, leaving plenty of room between them because they will expand.
Step 4: The Initial Soft Bake
Preheat your oven to 400F (200C). Bake the rings for about 15 to 20 minutes. You are not looking for a dark crust here; you just want them fully baked through and slightly firm to the touch. They should look like pale, slightly puffed bagels. Remove them from the oven, but leave the oven on.
Step 5: The Crucial Slicing Technique
This is where most people mess up. You must let the rings cool for at least 30 minutes before cutting. If you cut them hot, the crumb will tear into a gummy mess. Once they are cool enough to handle, take a high-quality serrated bread knife and carefully slice each ring horizontally, right through the equator, leaving you with a top half and a bottom half.
Step 6: The Second Drying Bake
Lower your oven temperature to 300F (150C). Place all your halved rings back onto the baking sheets, cut side facing UP. This exposes the delicate crumb to the hot, dry air. Bake them for another 40 to 60 minutes. Keep an eye on them; you want them thoroughly dry and lightly golden, not dark brown or burnt. They should sound hollow and feel like literal rocks when you tap them.
Step 7: Cooling and Long-Term Storage
Take them out of the oven and transfer them to wire racks. They must cool completely—at least a few hours—before you even think about storing them. Any residual heat will cause condensation in your storage container, leading to mold. Once totally cold, pack them into large glass jars or paper bags. Keep them in a dry, dark place, and they will literally last for months.
Busting the Crunch Myths
Myth: This is just leftover stale bread that bakers couldn’t sell.
Reality: Absolutely not. It is an intentional, two-step baking process designed specifically for preservation and texture. Stale bread goes bad and gets moldy; this is systematically dehydrated to last a year.
Myth: You eat it completely dry, straight out of the bag.
Reality: Please do not do this. You must briefly hydrate it with water or broth first. Eating it dry is the fastest way to arrange an emergency visit to your local dentist.
Myth: You need expensive bottled Italian mineral water to soak it properly.
Reality: Any clean liquid works! Filtered tap water is standard, but you can use chicken broth, tomato juice, or even a splash of white wine mixed with water for a crazy flavor boost.
Frequently Asked Questions
Are they suitable for a vegan diet?
Yes, absolutely. The traditional recipe contains only flour, water, yeast, and salt. Just double-check store-bought brands for any unusual additives.
Can I freeze the raw dough before baking?
For sure! You can freeze the shaped rings after the first rise. Just let them thaw and puff up slightly at room temperature before doing the first bake.
How long do they actually last in the pantry?
If kept in a totally dry, airtight container away from humidity, they can easily last 6 to 12 months without losing any quality.
What type of flour is absolutely necessary?
While you can use all-purpose, using durum wheat semolina (semola di grano duro) is crucial for the authentic texture and slightly nutty flavor.
Can I use hot water to soak them faster?
Avoid hot water at all costs! Hot water turns the starches into a gummy, sticky paste. Always use cold or room-temperature liquid to maintain the crunch.
Is this exactly the same thing as bruschetta?
No. Bruschetta uses fresh bread that is toasted or grilled right before serving. This bread is baked twice, completely dried, and requires rehydration.
Can I make them gluten-free?
You can try using a dense gluten-free flour blend with xanthan gum, but the lack of gluten network makes the double-bake very crumbly. It takes practice.
Where can I buy them if I don’t want to bake?
Most Italian delis, specialty grocery stores, and online Mediterranean food retailers stock them year-round.
Do I have to use tomatoes on top?
Not at all. While tomatoes are traditional, you can top them with roasted peppers, mashed white beans, anchovies, or even sweet ricotta and honey.
What is the absolute worst mistake to make?
Over-soaking. Leaving the bread submerged in water for more than 5 seconds will turn it into a soggy, unappetizing sponge. In and out, quickly!
So there you have it—the complete masterclass on the greatest preserved carb on the planet. It is affordable, historically fascinating, and infinitely customizable. You have the recipe, you know the science, and you know how to avoid breaking your teeth. Go grab some semolina flour, heat up your oven, and bake a massive batch today. Your future hungry self will definitely thank you!
Leave a Reply