

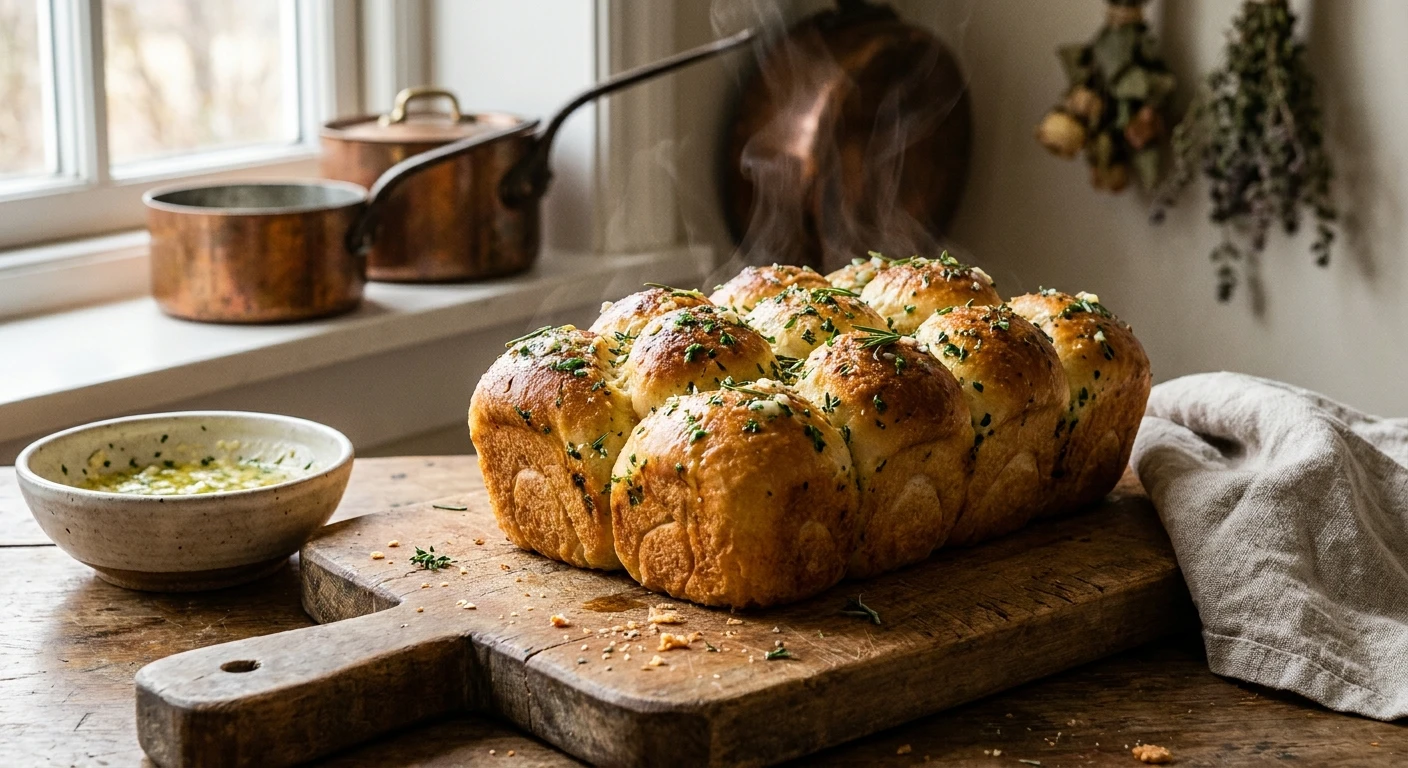
Why You Need to Bake Bubble Bread
You want a soft, buttery, pull-apart side dish that looks amazing on any table, and bubble bread delivers exactly that. This unique yeast dough structure creates individual, tear-away spheres of carbohydrate perfection, making it the ultimate sharing food for family dinners and festive gatherings. Baking bread at home often feels intimidating for beginners, but forming these small, coated dough balls actually forgives many common shaping mistakes. When you arrange these little spheres in a pan, they expand and fuse together during baking while remaining distinctly separable. Every single piece is coated in butter, herbs, cheese, or cinnamon sugar, meaning every bite has maximum flavor. The high surface-area-to-volume ratio guarantees you get a perfect crust and a fluffy interior in every single pull. People love tearing into a warm loaf, passing pieces around the table, and savoring the rich, infused flavors. It acts as both a visual centerpiece and a deeply comforting side dish. If you want to impress dinner guests or just want a cozy weekend baking project, mastering this pull-apart technique is the absolute best path forward. The methodology relies on standard bread ingredients but utilizes a totally distinct assembly technique that maximizes flavor adhesion across the entire loaf.
The core benefit of this baking method lies in the coating. Unlike a standard loaf where all the flavor is trapped strictly on the outer crust, this method ensures flavor permeates the entire structure. Because the dough is rolled into small, individual pieces before being stacked in the baking pan, you can coat every single sphere in melted butter, garlic, parmesan, or sweet glazes. This creates a matrix of flavor pockets throughout the entire loaf. You never get a boring, plain center bite.
Read also: The Best Things That Are Not a Waffle to Make Today; Mastering the Ultimate crimp and crumb at Home.
| Bread Type | Texture Profile | Serving Style |
|---|---|---|
| Bubble Bread | Soft, pull-apart, highly coated | Communal tearing |
| Standard Brioche | Rich, uniform, sliceable | Individual slices |
| Classic Baguette | Crispy crust, chewy crumb | Shatter-crisp slicing |
The value proposition here is pure versatility and shareability. For instance, a savory garlic-herb version acts as the perfect companion to pasta nights, soaking up marinara sauce with ease. Alternatively, a sweet cinnamon-pecan version works brilliantly for holiday breakfasts or weekend brunches. A third option involves rolling the dough in mozzarella and pepperoni bits for a pizza-inspired snack. The underlying dough technique remains identical; only the exterior coating changes. You get the aesthetic appeal of a highly complex bake with the straightforward prep of a standard enriched yeast dough.
- Digital Kitchen Scale: Precision is mandatory for consistent yeast dough hydration. Measuring flour by volume often leads to dense, dry bread.
- Heavy-Duty Stand Mixer: While hand kneading definitely works, a machine equipped with a dough hook develops the necessary gluten network much faster and with zero physical fatigue.
- Bundt Pan or Tube Pan: The central metal tube conducts heat directly to the middle of the dough mound, ensuring entirely even baking and preventing a raw, undercooked center.
- Stainless Steel Bench Scraper: Essential for dividing the large mass of dough into dozens of equal-sized pieces quickly and cleanly without tearing the gluten strands.
Origins of the Pull-Apart Dough
Tracing the roots of this communal bake takes us back directly to traditional Hungarian baking techniques. The original concept closely mirrors the famous Hungarian dessert known as Aranygaluska, or “golden dumplings.” Hungarian bakers would take small balls of rich, enriched yeast dough, dip them in melted butter, roll them in granulated sugar and crushed walnuts, and bake them together in a large pan. This created a sweet, tear-apart cake that fostered communal eating and celebration. Immigrants brought these beloved recipes to North America during the late nineteenth and early twentieth centuries, where the core concept quickly adapted to local ingredients, available sweeteners, and standard American baking pans.
The Evolution of Monkey Bread Variations
By the mid-twentieth century, this pull-apart concept gained immense traction across the United States under various colorful names, most notably “monkey bread.” The term reportedly originates from the physical way the bread is eaten—picked apart continuously with the fingers, much like monkeys grooming each other in the wild. During the 1980s, the sweet, cinnamon-sugar version became a massive commercial success. Many busy home cooks began utilizing pre-made, store-bought canned biscuit dough for extreme convenience. However, traditional baking purists continued to advocate for from-scratch yeast dough, correctly arguing that the superior texture, chew, and complex flavor development of real biological fermentation cannot ever be replicated by fast-acting chemical leaveners.
Modern State of Savory Baking
Today, the concept has completely fractured into both distinct sweet and savory disciplines. Savory pull-apart loaves have become absolute staples at dinner parties, barbecues, and holiday gatherings. Modern bakers began treating the individual dough spheres like miniature dinner rolls, aggressively coating them in garlic butter, sharp aged cheddar, diced jalapeños, and fresh herbs. This savory shift successfully turned a classic breakfast treat into a heavy-hitting dinner accompaniment. The massive visual appeal of the stacked, golden-brown spheres makes it highly photogenic, driving a massive resurgence in popularity across visual culinary blogs, social media platforms, and professional artisan bakeries alike.
The Science of Yeast Fermentation
Understanding how this specific dough behaves requires a close look at biological fermentation. When you hydrate active dry yeast or instant yeast, you awaken a microscopic, single-celled fungus called Saccharomyces cerevisiae. These hungry microorganisms immediately begin consuming the simple sugars naturally present in the flour and any intentionally added sweeteners. As they metabolize these sugars, they constantly release carbon dioxide gas and ethanol as byproducts. The ethanol provides that distinct, complex, “yeasty” aroma that fills your kitchen, while the carbon dioxide gas creates the millions of tiny bubbles that cause the dough to physically rise. Because you are deliberately rolling the dough into small, individual pieces, you are effectively creating dozens of miniature, independent fermentation chambers. When tightly stacked in the pan, the immense gas expansion forces the spheres to press hard against one another, fusing them together while simultaneously maintaining their individual structural integrity.
Gluten Network Formation
The entire structural integrity of those individual spheres depends completely on proper gluten development. Wheat flour contains two primary and highly important proteins: glutenin and gliadin. When hydrated with water or milk and mechanically agitated through vigorous kneading, these proteins chemically bond to form an incredibly elastic web called gluten. This microscopic network successfully traps the expanding carbon dioxide gas. Without a strong, well-developed gluten network, the expanding spheres would simply rupture and collapse into a dense, solid brick.
- Hydration Rate: Enriched doughs typically require a precise hydration level of 60-65% to remain highly workable but distinctly soft.
- Maillard Reaction: The amino acids and reducing sugars on the exposed surface of the dough spheres undergo a complex chemical reaction above 300°F (150°C), producing the striking golden-brown color and rich, roasted flavor.
- Starch Gelatinization: At exactly around 150°F (65°C) internal temperature, the starches in the flour absorb free water and permanently swell, giving the final crumb its permanent, fluffy structure.
- Thermal Mass: A dark metal pan conducts heat significantly faster than glass or ceramic, resulting in a darker, crispier, and more desirable exterior crust.
- Lipid Shortening: Fats like butter coat the gluten strands, physically shortening them to guarantee a tender, melt-in-the-mouth texture rather than a chewy, tough bite.
Step 1: Activating the Yeast
Begin the process by warming your milk or water to precisely 105°F to 110°F (40°C to 43°C). Temperature control is critical; any hotter, and you risk completely killing the fragile yeast cells. Any cooler, and the fermentation process will stall heavily. Stir in exactly one teaspoon of sugar and your yeast. Wait patiently for five to ten minutes until the mixture turns noticeably frothy and smells heavily of yeast, signaling that the organisms are alive, active, and ready to work.
Step 2: Mixing the Core Ingredients
In the large bowl of your stand mixer, thoroughly combine the bread flour, kosher salt, and remaining granulated sugar. Carefully pour in the frothy activated yeast mixture, the melted and slightly cooled butter, and one large room-temperature egg. Mix everything on low speed until a rough, shaggy dough forms. Ensure absolutely no dry spots of unmixed flour remain hidden at the bottom of the mixing bowl.
Step 3: Kneading the Dough
Switch your mixer to the dough hook attachment. Knead the mixture continuously on medium speed for about eight to ten minutes. You want the dough to pull away completely from the sides of the bowl and become incredibly smooth and highly elastic. Perform the classic windowpane test: carefully stretch a small piece of dough between your fingers. If it successfully forms a thin, translucent membrane without immediately tearing, the gluten network is sufficiently developed.
Step 4: The First Bulk Fermentation
Gently shape the kneaded dough into a tight, uniform ball. Place it carefully in a lightly oiled bowl, rolling it once so the top is coated with oil. Cover the bowl tightly with plastic wrap or a damp kitchen towel to prevent a dry skin from forming. Set it in a warm, draft-free spot in your kitchen. Let it rise undisturbed for one to two hours, or until it has completely doubled in physical volume.
Step 5: Shaping the Dough Bubbles
Firmly punch the risen dough down to release the trapped excess gas. Turn the dough out onto a very lightly floured wooden surface. Using your sharp bench scraper, divide the large mass into roughly 40 to 50 equal-sized pieces. Each piece should be approximately the size of a whole walnut. Cupping your hand over the dough on the counter, roll each piece vigorously into a perfectly smooth, tight ball.
Step 6: Coating and Second Proofing
Prepare your liquid coating station immediately. For a savory loaf, thoroughly melt butter and vigorously whisk in minced fresh garlic, finely grated parmesan cheese, and chopped fresh parsley. Dip each individual dough ball completely into the mixture, then stack them randomly in a heavily greased Bundt pan. Cover the pan loosely and let the entire structure proof again for roughly 45 minutes until the balls become visibly puffy and fill the pan.
Step 7: Baking and Final Glaze
Bake the pan in a fully preheated oven at exactly 350°F (175°C) for 35 to 40 minutes. The top should develop a deep, rich golden-brown color. If it browns too quickly, cover it loosely with aluminum foil. Let the finished loaf cool in the pan for exactly ten minutes before carefully inverting it onto a wire cooling rack. Generously brush any remaining garlic butter over the hot loaf before serving immediately.
Myth: You absolutely need professional bakery equipment to make this style of bread.
Reality: While a heavy-duty stand mixer undoubtedly speeds up the kneading process, you can easily and successfully develop the necessary gluten completely by hand. The shaping and proofing processes require absolutely no specialized tools beyond a standard baking pan and patience.
Myth: You cannot make this specific dough ahead of time without ruining the yeast.
Reality: Cold fermentation works beautifully and is highly recommended here. You can prepare the dough, complete the first bulk rise slowly in the refrigerator overnight, and easily shape it the next day. This extended time actually vastly improves the complex flavor profile.
Myth: Canned commercial biscuit dough is just as good as homemade yeast dough.
Reality: Pre-made canned dough relies heavily on harsh chemical leaveners like baking powder, which completely lacks the complex flavor, satisfying chew, and robust structural integrity of a proper, slowly fermented yeast-leavened bread.
Myth: Sweet cinnamon versions are the only authentic or correct variations.
Reality: The foundational pull-apart technique adapts seamlessly to virtually any flavor profile. Savory garlic, sharp cheese, and robust herb variations are just as legitimate, historically valid, and incredibly popular globally.
Can I freeze the dough?
Yes, you can easily freeze the dough immediately after the first bulk fermentation is complete. Ensure you thaw it completely in the refrigerator overnight before attempting the shaping and final proofing stages.
What size pan is strictly best?
A standard 10-cup to 12-cup metal Bundt pan or traditional tube pan is absolutely ideal for ensuring the thick center mass bakes evenly and thoroughly.
Can I use a stand mixer?
Absolutely. A powerful stand mixer equipped with a sturdy dough hook is by far the most efficient and painless way to knead this slightly enriched, heavy dough.
How do I store leftovers?
Store any remaining leftovers tightly wrapped in an airtight container at room temperature for up to two days, or refrigerate for up to five days. Always reheat pieces briefly in the oven or microwave before serving.
Is bread flour absolutely mandatory?
You can certainly use standard all-purpose flour in a pinch, but high-protein bread flour predictably provides a significantly better, chewier, and taller texture due to its superior gluten-forming capabilities.
Can I make it vegan?
Yes, the conversion is simple. Substitute the dairy milk with a neutral plant-based milk, use a high-quality vegan butter for the coating, and entirely omit the egg, replacing it with a small splash of extra liquid.
Why didn’t my dough rise?
Your activating liquid may have been drastically too hot and subsequently killed the fragile yeast, or your stored yeast was simply expired. Always verify the frothy bloom in step one before proceeding.
Baking this stunning, aromatic pull-apart loaf is an incredibly rewarding culinary process that effectively combines fundamental baking principles with a highly impressive visual presentation. Whether you serve it alongside a robust, meaty pasta dinner or act as the main focal centerpiece for a lively holiday brunch, it always successfully draws a crowd. Grab your high-protein flour, carefully check your yeast viability, and confidently start baking your own incredible bubble bread today! The results will heavily upgrade your standard baking repertoire.



Leave a Reply