

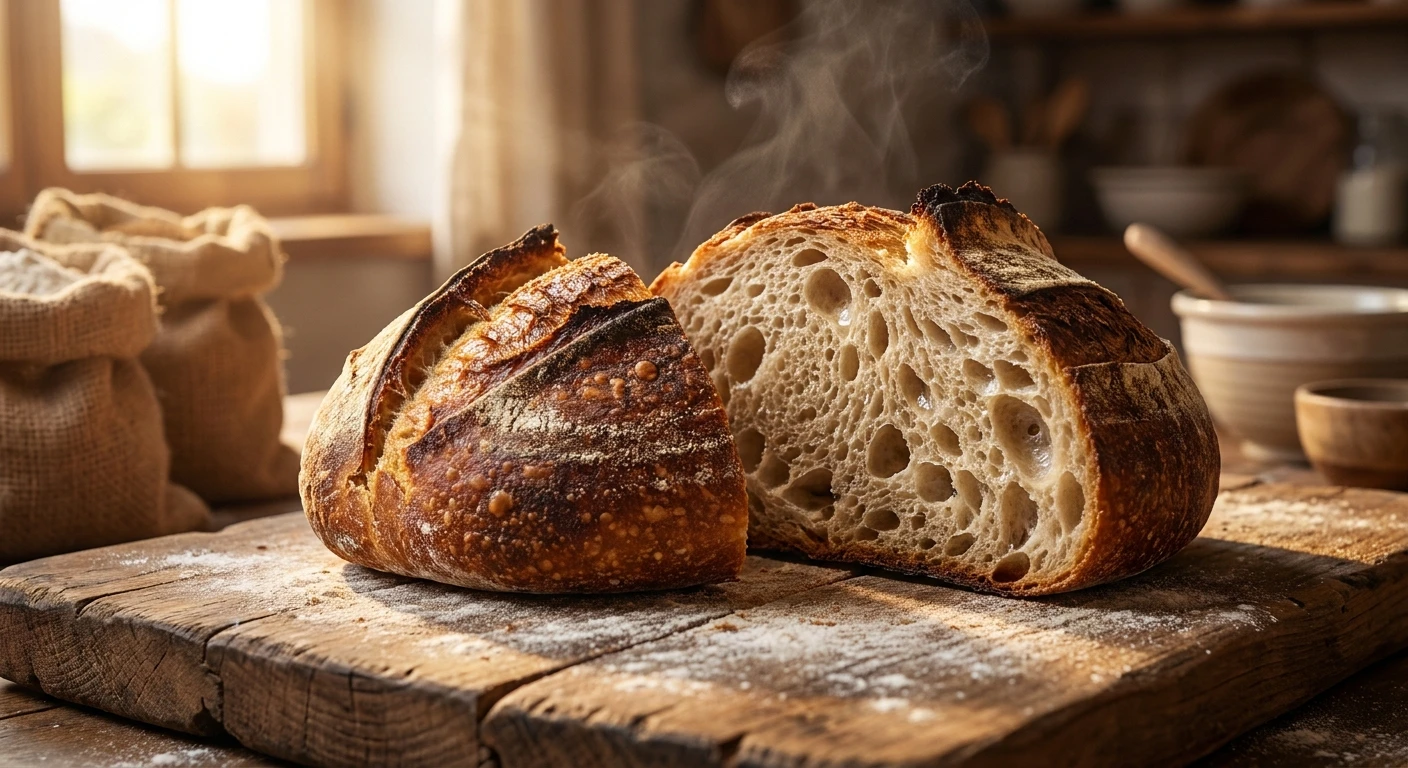
Achieving the Ultimate crimp and crumb at Home
Hey everyone! If you are as obsessed with baking as I am, you probably already know that nailing the perfect crimp and crumb is basically a lifestyle choice for serious bakers. That beautiful, crusty exterior edge and the soft, airy interior structure of a loaf are the twin holy grails of artisan baking. Honestly, I used to think getting that bakery-level finish was entirely based on luck or commercial ovens. But figuring out the exact balance between crust tension and internal hydration totally shifted my perspective. The truth is, getting both elements right requires just a bit of patience, some targeted techniques, and an understanding of how your dough is feeling on any given day.
I distinctly remember spending a chilly winter weekend in the Carpathian mountains here in Ukraine, baking in a traditional wood-fired pich. The locals have this incredibly intuitive relationship with dough. My host didn’t measure anything, yet she pulled out a loaf with an aggressive, beautiful crust and an interior so soft and airy it felt like a cloud. Standing in that rustic kitchen, flour everywhere, I realized that mastering these techniques is about reading the environment. You need to watch the temperature, feel the elasticity, and respond to the dough. If she could do it with a blazing wood fire and zero thermometers, we can definitely do it in our home kitchens. My goal here is to share everything I have learned about balancing the outer structure and the inner texture so you can create masterpieces right in your own oven.
To really get what makes a great bake, we have to look closely at what these terms actually mean. The exterior architecture of your pastry or bread—often styled, folded, or scored into a distinct edge—creates a rigid barrier that traps steam and dictates how the dough expands. Meanwhile, the interior structure, which is entirely dependent on fermentation gases and gluten strength, dictates the eating experience. When these two elements align perfectly, you get a loaf or pastry that looks rustic and professional while tasting absolutely incredible. The visual appeal draws you in, but the texture keeps you coming back for another slice.
The main value of focusing on these two specific aspects comes down to two major benefits: moisture retention and flavor development. A well-sealed exterior keeps the steam inside during the crucial first half of the bake, which gives the bread time to rise before the crust sets. A well-fermented interior means you get a complex, slightly tangy flavor profile that holds butter beautifully without being dense or gummy. Here are a couple of examples. Think of a classic sourdough boule. A deep score creates a prominent ‘ear’ or crimped edge, allowing the loaf to expand upward rather than outward, resulting in an open, lacy interior. Or consider a hand-crimped Cornish pasty—the thick, twisted edge seals the juices in, so the interior crumb of the pastry cooks perfectly in its own steam.
Here are the non-negotiable steps to getting this balance right:
- Hydration Control: Pushing your water content higher generally creates larger holes in the bread, but it makes handling and shaping the exterior much more difficult. Finding your personal sweet spot is crucial.
- Proper Tension: When shaping, creating surface tension on the outside is what allows you to score deeply and create those beautiful exterior ridges and ears. Without tension, the dough just flattens.
- Fermentation Timing: Catching the dough exactly when it has doubled and feels lively, but before the gluten degrades, is the secret to an airy interior.
Let’s break down how hydration affects your results. I put together this quick cheat sheet to help you decide how much water to use based on your skill level and goals:
| Hydration Level | Handling & Shaping (Exterior) | Internal Structure (Interior) |
|---|---|---|
| Low (60-65%) | Very easy to shape, holds intricate crimps and scores perfectly. | Tighter, more uniform holes. Great for sandwich bread. |
| Medium (70-75%) | Requires some skill and tension building, but manageable. | Beautifully balanced, moderately open, great for everyday artisan loaves. |
| High (80%+) | Extremely sticky, requires advanced folding techniques. Hard to hold a rigid shape. | Wildly open, glossy, large irregular holes. The Instagram-worthy texture. |
Origins of Artisan Baking
The story of how humans started manipulating wheat and water goes back thousands of years. Early flatbreads baked on hot stones didn’t really have a complex interior structure. It wasn’t until wild yeasts were accidentally allowed to ferment the dough in ancient Egypt that the concept of an aerated bread interior was born. Those early bakers realized that letting the mixture sit around created bubbles, which made the bread softer and easier to chew. However, the exterior was likely still quite tough and unrefined. The careful sealing and scoring of the crust came much later, as communal ovens in Europe forced bakers to mark their loaves distinctively to avoid mix-ups.
The Evolution of Baking Techniques
Fast forward to the middle ages, and baking had become a highly regulated guild profession. European bakers, especially the French, began to obsess over the aesthetics of their bread. The way a baker finished the edge of a loaf or a pastry became a signature. A tightly folded edge on a pie or a strategically slashed baguette wasn’t just for looks; it controlled the expansion of the dough. If a baker didn’t slash the dough, the trapped gases would burst out of the weakest point, creating an ugly, blown-out loaf. By intentionally creating weak points, they could dictate the final shape, leading to a much better internal texture. This marriage of form and function laid the groundwork for all modern artisan techniques.
The Modern State of Sourdough
Right now, in 2026, home baking technology and knowledge sharing have reached absolute peak levels. We have smart ovens, precisely calibrated digital proofing boxes, and massive online communities dissecting every single bubble in a loaf of bread. But interestingly enough, the trend has swung back to rustic, highly manual techniques. Bakers are hunting down heritage grains and focusing heavily on hyper-local ingredients. We are realizing that all the gadgets in the world can’t replace the tactile knowledge of feeling when your dough is perfectly proofed. The current philosophy is all about high hydration, extremely bold bakes with nearly charred edges, and wild, custardy interiors.
Fermentation and Gluten Matrix
Let’s talk science for a minute, because understanding what is actually happening on a microscopic level makes you a significantly better baker. When you mix water and wheat flour, two proteins—glutenin and gliadin—link together to form the gluten matrix. Think of this matrix as a web of tiny balloons. As the wild yeast and lactic acid bacteria in your starter consume the starches in the flour, they release carbon dioxide gas and organic acids. The gluten balloons trap this gas, causing the dough to inflate. If your gluten network is weak, the balloons pop, the gas escapes, and your bread ends up flat and dense. Developing a strong network through folding and time ensures those bubbles stay intact right up until they hit the heat of the oven.
Maillard Reaction and Oven Spring
When you finally put your scored dough into a roaring hot oven, a rapid sequence of physical and chemical changes occurs. First, the heat penetrates the dough, causing the trapped gases to expand rapidly. The yeast goes into overdrive for a few minutes before dying off. This massive final push of expansion is called oven spring. Simultaneously, the surface of the dough is subjected to intense heat, triggering the Maillard reaction. This is a chemical reaction between amino acids and reducing sugars that gives browned food its distinctive flavor. A well-hydrated environment (using a Dutch oven or injecting steam) keeps the exterior pliable long enough for maximum expansion before it caramelizes and hardens into that perfect, crunchy shell.
- Gelatinization: At around 150°F (65°C), the starches in the dough swell and absorb water, setting the final structure of the interior.
- Steam Injection: Adding moisture to the oven delays crust formation, allowing for a larger volume and a shinier, blistered exterior.
- Lactic vs. Acetic Acid: Temperature during fermentation dictates flavor. Cooler temperatures favor acetic acid (more sour), while warmer temperatures favor lactic acid (milder, creamier flavor).
Day 1: Feeding Your Starter
If you want absolute perfection, you have to start with a robust foundation. Your sourdough starter needs to be incredibly active. On day one, pull your starter from the fridge and give it a hearty feeding—typically equal parts starter, water, and flour by weight. Keep it in a warm spot, around 75°F to 80°F. You want to see it double in size within four to six hours. If it takes longer, feed it again. An active starter is the engine that will eventually push the dough up and open up that interior.
Day 2: Mixing the Levain
Instead of mixing your dough directly with your main starter stash, build an offshoot called a levain. This is a specific mixture tailored for your recipe. I usually do 20g of starter, 40g of water, and 40g of a 50/50 mix of white bread flour and whole wheat. Let this sit overnight at a cool room temperature. By the morning, it should be domed on top, full of bubbles, and smell sweet and slightly yogurty, rather than harsh and vinegary.
Day 3: Autolyse and Bulk Fermentation
Mix your flour and water together and let it sit for an hour before adding the levain and salt. This process, known as the autolyse, jumpstarts gluten development and makes the dough incredibly stretchy. After incorporating the levain and salt, begin your bulk fermentation. This usually lasts around 4 to 6 hours. During the first two hours, perform a series of stretch-and-folds every 30 minutes to build strength. You will feel the dough go from a shaggy mess to a smooth, billowy pillow.
Day 4: Shaping and Cold Retard
Turn the dough out onto a lightly floured surface. You need to create tension on the outer skin of the dough without degassing the delicate bubbles inside. Use a bench scraper to gently pull the dough into a tight round. Place it upside down in a banneton basket, cover it, and put it in the fridge for 12 to 24 hours. This cold retard slows down yeast activity, allowing bacteria to produce incredible depths of flavor, and firms up the dough, making it much easier to score.
Day 5: The Bake and Achieving the Crimp
Preheat a Dutch oven at 500°F (260°C) for at least an hour. Turn your cold dough onto a piece of parchment paper. Using a very sharp razor blade or lame, score the dough at a 45-degree angle. This angled cut is what creates the pronounced flap or ‘ear’ during baking. Drop the dough into the Dutch oven, add an ice cube underneath the parchment for extra steam, and put the lid on. Bake covered for 20 minutes, then remove the lid, drop the temperature to 450°F (230°C), and bake for another 20 minutes until deeply browned.
Day 6: Analyzing the Crumb Structure
The hardest part of baking is waiting. You must let the bread cool completely—usually at least two hours—before slicing. Cutting hot bread turns the starches to mush and ruins the interior structure. When you finally slice it, look at the distribution of the holes. Are they even? Are there huge tunnels surrounded by dense rubbery patches? Analyzing the cross-section tells you everything about how your fermentation went.
Day 7: Adjusting Variables for Next Time
Baking is a constant learning loop. If your loaf was too dense, you probably under-proofed it or your starter wasn’t active enough. If it spread out completely flat, you might have over-proofed it or used too much water for the flour’s protein content. Take notes on your room temperature, the water temperature you used, and how long everything took. Adjust just one variable for your next bake.
Myths & Reality
Myth: You need expensive, high-protein imported flour to get large, open holes in your bread.
Reality: While strong flour helps trap gas, proper fermentation timing and gentle handling are far more critical. I have made incredibly open bread using standard supermarket all-purpose flour simply by nailing the proofing time.
Myth: Adding a ton of commercial yeast will make the bread rise higher and fluffier.
Reality: Too much yeast causes the dough to rapidly over-inflate and collapse before the gluten network can stabilize it. Slow, steady fermentation always wins.
Myth: You have to knead the dough aggressively for 20 minutes to build gluten.
Reality: Time is a fantastic substitute for mechanical kneading. Gentle stretch-and-folds paired with adequate resting periods will develop maximum gluten strength without exhausting the dough.
Myth: A darker, nearly burnt crust means the bread is overcooked and ruined.
Reality: A bold, dark bake caramelizes the sugars in the crust, introducing massive flavor complexity that pale loaves completely lack. The interior remains perfectly moist if baked correctly.
Why is my crumb too dense?
A dense interior is almost always a sign of under-fermentation. The yeast didn’t have enough time or warmth to produce the gas needed to inflate the gluten network. Give your bulk fermentation more time next round.
How do I get a better crimp on my pie or bread?
For pies, chill your dough thoroughly before shaping. For bread, ensure you are creating enough surface tension during the final shaping stage, and make sure your scoring blade is extremely sharp and angled.
Does steam help the crumb?
Indirectly, yes. Steam keeps the exterior crust soft during the first half of the bake, allowing the interior gases to expand to their maximum potential before the structure sets.
Can I cut the bread while it’s hot?
Absolutely not! Cutting hot bread stops the moisture from evaporating properly, causing the interior starches to clump together and turn gummy. Always wait at least two hours.
What flour is best for an open crumb?
A strong white bread flour with a protein content around 12-13% provides the best balance of extensibility (stretching) and elasticity (holding shape) needed for massive gas bubbles.
Why did my dough collapse?
If your dough deflated when you scored it or put it in the oven, it was over-proofed. The gluten matrix degraded too much from acid buildup and couldn’t hold the gas structure anymore.
How long does a cold retard take?
Typically between 12 and 24 hours in a standard home refrigerator (around 37°F/3°C). Pushing it past 24 hours can risk over-fermentation and overly sour flavors depending on your starter’s strength.
Well, there you have it! Perfecting your exterior scoring and your interior texture is an incredibly rewarding journey that takes a little practice and a lot of passion. Don’t get discouraged if your first few loaves aren’t bakery-perfect; every single bake teaches you something new about how flour, water, and wild yeast interact in your unique kitchen environment. Grab your digital scale, feed your starter tonight, and plan out your weekend bake. If you enjoyed this guide and want more tips, make sure to subscribe to our newsletter and share your successful bakes with us!



Leave a Reply