
The Ultimate Guide to Baking Authentic italian crackers
You haven’t truly experienced the rustic magic of Mediterranean baking until you’ve tasted a batch of fresh, homemade italian crackers straight out of the oven. Hey, I get it. Most people think of crackers as those boring, overly salted squares you buy in a cardboard box at the supermarket. But genuine artisan baking is a completely different ballgame. Just last month, right here in Kyiv—where the culinary scene has absolutely exploded in 2026—I ducked into a tiny local bakery escaping the cold. The baker handed me a freshly baked fennel taralli. The snap, the richness of the olive oil, the subtle hint of white wine… it was a revelation. It instantly reminded me why these traditional bakes are unparalleled. My thesis is simple: mastering these crunchy, savory bites at home is not only achievable, but it will fundamentally change how you entertain guests and snack on the weekends.
When we talk about this specific style of baking, we are discussing a brilliant synergy between high-quality fats and simple starches. The beauty lies in the minimalistic approach. You don’t need a pantry full of dough conditioners or artificial preservatives. You just need patience, good technique, and a love for the process.
Let me break down exactly why these savory snacks destroy the store-bought competition. Commercial snacks are flash-baked and heavily processed to maximize shelf life, stripping away the nuanced flavors of the grain. Artisan recipes, however, rely on slow fermentation, high-quality extra virgin olive oil, and unique cooking methods—like boiling the dough before baking it. This dual-cooking method creates a glassy, incredibly crisp exterior that snaps audibly when you bite into it. I’ve served these at countless dinners, and they always steal the show from the expensive cheeses.
Let’s look at a quick breakdown of the heavy hitters in this category:
| Cracker Type | Defining Ingredients | Best Pairing |
|---|---|---|
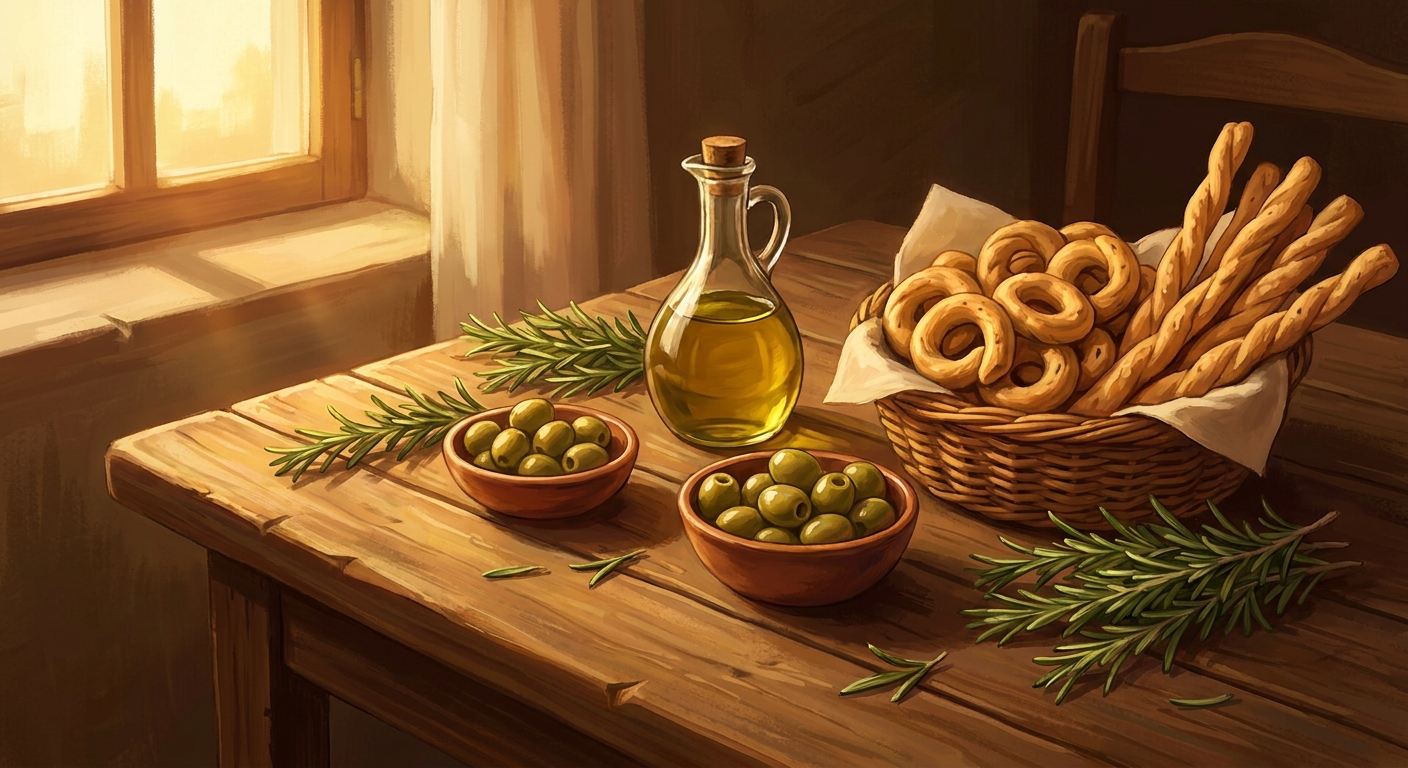
| Taralli | Olive oil, white wine, fennel seeds | Cured meats and sharp provolone |
| Grissini | Bread flour, yeast, semolina dusting | Wrapped in prosciutto, dipped in olive oil |
| Schiacciatina | Rosemary, coarse sea salt, lard or oil | Creamy ricotta and fig jam |
The value proposition here is massive. First, you get total control over the sodium levels. Second, the cost per batch is pennies compared to buying imported artisan brands. Take taralli and grissini, for example. If you make them at home, you can infuse them with wild garlic you foraged yourself, or fold in crushed black peppercorns for a spicy kick. Here is why you absolutely need to start making these:
- Unmatched Crunch Factor: The boiling method locks in the starches, resulting in a shatteringly crisp texture that doesn’t get soggy easily.
- Insane Shelf Stability: Thanks to the low moisture content and the olive oil acting as a natural preservative, they stay fresh for weeks in a sealed jar.
- Infinite Versatility: You can tweak the base dough with literally any dry spice, herb, or hard cheese you have sitting in your fridge.
Origins of the Mediterranean Crunch
If we look back, the concept of a twice-baked or highly dried bread product wasn’t born out of a desire for a fancy snack. It was pure survival. Ancient Roman legions needed rations that could withstand months of marching across Europe without spoiling. They developed panis biscoctus, which literally translates to bread baked twice. This early iteration was notoriously hard—so hard you had to soak it in water or cheap wine just to avoid breaking a tooth. But it provided the essential caloric base for armies and sailors alike. The focus was strictly utility, lacking the culinary flair we associate with Mediterranean food today.
Evolution Through the Renaissance
Fast forward to the Renaissance period, particularly in regions like Puglia and Piemonte, and things start getting incredibly delicious. As trade routes expanded and olive oil production became more refined, bakers began experimenting. They realized that working generous amounts of olive oil into the tough biscuit dough not only tenderized the crumb but vastly improved the flavor. In Puglia, bakers started twisting the dough into small rings and boiling them before baking, a technique adapted from bagel-making communities. They threw in local wild fennel and cheap local white wine instead of water, creating the iconic taralli. Meanwhile, in the north, a baker in Turin supposedly invented the long, thin grissini to cure a young duke’s digestion problems, proving that these baked goods were seen as both medicinal and indulgent.
The Modern State of Artisan Baking
By the time we hit 2026, the global appreciation for authentic, regional baking has reached a fever pitch. We’ve moved away from mass-produced snacks and circled back to the old ways. Home bakers are now using heirloom wheat varieties, wild sourdough starters, and single-estate olive oils to craft these traditional snacks. They’ve become the ultimate status symbol of a well-curated charcuterie board, representing a deep respect for culinary heritage and slow-food principles.
The Science of Starch Gelatinization
Okay, let’s get a bit nerdy because understanding the chemistry is what takes your baking from amateur to professional. The real secret behind the signature snap of these baked goods is starch gelatinization. When you drop raw dough rings into boiling water, the starches on the absolute exterior of the dough swell and burst, creating a gel-like coating. Once you transfer that boiled dough into a hot oven, that gel matrix dehydrates rapidly, forming a glossy, impenetrable crust. This is exactly why a taralli snaps cleanly instead of crumbling like a standard butter cracker.
Emulsions and Gluten Development
Another fascinating aspect is how the fat interacts with the flour. Because we are using liquid fats (olive oil) and often acidic liquids (white wine), we are intentionally restricting gluten development. Gluten needs water to form long, elastic strands. By coating the flour proteins in oil first, we create a “short” dough. This ensures the final product is crisp and tender, rather than chewy like bread. Here are the core scientific facts you need to memorize:
- Hydration Limits: Keeping hydration around 40-45% prevents the dough from becoming puffy, ensuring a dense, snappy crumb.
- The Maillard Reaction: The amino acids and reducing sugars react at temperatures above 300°F (150°C), creating those complex, nutty flavor compounds on the crust.
- Lipid Oxidation Defense: Using high-quality olive oil provides natural antioxidants (polyphenols) that delay rancidity, meaning your bake stays tasting fresh longer.
- Alcohol Evaporation: The white wine in the dough evaporates faster than water during the bake, creating microscopic air pockets that enhance the crispiness.
Day 1: Sourcing Authentic Ingredients
You can’t build a great house on a weak foundation. Spend your first day gathering the right materials. Skip the bleached all-purpose flour and hunt down Italian “Tipo 00” flour or a high-quality unbleached bread flour. You want a protein content around 11-12%. Grab a bottle of extra virgin olive oil that actually tastes good enough to drink, a dry, unoaked white wine (like Pinot Grigio), and whole fennel seeds. Quality in equals quality out.
Day 2: Mixing the Core Dough
Measure everything by weight. Mix 500g of flour with 10g of fine sea salt. Create a well in the center and pour in 125g of olive oil and 150g of white wine. Use a fork to gradually incorporate the flour until a shaggy dough forms. Knead it aggressively for about 10 minutes until it becomes completely smooth and elastic. Wrap it tightly in plastic wrap and let it rest at room temperature for at least an hour. This resting phase relaxes the gluten.
Day 3: The Art of Shaping
This is where it gets fun and meditative. Cut off small golf-ball-sized pieces of dough. Roll each piece under the palms of your hands against an un-floured wooden surface until it forms a rope about 8mm thick. Cut the rope into 10cm lengths, and pinch the ends together to form little rings. Make sure you press the seal firmly, or they will explode during the boiling phase.
Day 4: Mastering the Boiling Process
Bring a large, wide pot of water to a rolling boil. Do not salt the water. Drop the dough rings in batches of 10 or 15. They will sink to the bottom immediately. After a minute or two, they will float to the surface. As soon as they float, use a spider skimmer to remove them and place them on a clean, lint-free kitchen towel to drain. Let them dry for at least 30 minutes before baking.
Day 5: Perfecting the Bake
Preheat your oven to 375°F (190°C). Transfer your dried, boiled rings to a parchment-lined baking sheet. Bake them for 30 to 40 minutes. You are looking for a deep, golden-brown color. The key is to bake them until they feel completely light and hollow. If they are pale, they will be chewy in the middle. Be bold with your bake time.
Day 6: Curing and Storage
Do not eat them straight out of the oven! They need to cool completely on a wire rack to allow the internal moisture to fully evaporate. This curing process takes a few hours. Once they are at absolute room temperature, store them in a glass jar with an airtight seal or a metal tin. Do not put them in the fridge; the humidity will ruin the texture.
Day 7: Pairing and Serving
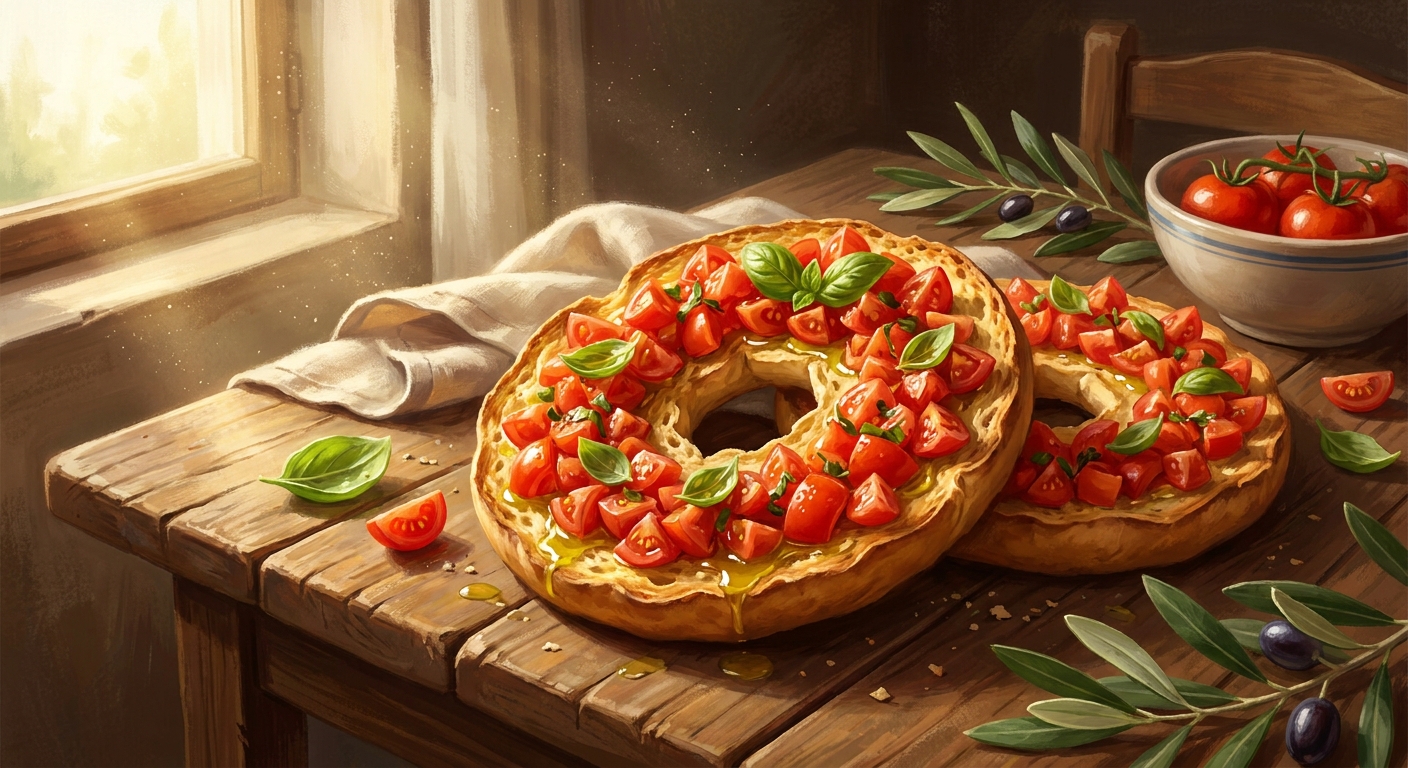
Now, enjoy the fruits of your labor. Set up a massive wooden board. Arrange your homemade masterpieces next to thinly sliced prosciutto crudo, spicy salami, a wedge of Pecorino Romano, and a bowl of marinated Cerignola olives. Crack open a bottle of the same white wine you used in the dough, invite your friends over, and watch how fast these disappear.
Let’s clear up some nonsense floating around the internet about this process.
Myth: They are just dried-out pieces of regular bread dough.
Reality: Absolutely false. The fat-to-liquid ratio is completely different. Bread dough relies heavily on water for high hydration and large air pockets. This dough relies on fat and wine for a short, dense, and crispy structure.
Myth: You need a commercial steam oven to get the right crust.
Reality: The boiling step completely negates the need for a steam oven. The gelatinization happens in the pot, allowing your standard home oven to dry and crisp the exterior perfectly.
Myth: Adding wine makes them taste alcoholic.
Reality: The alcohol completely burns off during the baking process. What remains is a subtle, complex acidity that balances the richness of the olive oil.
Myth: You have to use yeast for all variations.
Reality: While grissini often uses yeast for a slight puff, traditional taralli uses absolutely zero chemical or biological leavening. The texture comes entirely from the rolling and boiling.
Can I freeze the raw dough?
Yes, but it’s not ideal. Freezing alters the hydration matrix. It is much better to bake the entire batch and store the finished product, which lasts for weeks anyway.
Why did my dough rings unroll in the water?
You didn’t pinch the ends hard enough. You really have to smash the two ends together to create a seamless seal before dropping them in the pot.
Do I need a pasta machine to roll them out?
Not at all. Your hands and a wooden cutting board are the best tools. A pasta machine will actually make them too flat and uniform; you want that rustic, handmade look.
What kind of olive oil is best?
Use an extra virgin olive oil that has a peppery, robust flavor profile. Since it’s a primary ingredient, a cheap, flavorless oil will result in a bland final product.
Are these snacks gluten-free?
Traditional recipes rely heavily on the gluten in wheat flour to hold the shape during boiling. You can experiment with GF blends, but the texture will be significantly different.
How long do they actually stay fresh?
If kept in a totally airtight glass or metal container away from direct sunlight, they can easily maintain their peak crunch for 3 to 4 weeks.
Can I skip the boiling step?
You can, but you won’t get that authentic, glassy snap. Skipping the boil turns them into a standard shortbread-style cracker rather than a genuine taralli.
Why are my crackers tough instead of crispy?
You likely over-kneaded the dough or your hydration was too high. Remember, you want a short dough. Knead just until smooth, and don’t add extra water.
Listen, taking the time to bake genuine artisan snacks at home is a massive flex. It connects you to centuries of culinary tradition and forces you to slow down and appreciate the simple magic of flour, oil, and wine. Stop settling for stale, factory-made snacks that taste like cardboard. Grab your ingredients, clear off your counter, and bake your own batch today and taste the crunch! You’ve got the science, the history, and the step-by-step plan. Go make it happen.
Leave a Reply