

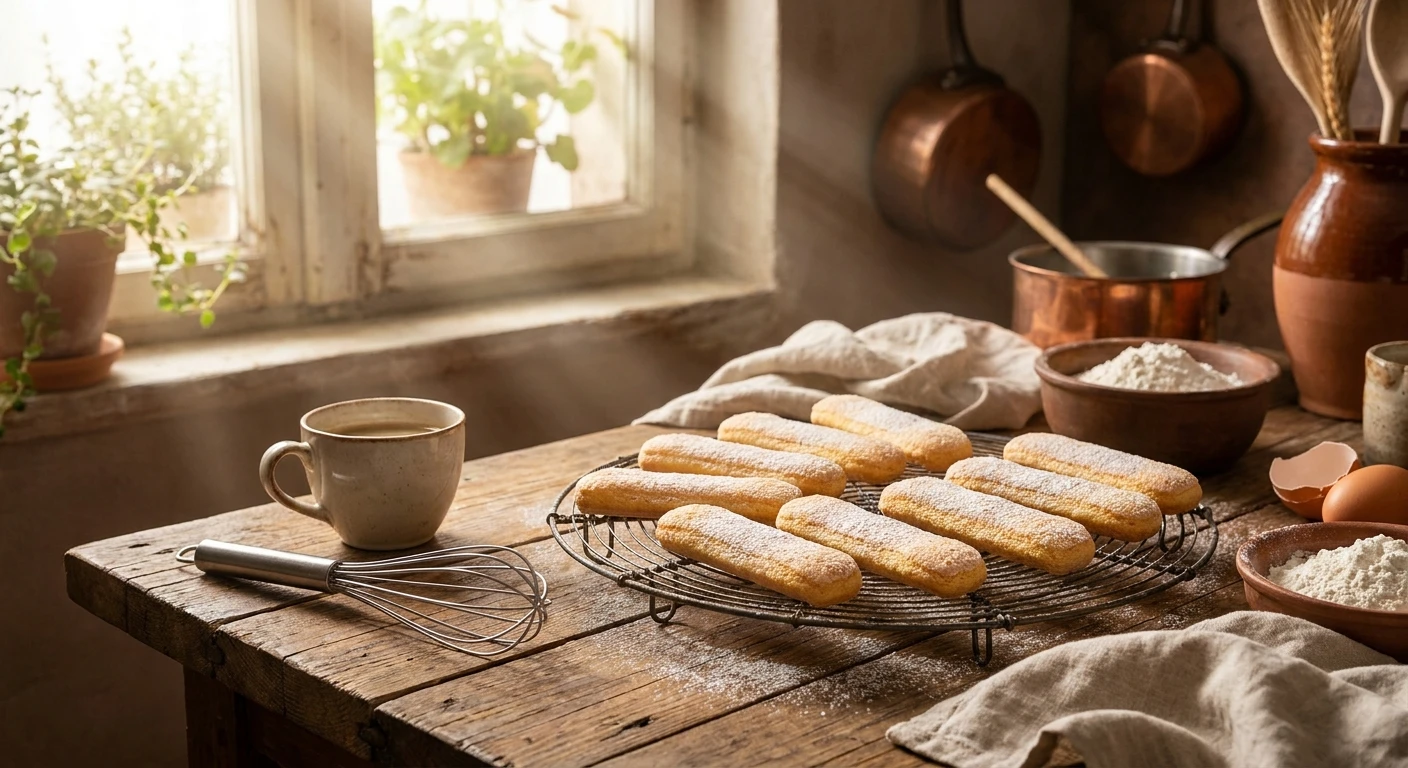
Mastering the Art of Savoiardi Cookies
Let me tell you a little secret about savoiardi cookies that completely completely shifted my baking perspective recently. Last winter, I was sitting in a tiny, dimly lit coffee shop right near Rynok Square in Lviv, sipping a ridiculously good double espresso. The barista brought out this massive slice of homemade tiramisu, and the texture was completely out of this world. It wasn’t soggy, and it wasn’t overly dry; it had the perfect bite. I asked him what made it so special. He leaned over the counter and whispered, ‘We bake the sponge fingers from scratch every single morning.’ That hit me like a ton of bricks. Why do so many of us rely on stale, cardboard-tasting stuff from a plastic packet when we can create actual magic in our own kitchens?
My thesis for you today is simple: mastering the exact technique behind these light, airy biscuits gives you ultimate dessert superpowers. If you want to elevate your baking game and impress absolutely everyone you know, you need this skill in your arsenal. You don’t need fancy, expensive equipment, just some patience, fresh eggs, and a little bit of technique. I promise, once you get the hang of it, you’ll be baking these for everything from elaborate trifles to simply snacking with your afternoon tea.
Why do these delicate little biscuits matter so much? Well, they are the structural foundation of some of the greatest desserts on the planet. When you build a house, you don’t use weak bricks. Similarly, when you build a classic dessert, you need a biscuit that can absorb a serious amount of liquid without immediately disintegrating into a sad, mushy puddle.
The real value proposition here is achieving maximum structural integrity combined with a cloud-like texture. For example, if you assemble a classic Italian tiramisu, homemade sponge fingers drink up the bitter espresso beautifully while miraculously keeping their shape. Alternatively, if you use them to line the edges of a gorgeous Charlotte Russe, they hold the heavy layers of Bavarian cream and fresh fruit perfectly upright without buckling under the pressure.
| Type of Biscuit | Texture & Structure | Best Used For |
|---|---|---|
| Store-bought (Supermarket) | Extremely dry, hard, and often brittle | Emergency quick desserts, long pantry storage |
| Bakery-fresh (Commercial) | Crisp on the outside, slightly dense inside | Eating plain with morning coffee or tea |
| Homemade From Scratch | Light as air, highly absorbent, perfectly sweet crust | Premium desserts, gifting, ultimate layered cakes |
Listen, there are three huge reasons you should start making them yourself right now rather than buying them:
- Absolute flavor control: You can scrape in fresh vanilla bean paste, add a tiny hint of lemon zest, or even swap out a fraction of the sugar to tweak the sweetness profile perfectly to your liking. Try doing that with a sealed plastic bag of factory-made biscuits.
- Superior absorption mechanics: Freshly baked and properly dried ones soak up espresso or liqueur like an absolute sponge but stubbornly refuse to collapse, giving you those beautiful, distinct visual layers when you cut into your cake.
- The ultimate baking flex: Let’s be real for a second, casually telling your dinner guests that you even made the ladyfingers from scratch is guaranteed to drop jaws and earn you some serious culinary respect.
Origins of the Biscuit
You might think these are just a random bakery staple that popped up over time, but they actually have a seriously royal pedigree. Back in the late 15th century, at the highly influential court of the Duchy of Savoy (which covered parts of modern-day Italy, France, and Switzerland), the ruling family needed something incredibly special to impress the visiting King of France. So, their genius pastry chefs whipped up what they originally called ‘Savoiardi.’ It was a massive, instant hit. The king was completely obsessed with the airy texture, and soon enough, these little sponge cakes became the official court biscuit. They were seen as a major symbol of elite hospitality and immense wealth because highly refined sugar and finely milled white flour were incredibly expensive luxury items back then.
Evolution Across Europe
Over the following centuries, the recipe rapidly traveled across borders and oceans. The French adored them and called them ‘boudoirs,’ while the British started calling them ‘ladyfingers’ because their elegant, elongated shape closely resembled the delicate, manicured fingers of a lady at the royal court. Every single region started tweaking the recipe to fit their local tastes. Some bakers added fine almond flour for richness, others played with different types of dusting sugars for extra crunch. But the core method—whipping eggs vigorously to trap large amounts of air—remained completely identical. It’s fascinating how a single recipe survived empires rising and falling, massive wars, and shifting geographical borders, simply because it tastes so incredibly good dipped in something hot or boozy.
The Modern State of Sponge Fingers
Now, sitting here in 2026, it’s pretty wild to think about how mass production completely changed things. The industrial revolution eventually turned these delicate, royal treats into hard, cardboard-like sticks sold in uninspiring plastic wrap. Sure, the commercial versions are convenient if you are in a massive rush, but they entirely lack the soul, flavor, and delicate crunch-to-softness ratio of the original 15th-century method. We’ve kind of lost touch with how incredible a freshly baked batch actually is. But the good news is that home baking is experiencing a huge, continued revival right now, and folks are finally realizing that bringing back the authentic, traditional technique is completely worth the minor effort.
The Aeration Mechanism
Okay, let’s get a little nerdy for a second because understanding the physics of this batter is exactly how you avoid flat, sad biscuits that look like pancakes. The entire lift comes from mechanical aeration. You do not use chemical leaveners like baking powder or baking soda here. Instead, you’re using the sheer structural power of egg whites and egg yolks. When you aggressively whip the egg whites, you are physically uncoiling their tightly wound proteins. Those proteins then link back together around tiny, microscopic bubbles of air. You are essentially building millions of microscopic balloons inside your bowl. The sugar you slowly add stabilizes these balloons, preventing them from popping while they sit on your counter waiting to go into the hot oven.
Starch Gelatinization and Structure
When those raw, airy fingers hit the intense heat of the oven, the trapped air bubbles rapidly expand—that gives you the initial rise. But what keeps them from collapsing when they cool down? That is where starch gelatinization steps in to save the day. The flour you gently fold into the eggs contains complex starches that absorb surrounding moisture and swell up in the heat, eventually setting into a rigid, permanent sponge web. It’s a literal race between the air expanding and the starches setting up. If you mix it perfectly, they freeze exactly in that expanded state.
- Protein Denaturation: The physical beating fundamentally changes the shape of the ovalbumin present in the egg whites, creating your critical structural foam.
- Hygroscopic Action: The heavy layer of powdered sugar on top pulls ambient moisture from the air, dissolving slightly before baking into that iconic, crispy, pearl-like crust.
- Maillard Reaction: The browning on the bottom and edges isn’t just a color change; it’s a highly complex chemical reaction between amino acids and reducing sugars creating intense, caramel-like flavor.
- Specific Gravity: The perfect batter is literally lighter than water. If you aggressively lose too much air during the folding phase, the specific gravity drastically increases, and your biscuits will turn into heavy, dense rubber.
Step 1: Prep the Canvas
Before you even crack a single egg, you need to have your entire workspace organized perfectly. Line two large baking sheets with high-quality parchment paper or silicone mats. Do not use wax paper, or you will have a smoking disaster in your oven. Preheat your oven exactly to 375°F (190°C). Prepare a large piping bag fitted with a plain round tip (about 1/2 inch or 1.3 cm wide). Having this ready prevents the batter from sitting around and deflating while you scramble to find your equipment.
Step 2: Whip the Whites
Separate your room-temperature eggs with extreme care. Even a single tiny drop of fat from the yolk will prevent the whites from achieving maximum volume. In a totally clean, grease-free glass or metal bowl, whip the egg whites until they reach soft peaks. Slowly rain in half of your granulated sugar, continuing to whip until the peaks are glossy, stiff, and hold their shape completely when you hold the whisk upside down. This is your primary source of leavening.
Step 3: Ribbon the Yolks
In a separate bowl, combine the egg yolks with the remaining granulated sugar and a dash of vanilla extract. Whip them vigorously until the mixture transforms into a pale, thick yellow cream. When you lift your whisk, the mixture should fall back into the bowl in thick ribbons that sit on the surface for a few seconds before disappearing. This ribbon stage ensures the sugar is fully dissolved and the yolks have trapped enough air.
Step 4: The Delicate Fold
This is where champions are made. Gently pour the thick egg yolk mixture over the stiff egg whites. Using a large, flexible silicone spatula, carefully fold the two together just until they are combined. Do not overmix. Next, sift your measured all-purpose flour directly over the egg mixture in two batches. Fold gently by slicing down through the center, scraping the bottom of the bowl, and folding the batter over itself. Stop the very second you no longer see any dry flour streaks.
Step 5: Piping the Fingers
Carefully transfer your fragile batter into the prepared piping bag. Pipe lines that are about 3 to 4 inches long onto your parchment-lined baking sheets. Leave roughly an inch of space between each one because they will expand slightly as they bake. Keep your pressure even and steady to ensure they are all roughly the same width so they bake at exactly the same speed.
Step 6: The Double Sugar Dust
This is a completely non-negotiable step if you want that signature cracked, pearlescent crust. Generously sift a thick layer of powdered sugar completely over the piped batter. Wait exactly two minutes for the first layer to lightly absorb, and then aggressively dust them a second time. This double-layering technique creates the distinct barrier that gives the biscuit its famous crunch while keeping the interior incredibly soft and spongy.
Step 7: The Perfect Bake
Slide the baking sheets into your preheated oven and bake for about 12 to 15 minutes. You are looking for a light golden blonde color, slightly deeper on the edges but relatively pale on top. Do not open the oven door for the first 10 minutes, or the sudden rush of cold air could cause them to collapse instantly. Once baked, pull them out and let them cool on the tray for a few minutes before transferring them to a wire rack.
Myth: You absolutely need to add cream of tartar to stabilize the egg whites.
Reality: While cream of tartar certainly helps, starting with a meticulously clean bowl and slowly adding your sugar provides more than enough stability for a perfectly strong meringue foam.
Myth: They should be totally soft and cake-like right out of the oven.
Reality: They should actually be slightly crisp on the outside right away. If you plan to use them for tiramisu, you often need to let them sit out overnight to dry out further so they can absorb liquid without turning to mush.
Myth: Store-bought versions are just as good for authentic layered desserts.
Reality: Store-bought versions have a completely different hydration capacity and usually lack the delicate flavor profile that fresh eggs and real vanilla bring to the table.
Myth: You can just use regular granulated sugar for the top dusting.
Reality: Granulated sugar will melt into a sticky syrup in the oven. You specifically need the fine texture of powdered sugar to create the correct protective crust.
Can I freeze them?
Yes, they freeze exceptionally well. Place them in an airtight container with parchment paper between the layers, and they will easily last up to three months without losing quality.
Why are my ladyfingers flat?
This usually happens because the egg whites were not whipped to stiff enough peaks, or you were too aggressive during the folding process and knocked all the trapped air out of the batter.
Can I make them gluten-free?
Absolutely. You can substitute the regular all-purpose flour with a high-quality 1-to-1 gluten-free baking blend. Just ensure your blend contains xanthan gum to help hold the structure.
What is the absolute best piping tip to use?
A plain round tip that is roughly 1/2-inch wide is the standard. If you do not have a piping tip, you can just snip the end off a disposable pastry bag or a large ziplock bag.
How long do they last at room temperature?
If kept in a loosely covered container, they will easily stay fresh for about three days. Over time they will continue to dry out, which actually makes them even better for soaking in coffee.
Do I really need powdered sugar on top?
Yes, skipping the powdered sugar severely impacts the final texture. It provides the crucial crunchy crust that defines the traditional biscuit.
Can I add flavorings like vanilla or citrus?
Definitely. Adding a teaspoon of high-quality vanilla extract or some freshly grated lemon zest to the egg yolk mixture elevates the flavor beautifully.
Do I serve these warm or cold?
They are traditionally served completely cooled to room temperature so the structural crumb has fully set up, though stealing one warm off the tray is a baker’s privilege.
Can I use a stand mixer instead of a hand mixer?
Yes, a stand mixer makes whipping the egg whites incredibly fast and easy. Just be careful not to walk away and accidentally over-whip the whites until they are chunky.
Why did my batter get runny when piping?
If the batter sits out too long before hitting the oven, the air bubbles begin to deflate and the sugar begins pulling water out of the eggs, resulting in a runny, flat mess.
To wrap all of this up, making these iconic biscuits at home is vastly superior to buying them, and armed with the right science and technique, it is entirely foolproof. Go preheat that oven right now, give this method a try, and absolutely share your results—your desserts will never be the same again!



Leave a Reply