

Classic Old Fashioned Swiss Steak Secrets
You know that feeling when you just need a serious, stick-to-your-ribs meal, and only an old fashioned swiss steak will hit the spot? Listen, I totally get it. I was sitting in my kitchen here in Kyiv just last week, watching the rain pour down outside, and my stomach was absolutely begging for something warm, heavy, and nostalgic. I wanted a dish that didn’t just fill me up, but actually gave me a culinary hug. That is exactly what this legendary comfort food does.
I headed down to my local butcher, grabbed a beautiful, slightly tough cut of beef, and knew exactly what was going on the menu. The beauty of this meal is that it takes a stubbornly tough piece of meat and gently coaxes it into absolute submission. Through the magic of pounding, searing, and long simmering in a rich, bubbling tomato and onion gravy, you get meat that literally falls apart when you look at it. Even now in 2026, when everyone seems obsessed with fifteen-minute instant meals or ordering from flashy delivery apps, taking a couple of hours to slow-cook beef just feels incredibly right. It grounds you. The aroma that fills your house while this cooks is better than any candle you could ever buy. Grab your cast iron skillet, and let me walk you through the absolute best way to make this legendary Sunday dinner.
Why We Keep Coming Back to This Dish
There is a very specific reason why your grandmother made this all the time, and why it has survived on dinner tables for generations. It comes down to basic economics and massive flavor. You are taking one of the cheapest cuts of beef available at the supermarket and turning it into a luxurious, melt-in-your-mouth dining experience. It requires very little active prep time, but the slow cooking process does all the heavy lifting for you.
Think about the value proposition here. First, a cheap round steak instantly becomes a luxury dinner, saving you a ton of cash while feeding a whole family. Second, the cooking process automatically creates a massive amount of rich, hearty tomato gravy that practically begs to be poured over a mountain of buttery mashed potatoes or thick egg noodles. You are making the main course and the sauce in one single pan, minimizing cleanup and maximizing the flavor profile.
If you want to achieve absolute perfection, you have to follow three non-negotiable rules for prepping your meat:
- Pound it mercilessly: You must use a heavy meat mallet to break down those stubborn muscle fibers. Do not be gentle. You want to physically tenderize the steak until it is noticeably thinner and wider.
- Flour it generously: Dredging the meat in seasoned flour does two things. It creates a crust during the sear, and that flour later thickens the tomato sauce into a proper gravy.
- Sear it fiercely: Get your oil hot. You want a dark brown crust on both sides of the meat. This isn’t about cooking the steak through; it’s about building deep, complex flavor notes at the bottom of the pan.
To give you a better idea of what meat to buy, check out this quick comparison guide I put together for your shopping trip:
| Beef Cut | Best Cooking Method | Tenderness Result After Braising |
|---|---|---|
| Bottom Round | Slow braise (2+ hours) | Incredible, melt-in-the-mouth texture |
| Chuck Steak | Stewing or braising | Very tender, slightly more fat content |
| Sirloin | Quick pan sear | Firm but juicy (Not recommended for this recipe) |
Stick to the round steaks. They are lean, tough, and perfectly suited for the long simmer we are about to put them through.
The Story Behind the Simmer
Peeling Back the Origins
So, let us clear up a massive misunderstanding right out of the gate. This dish has absolutely nothing to do with the country of Switzerland. You won’t find Swiss people eating this in the Alps after a day of skiing. The name actually comes from a process called “swissing.” In the textile industry, swissing meant running fabric through heavy rollers to soften it. Butchers adapted this term for meat that had been run through a mechanical tenderizing machine or pounded flat with a textured mallet. When you “swiss” a steak, you are physically breaking down its tough connective tissues.
Evolution Over the Decades
This technique became incredibly popular during periods when household budgets were tight. Back in the early 20th century and especially post-World War II, families could not afford prime rib or tenderloin every night. They needed to stretch their dollars. At the same time, the canned food industry was booming. Canned tomatoes became a staple in pantries across North America and Europe. Clever home cooks realized that combining heavily pounded, cheap beef with the acidic, flavorful punch of canned tomatoes and onions created a meal fit for a king. It was economical, filling, and deeply comforting.
The Modern State of the Dish
These days, the dish is experiencing a bit of a massive comeback. People are genuinely tired of ultra-processed fast food. There is a whole movement shifting back to slow, intentional cooking. Making a hearty dinner from scratch is a weekend ritual for many. While the classic recipe remains largely untouched, modern cooks often add things like smoked paprika, a splash of Worcestershire sauce, or fresh garlic to elevate the base flavors. Yet, the soul of the meal remains exactly the same as it was fifty years ago.
The Science of Tenderizing Tough Meat
The Maillard Reaction and Collagen Breakdown
I promise not to bore you with too much science, but knowing exactly what happens in your skillet makes you a significantly better cook. When you drop that floured steak into screaming hot oil, you trigger the Maillard reaction. This is a chemical reaction between amino acids and reducing sugars that gives browned food its distinctive, savory flavor. But that’s just step one. The real magic happens during the long braise. Tough cuts like bottom round are packed with a tough protein called collagen. If you cook it quickly, the collagen tightens up, and you end up chewing on a rubber tire. But when you cook it slowly, at a low temperature, that hard collagen literally melts and transforms into rich, luxurious gelatin. This gelatin coats the meat fibers, making them feel incredibly succulent and tender in your mouth.
Acidic Tenderization from Tomatoes
Tomatoes are not just hanging out in the pan to look pretty and taste good. They are actively working on the meat. Tomatoes are naturally acidic. When you submerge your beef in a simmering tomato sauce, that mild acid slowly helps to denature the proteins on the surface of the meat, further aiding the tenderizing process. It is a slow, gentle chemical breakdown that happens over the course of two hours.
- Collagen requires a sustained temperature of around 160°F (71°C) to begin melting into gelatin.
- The mechanical “swissing” physically shears long protein strands, allowing moisture to penetrate the center of the cut.
- Tomatoes provide a natural acid environment (averaging a pH of about 4.5), acting as a gentle, continuous chemical tenderizer.
- The starches in the flour coating gelatinize during the long simmer, naturally thickening the pan liquids into a glorious, spoon-coating gravy.
Your Step-by-Step Guide to Perfect Swiss Steak
Step 1: Selecting and Pounding the Beef
Go to the store and buy about two pounds of bottom round or chuck steak, roughly an inch thick. Bring it home, lay it out on a solid cutting board, and cover it with a piece of plastic wrap to keep your kitchen clean. Grab a textured meat mallet and start pounding. Hit it firmly on both sides until the steaks are about half an inch thick. You should actually see the fibers breaking apart. Cut the large pounded steak into individual serving-sized portions.
Step 2: Seasoning and The Crucial Flour Dredge
In a wide, shallow bowl, mix together one cup of all-purpose flour, a heavy pinch of kosher salt, a generous amount of freshly cracked black pepper, and maybe a little garlic powder if you are feeling adventurous. Take each piece of pounded meat and press it firmly into the flour mixture. Make sure every single crevice is coated. Shake off the excess. Do not skip this step, as it is the foundation of your gravy.
Step 3: Getting the Pan Screaming Hot
Place a large, heavy-bottomed Dutch oven or cast iron skillet on your stove over medium-high heat. Add about three tablespoons of cooking oil—something with a high smoke point like canola or avocado oil. Wait until the oil is shimmering and just barely starting to smoke. You need high heat to get a proper sear without overcooking the inside.
Step 4: The Golden Brown Sear
Carefully lay your floured steaks into the hot oil. Do not crowd the pan; work in batches if you have to. Let them sit completely undisturbed for about three to four minutes until a dark, golden-brown crust forms on the bottom. Flip them over and repeat on the other side. Once browned, remove the steaks and set them aside on a plate. The meat will still be raw in the middle, and that is exactly what you want.
Step 5: Building the Aromatic Base
Lower the heat to medium. Your pan will be full of dark, tasty brown bits stuck to the bottom. Toss in one large sliced yellow onion and maybe some sliced celery or bell peppers if you like extra aromatics. Sauté them until they soften and start picking up the flavors from the beef drippings. Pour in one large can of crushed or diced tomatoes, and maybe half a cup of beef broth. Scrape the bottom of the pan with a wooden spoon to release all those crispy brown bits.
Step 6: The Long, Low Simmer
Nestle your seared steaks back into the bubbling tomato and onion mixture. Make sure they are mostly submerged. Bring the whole pot up to a gentle boil, then immediately drop the heat to the absolute lowest setting. Cover the pot tightly with a heavy lid. Walk away. Let it simmer gently for one and a half to two hours. You can also do this in a 325°F oven if you prefer perfectly even heating.
Step 7: Resting and Plating Like a Pro
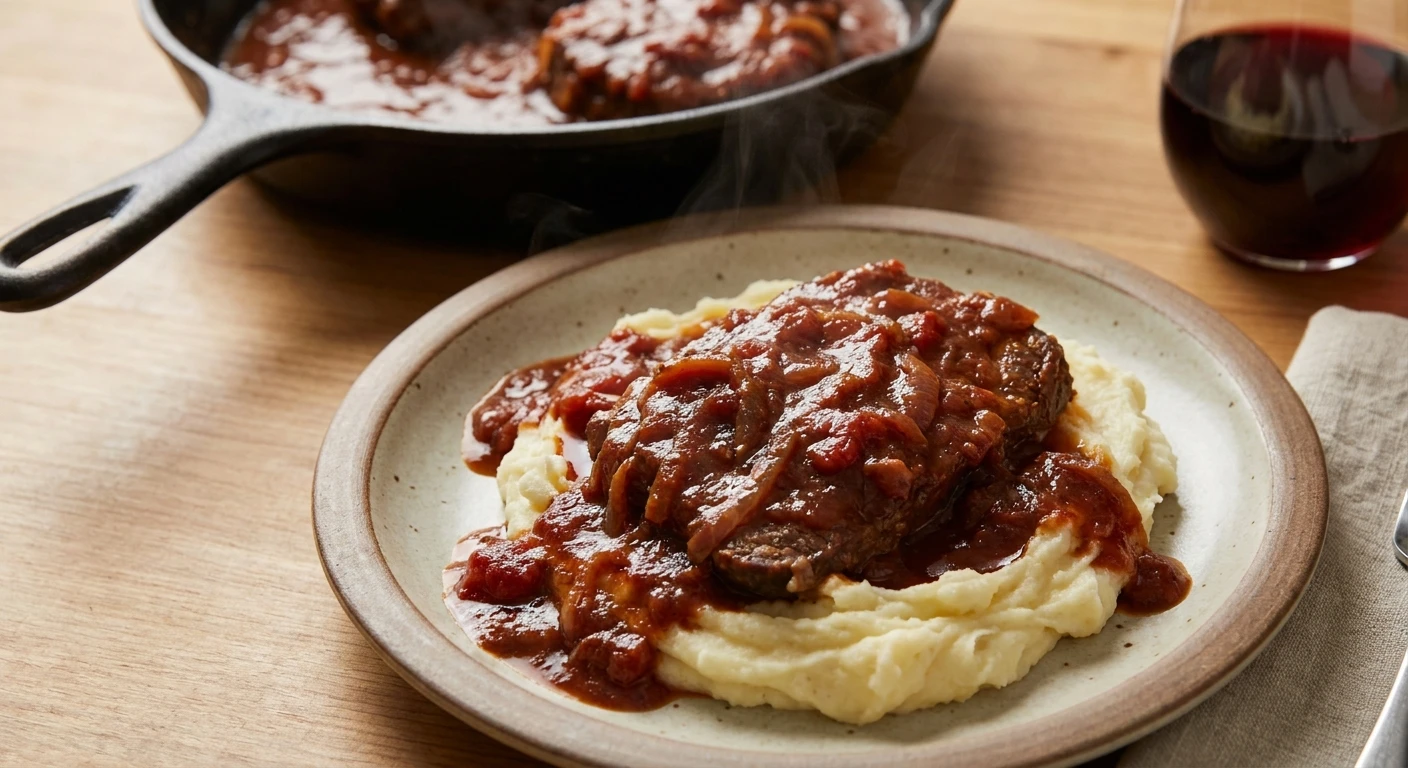
After about two hours, take a fork and test the meat. It should yield with almost zero resistance. If it is still tough, put the lid back on and give it another thirty minutes. Once it is perfectly tender, turn off the heat. Let it rest for five minutes. Serve a massive piece of the steak over a mountain of creamy mashed potatoes, and spoon a ridiculous amount of the thick tomato-onion gravy right over the top.
Clearing Up Common Cooking Myths
Myth: You can use any cut of meat and just cook it for less time.
Reality: If you try to use a tough cut like a round steak and only cook it for twenty minutes, you will end up chewing on shoe leather. The long braising time is totally mandatory to melt the collagen.
Myth: More flour on the meat makes a thicker, better crust.
Reality: If you pack too much flour onto the beef, it will turn gummy and fall off in the pan. You want a light, even, and well-pressed dusting.
Myth: You must use fresh tomatoes for the best flavor.
Reality: Canned tomatoes actually perform much better in this application. They are picked and packed at absolute peak ripeness, offering a consistent acidity and moisture level that fresh winter tomatoes simply cannot match.
Myth: Searing the meat “seals in the juices.”
Reality: Searing does absolutely nothing to seal in moisture. What it actually does is trigger the Maillard reaction, which builds incredibly deep flavor profiles on the surface of the meat.
Frequently Asked Questions
Can I make this in a slow cooker?
Absolutely. You still need to pound, flour, and sear the meat in a pan first for flavor. After browning, transfer the meat and the tomato mixture to your slow cooker and cook on low for 6 to 8 hours.
What is the absolute best side dish for this?
You cannot go wrong with classic, butter-heavy mashed potatoes. The potatoes act as a sponge for the rich tomato gravy. Buttered egg noodles or white rice are fantastic secondary options.
How long do leftovers last in the fridge?
Stored in an airtight container, leftovers will easily last three to four days. Honestly, sitting in the fridge overnight allows the flavors to meld even further, making it taste way better the next day.
Can I freeze the cooked steak?
Yes, it freezes beautifully. The heavy gravy protects the meat from freezer burn. Let it cool completely, pack it in a freezer-safe container, and it will keep for up to three months.
Is this recipe gluten-free?
Not as written, because of the all-purpose flour dredge. However, you can easily swap the wheat flour for a gluten-free one-to-one baking blend or simply use cornstarch.
Why is my meat still tough after cooking?
You simply didn’t cook it long enough. Tough meat means the collagen hasn’t melted yet. Put the lid back on, ensure there is enough liquid, and simmer for another 30 to 45 minutes.
Do I really need to pound it with a mallet?
Yes. The physical, mechanical breakdown of the muscle fibers is half of the secret to getting that perfect, tender texture. If you don’t have a mallet, use a heavy rolling pin or the bottom of a heavy skillet.
What if my gravy turns out too thin?
If your sauce isn’t thick enough at the end of the cooking time, take the lid off the pan and let it simmer uncovered for the last 15 minutes. The excess water will evaporate, concentrating and thickening the gravy.
Wrapping Up
Making a proper, classic dinner doesn’t have to be intimidating, and it definitely doesn’t require a culinary degree. By just putting in a little bit of physical elbow grease to pound the meat, searing it well, and letting time do the rest, you create an unforgettable meal. Even with the crazy pace of life in 2026, finding two hours on a Sunday afternoon to simmer this beautiful dish will absolutely bring your family running to the dinner table. Grab your ingredients, heat up that cast iron skillet, and get ready to experience real comfort food. Drop a comment below once you make it and let me know how much you loved that amazing gravy!



Leave a Reply