

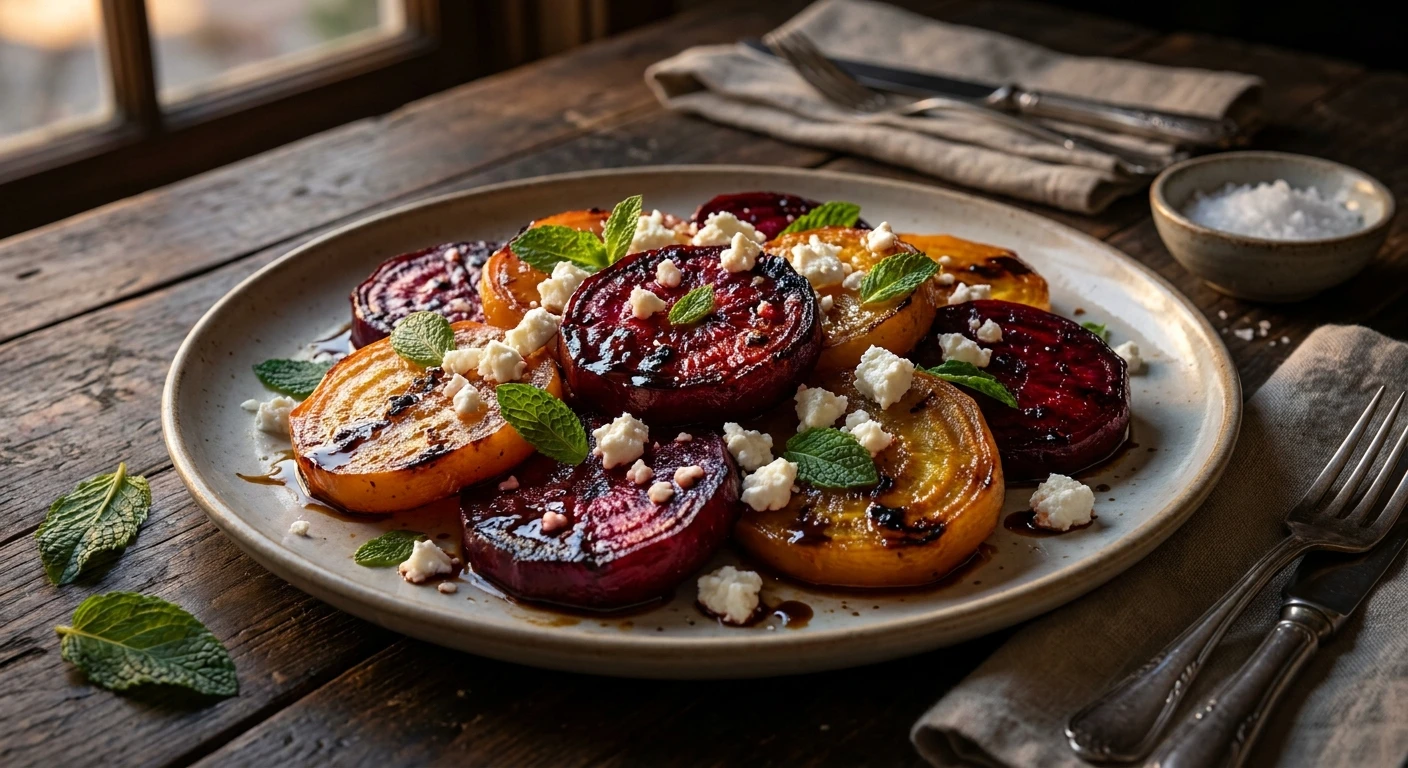
The Ultimate Guide to Perfect Fried Beets
Are you looking to completely elevate your side dish game with perfectly crispy, caramelized fried beets? You are in exactly the right place. Root vegetables often get a bad reputation for being too earthy, overly soft, or simply boring, but applying direct, high heat in a skillet changes everything. When you toss sliced beetroot into a hot pan with a rich cooking fat, you unlock a depth of savory and sweet flavors that boiling or roasting simply cannot achieve.
The secret lies in the intense caramelization of the vegetable’s natural sugars. This technique creates a beautiful textural contrast: a tender, melt-in-your-mouth interior surrounded by a beautifully charred, slightly crispy exterior. Whether you want to serve them alongside a hearty main course, toss them into a vibrant salad, or enjoy them as a standalone savory snack, mastering this cooking method provides incredible culinary versatility.
Read also: The Ultimate Seafood Stir Fry Recipe; The Ultimate Roasted Grapes Recipe.
This comprehensive guide breaks down everything you need to know about preparing this vibrant ingredient. From understanding the chemistry of caramelization to selecting the best cooking fats, you will learn the exact techniques necessary to achieve restaurant-quality results in your own kitchen.
Why You Should Start Frying Your Root Vegetables
Cooking methods dictate the final flavor profile of any ingredient, and beetroot is especially sensitive to how it is handled. Many home cooks default to wrapping them in foil and baking them for over an hour, or worse, boiling them until their vibrant color and nutrients bleed out into the water. Instead, pan-frying offers a rapid, highly flavorful alternative.
When you fry this vegetable, the direct contact with a hot skillet rapidly evaporates surface moisture. This concentrates the natural sugars and triggers browning. The process is relatively quick; you can achieve beautifully tender slices by cooking them for about 20 minutes over medium heat. The addition of a savory fat balances the inherent sweetness perfectly.
Consider the immense value proposition of this technique. First, it saves time compared to roasting. Second, it allows for infinite flavor customizations directly in the pan. Third, it preserves the firm, satisfying bite of the root. Here are just a few examples of how you can elevate the dish:
- Rich and Savory: Frying slices in bacon fat and finishing with a balsamic drizzle creates a smoky, tangy masterpiece.
- Fresh and Bright: Pairing yellow and red beets cooked in ghee with a cool creamy mint sauce balances the earthy tones perfectly.
To master the basic technique, follow this essential workflow:
- Preparation: Wash, peel, and slice the roots into uniform, quarter-inch rounds to ensure even cooking. If you want a softer center, you can use pre-cooked roots, such as 800 g cooked beetroot tossed with butter.
- Searing: Heat your chosen fat in a heavy-bottomed skillet until shimmering, then arrange the slices in a single layer without overcrowding.
- Caramelization: Cook undisturbed for several minutes until a crust forms, then flip and repeat, finishing with your favorite herbs and acidic splash.
| Cooking Method | Average Time | Resulting Texture and Flavor |
|---|---|---|
| Boiling | 45-60 minutes | Very soft, diluted flavor, significant color loss into the water. |
| Oven Roasting | 50-70 minutes | Tender with slightly wrinkled edges, concentrated sweet flavor. |
| Pan-Frying | 15-20 minutes | Crispy exterior, tender interior, intensely savory and caramelized. |
The Culinary Journey of the Humble Beet
Origins of Root Vegetable Cookery
The history of cultivating and consuming this vibrant red root is a fascinating journey through agricultural evolution. Originally native to the coastlines of the Mediterranean Sea, early civilizations primarily harvested the plant for its leafy green tops, entirely discarding the fibrous root. The ancient Greeks and Romans recognized the medicinal and nutritional value of the greens but viewed the tough, woody underground portion as undesirable for daily consumption. It was not until careful selective breeding during the early centuries of the common era that the swollen, nutrient-dense taproot we recognize today began to emerge as a viable food source. As the Roman Empire expanded, they carried these early cultivars throughout northern Europe, introducing a hardy crop that could survive cold winters and provide vital sustenance during lean agricultural months.
The Evolution of Pan-Frying Techniques
During the Middle Ages and into the Renaissance, European peasants relied heavily on root cellars to store their harvests. Boiling was the default preparation method, largely because it required minimal expensive cooking fats and could be done in a communal hearth pot. However, as culinary techniques advanced in the 18th and 19th centuries, the accessibility of butter, rendered animal fats, and cast-iron cookware revolutionized the peasant kitchen. Cooks discovered that applying high, direct heat to slices of these stored roots transformed their sometimes muddy, earthy flavor into something remarkably sweet and nutty. Searing them in a hot skillet became a favored method in Eastern European and French country kitchens, where cooks learned that maintaining a crisp exterior provided a much-needed textural contrast to the traditionally soft stews and braises of the era.
Modern State of Gourmet Beets
Fast forward to the modern culinary landscape, and this once-humble ingredient has secured a starring role in high-end bistros and fine dining establishments globally. Chefs appreciate the striking visual appeal—the bleeding ruby reds and striking golden yellows—just as much as the complex flavor profile. Today, you will frequently see skillet-seared preparations featured on tasting menus, often paired with artisanal goat cheeses, toasted pistachios, and aged balsamic reductions. The modern approach treats the root with the same respect given to a premium steak, focusing on crust formation, moisture retention, and precise seasoning. This renaissance has encouraged home cooks to abandon the boiling pot and reach for the frying pan, unlocking professional-level flavors with simple, accessible techniques.
The Chemistry of Caramelization in Root Vegetables
Understanding the Maillard Reaction
To truly master the skillet, you must understand the underlying science of what happens when high heat meets organic vegetable matter. The magic responsible for that irresistible golden-brown crust is known as the Maillard reaction. This complex chemical process occurs when amino acids and reducing sugars are subjected to temperatures typically above 285°F (140°C). Because beetroot contains a remarkably high natural sugar content compared to other vegetables, it is perfectly primed for this reaction. When the sliced root hits the hot fat, the surface moisture rapidly evaporates. As the surface temperature rises, hundreds of new flavor compounds are rapidly synthesized. These new compounds are what our palates interpret as savory, roasted, and deeply complex, masking the geosmin—the organic compound responsible for that famous “dirt-like” or overly earthy taste that some people dislike.
Moisture Control and Cellular Breakdown
The structural integrity of root vegetables is maintained by rigid cell walls composed of cellulose, hemicellulose, and pectin. Direct pan heat physically breaks down these complex carbohydrates, causing the pectin to dissolve and resulting in a tender mouthfeel. However, managing moisture is the critical variable. If the heat is too low or the pan is overcrowded, the vegetables will release their internal water too slowly, causing them to steam in their own juices rather than fry. The goal is to drive off surface moisture instantly while gently breaking down the internal cell walls. This precise balance of heat transfer yields a dynamic texture that is crispy on the outside yet soft on the inside.
- Geosmin Degradation: The chemical compound geosmin produces the earthy aroma; high heat and acidic seasonings significantly neutralize its dominance on the palate.
- Betalain Stability: The vivid red and yellow pigments, called betalains, are water-soluble. Frying in oil, rather than boiling in water, helps retain these striking colors within the vegetable’s cellular matrix.
- Sugar Concentration: Beetroot contains up to 10% sugar by weight. Evaporating water through frying concentrates this sucrose, maximizing the natural sweetness.
- Pectin Gelatinization: Thermal degradation of pectin occurs much faster in direct fat than in ambient oven heat, ensuring a tender bite in a fraction of the time.
Step-by-Step Guide to Mastering Fried Beets
Step 1: Selecting the Right Beet Varieties
Your success begins at the market. Look for roots that are firm, heavy for their size, and possess a smooth, unblemished skin. Red varieties offer the classic, deep, earthy sweetness, while golden varieties are generally milder, slightly nuttier, and will not bleed pink juice all over your cutting board. Chioggia (candy-striped) are beautiful raw but tend to lose their distinct stripes when subjected to high heat.
Step 2: Peeling and Slicing Uniformity
Consistency is crucial for even heat distribution. Wash the roots thoroughly to remove grit, then use a sharp vegetable peeler to remove the tough outer skin. Using a chef’s knife or a mandoline slicer, cut the roots into exact 1/4-inch to 3/8-inch thick rounds. If the slices are too thick, the outside will burn before the inside softens; if too thin, they will turn into brittle chips rather than a satisfying side dish.
Step 3: Choosing the Ideal Cooking Fat
The fat you choose acts as both a heat transfer medium and a primary flavoring agent. Neutral oils like avocado or grapeseed are excellent for high-heat searing without burning. For a richer flavor, ghee or clarified butter works beautifully because the milk solids have been removed, raising the smoke point. Animal fats, such as bacon grease or duck fat, add an incredible layer of savory smokiness that complements the natural sugars perfectly.
Step 4: Heating the Pan to the Correct Temperature
Place a heavy cast-iron skillet or stainless-steel pan on the stove and preheat it dry for a minute before adding your chosen fat. Allow the fat to heat until it shimmers and glides easily across the surface of the pan. It should be hot enough that a slice immediately sizzles upon contact. Carefully lay the slices in a single, uncrowded layer. Do not stack them.
Step 5: The First Flip and Caramelization Check
Once the slices are in the pan, resist the urge to move them constantly. Let them cook for about 8 to 10 minutes, allowing a deep, dark crust to form. Watch the edges; when they begin to look slightly translucent and blistered, use tongs to lift one piece. If it is lightly blackened and crispy, it is time to flip. Continue cooking the other side until completely tender when pierced with a fork.
Step 6: Seasoning with Acids and Herbs
As soon as the vegetable reaches the desired tenderness, immediately remove the pan from the heat. This is the moment to build complexity. A splash of high-quality balsamic vinegar or fresh lemon juice will deglaze the pan and cut through the richness of the cooking fat and the intense sweetness of the root. Toss thoroughly with coarse sea salt and freshly cracked black pepper.
Step 7: Plating and Serving Suggestions
Transfer the caramelized slices to a warmed serving platter immediately to preserve their crust. Garnish with robust fresh herbs like chopped rosemary, thyme, or fresh mint. Crumbled feta or goat cheese makes an exceptional topping, melting slightly against the hot vegetable. Serve immediately alongside roasted poultry, grilled steaks, or as a hearty component of a warm winter salad.
Debunking Common Beet Myths
Myth: They always taste exactly like dirt, no matter how you cook them.
Reality: The earthy flavor comes from a compound called geosmin. Cooking them at high temperatures in a skillet, especially when paired with an acidic finishing ingredient like vinegar, breaks down and masks this compound, highlighting their intense natural sweetness instead.
Myth: You have to boil them for an hour before you can fry them.
Reality: While you certainly can pan-fry pre-cooked slices for a quick sear, raw roots sliced uniformly at 1/4-inch thickness will cook perfectly all the way through in a hot skillet in about 20 minutes.
Myth: Red varieties are the only ones worth cooking.
Reality: Golden and white varieties are spectacular in the skillet. They tend to have a milder, sweeter profile and offer the added benefit of not staining your hands, cutting boards, or the other ingredients in your pan.
Myth: Frying destroys all the nutritional value of the vegetable.
Reality: Boiling actually leaches far more water-soluble vitamins and antioxidants into the cooking water. Pan-frying retains the majority of the fiber, potassium, and beneficial plant compounds within the flesh.
Frequently Asked Questions
Do I need to peel the skin before frying?
Yes, the skin of mature roots can be tough, fibrous, and slightly bitter. Using a sharp vegetable peeler removes this barrier, allowing the fat to penetrate the tender flesh and promoting an even, delicious crust.
Can I use canned or pre-boiled beets for this recipe?
Absolutely. If you are using pre-cooked or canned slices, make sure you pat them completely dry with paper towels before adding them to the hot oil. They will only need a few minutes per side to develop a crust since the interior is already soft.
What is the best type of pan to use?
A well-seasoned cast-iron skillet is the undisputed champion for this technique. Cast iron retains heat exceptionally well and distributes it evenly, ensuring a consistent sear across every slice without dropping in temperature when the cold vegetable hits the pan.
How do I prevent my hands from turning pink when prepping?
The red pigments are highly potent. To avoid stained hands, wear tightly fitted food-safe nitrile gloves while peeling and chopping. You can also rub a little neutral oil on your hands before handling them, or wash your hands immediately with lemon juice afterward.
Why are my slices burning instead of caramelizing?
Burning usually indicates that your pan is too hot, or you sliced the vegetable too thick, meaning the outside scorches before the inside has time to soften. Lower the stove temperature to medium and ensure your slices are no thicker than a quarter of an inch.
How long do leftovers last in the refrigerator?
Store any remaining portions in an airtight glass container in the refrigerator for up to four days. While they will lose their initial crispness, they remain deeply flavorful and are excellent served cold in salads the next day.
How do I reheat them to restore the crispy texture?
Avoid the microwave, as it will make them soggy. Instead, place them back into a dry, preheated skillet over medium heat for a few minutes until they are warmed through and the exterior crisps up again.
Can I fry the green leafy tops as well?
Yes! The leafy greens are highly nutritious and taste similar to Swiss chard. Wash them thoroughly, chop them roughly, and quickly sauté them in the same pan for just a minute or two until wilted, seasoning with garlic and lemon.
Now that you understand the science, history, and exact techniques behind making perfect fried beets, it is time to heat up your skillet. By ditching the boiling water and embracing the pan-fry method, you will transform this incredibly healthy root vegetable into a sophisticated, highly requested side dish. Grab a bunch of fresh roots from your local market, pick your favorite savory cooking fat, and start experimenting with these flavors tonight!



Leave a Reply