
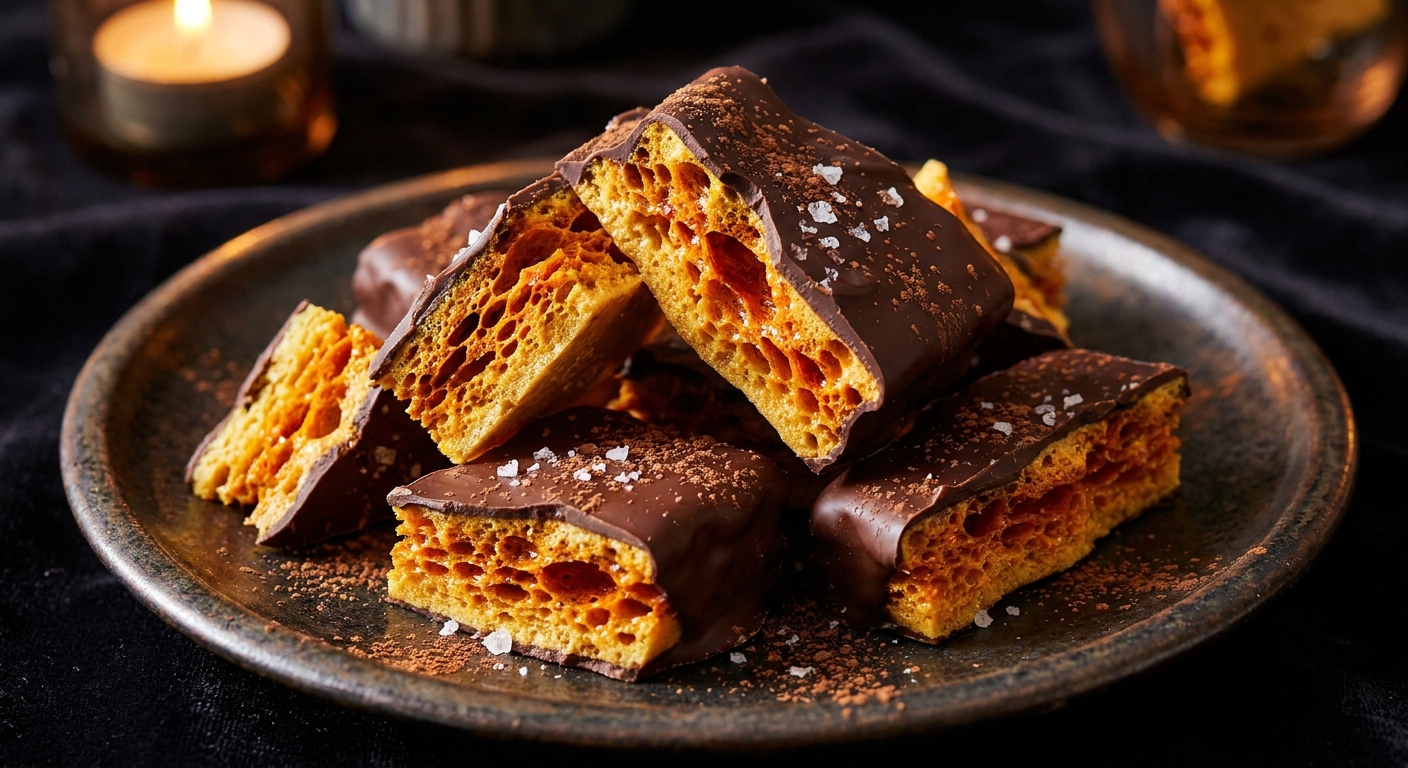
Why You Need This chocolate covered sponge toffee Guide Right Now
Look, if you haven’t tasted perfectly made chocolate covered sponge toffee yet, your sweet tooth is severely missing out on a massive flavor upgrade. I still remember the first time I encountered this magical stuff. Back in Kyiv, our traditional sweets leaned heavily toward dense chocolate truffles, rich layered honey cakes, or thick fruit pastes. But a few years ago, a buddy of mine brought back a massive, golden block of this aerated candy from a snowboarding trip to Canada. The moment I took a bite, the unbelievable contrast between the slightly bitter dark chocolate shell and the shattering, sweet, honeycomb-like interior completely blew my mind. Fast forward to the current year of 2026, and I am practically making huge batches of this crispy treat every single weekend to hand out to friends, family, and practically anyone who stops by my apartment. The thesis here is incredibly straightforward: mastering this bubbly, golden sugar magic coated in premium cocoa isn’t just a fun kitchen experiment; it is a textural masterpiece that you can absolutely pull off at home without needing a single piece of fancy commercial bakery equipment. You just need a bit of patience, a heavy-bottomed pot, and the exact roadmap I am about to hand you right now.
I know sugar work scares a lot of home cooks, but creating the perfect structural base for your candy is totally doable when you understand the basic mechanics. The sheer benefit of making your own batch instead of buying it wrapped in plastic at the local store is the absolute control you have over the flavor profile and the quality of the ingredients. You get exactly the crunch you want without it feeling like you are going to chip a tooth, and it simply melts into a glorious puddle on your tongue. Think about how amazing it tastes when you dunk a freshly enrobed piece into a steaming hot cup of black coffee—the chocolate slightly yields, and the sugar interior dissolves beautifully. Or imagine crumbling the leftover shards over a bowl of high-quality vanilla bean ice cream. The texture contrast is unbelievable.
Here is a quick cheat sheet on the core components you absolutely need to nail this recipe:
| Ingredient | Primary Purpose | Best Viable Substitution |
|---|---|---|
| White Granulated Sugar | Provides the structural crystalline base | Superfine caster sugar |
| Light Corn Syrup | Prevents premature crystallization | Golden syrup or brown rice syrup |
| Baking Soda (Fresh!) | Triggers the massive chemical aeration | NONE. Do not substitute this! |
If you want this candy to turn out perfectly on the first try, you have to follow a few absolute non-negotiables. Getting the timing right is literally the difference between a beautiful golden honeycomb and a burnt, bitter hockey puck.
- Prep your entire workstation before you even turn on the stove. Once the sugar hits the right temp, you have seconds to react. Line your baking pan with high-quality parchment paper and grease it lightly.
- Watch your sugar thermometer like a hawk. You need to hit exactly 300 degrees Fahrenheit (the hard crack stage) to ensure the candy sets up dry and brittle.
- Whisk the baking soda fast but briefly. If you over-mix after adding the leavening agent, you will completely deflate all those beautiful bubbles you just created.
Origins of the Honeycomb Candy
People have been boiling sugar for centuries, but the exact genesis of what we now call this specific crunchy treat is wonderfully scattered across the globe. You might hear people call it cinder toffee, sea foam, hokey pokey, or honeycomb, depending on where you are standing. Historically, the earliest iterations popped up as soon as commercially available baking soda hit the consumer market in the middle of the 1800s. Resourceful candy makers quickly realized that introducing an alkaline powder into highly acidic, molten sugar caused a rapid, aggressive release of carbon dioxide. This was a completely revolutionary way to stretch a relatively small amount of expensive sugar into a massive, visually impressive block of candy. It was cheap to produce, incredibly easy to sell at local fairs, and kids absolutely loved the magical way it expanded right before their eyes.
Evolution Across the Globe
As the core recipe traveled, different cultures put their own distinct spin on the concept. In the United Kingdom, cinder toffee became a massive staple around Guy Fawkes Night, serving as a sweet treat to crunch on while watching fireworks light up the crisp autumn sky. Over in New Zealand, bakers smashed it up into tiny bits and folded it into rich vanilla ice cream, creating the legendary “hokey pokey” flavor that remains a national obsession to this day. Meanwhile, North Americans, particularly Canadians, fully embraced the chocolate-coated version, turning it into incredibly popular mainstream candy bars that line grocery store checkout aisles from Vancouver all the way to Halifax. The addition of the chocolate was a massive leap forward for the confection. Not only did the cocoa provide a much-needed bitter contrast to the intense sweetness of the spun sugar, but the fat in the chocolate actually acted as an impermeable seal, protecting the highly hygroscopic sugar from absorbing moisture from the air and becoming a sticky, chewy mess.
The Modern State of Sponge Toffee
Right now, artisanal candy makers and high-end pastry chefs are taking this retro classic and elevating it to ridiculous new heights. You regularly see boutique chocolate shops dusting their creations with flaky Maldon sea salt, edible gold leaf, or infusing the sugar syrup itself with aromatic cardamom, dark espresso powder, or crushed dried lavender. The rustic, chunky aesthetic of hand-cracked candy deeply appeals to modern consumers who are pretty tired of perfectly uniform, machine-stamped sweets. Making it at home taps into that exact same artisanal spirit. You get to dictate the exact thickness of the chocolate shell, the darkness of the caramelization, and the precise size of the shards you serve to your friends.
The Thermal Breakdown of Sugar
Let’s get slightly nerdy for a second because understanding the thermal dynamics of your ingredients automatically makes you a significantly better cook. When you mix sugar, corn syrup, and a splash of water in your pot, you are creating a supersaturated solution. As you apply heat, the water evaporates, and the concentration of the sugar drastically increases. This pushes the boiling point of the mixture higher and higher. You are forcing the sucrose molecules to break apart and recombine into hundreds of new, complex flavor compounds. This is the Maillard reaction and caramelization happening in real-time right on your stove. If you pull it off the heat too early, the candy retains far too much moisture and turns into a chewy, jaw-sticking taffy. If you leave it on too long, the carbon structure breaks down completely, leaving you with an acrid, burnt mess.
The Aeration Reaction
The real showstopper is the intense chemical reaction that happens the second you whisk in the baking soda. Baking soda is chemically known as sodium bicarbonate. When it hits the intense heat of the 300-degree Fahrenheit sugar syrup, it undergoes rapid thermal decomposition. It violently releases carbon dioxide gas.
- The expansion rate is wild; the entire mixture will literally quadruple in volume in about three seconds flat.
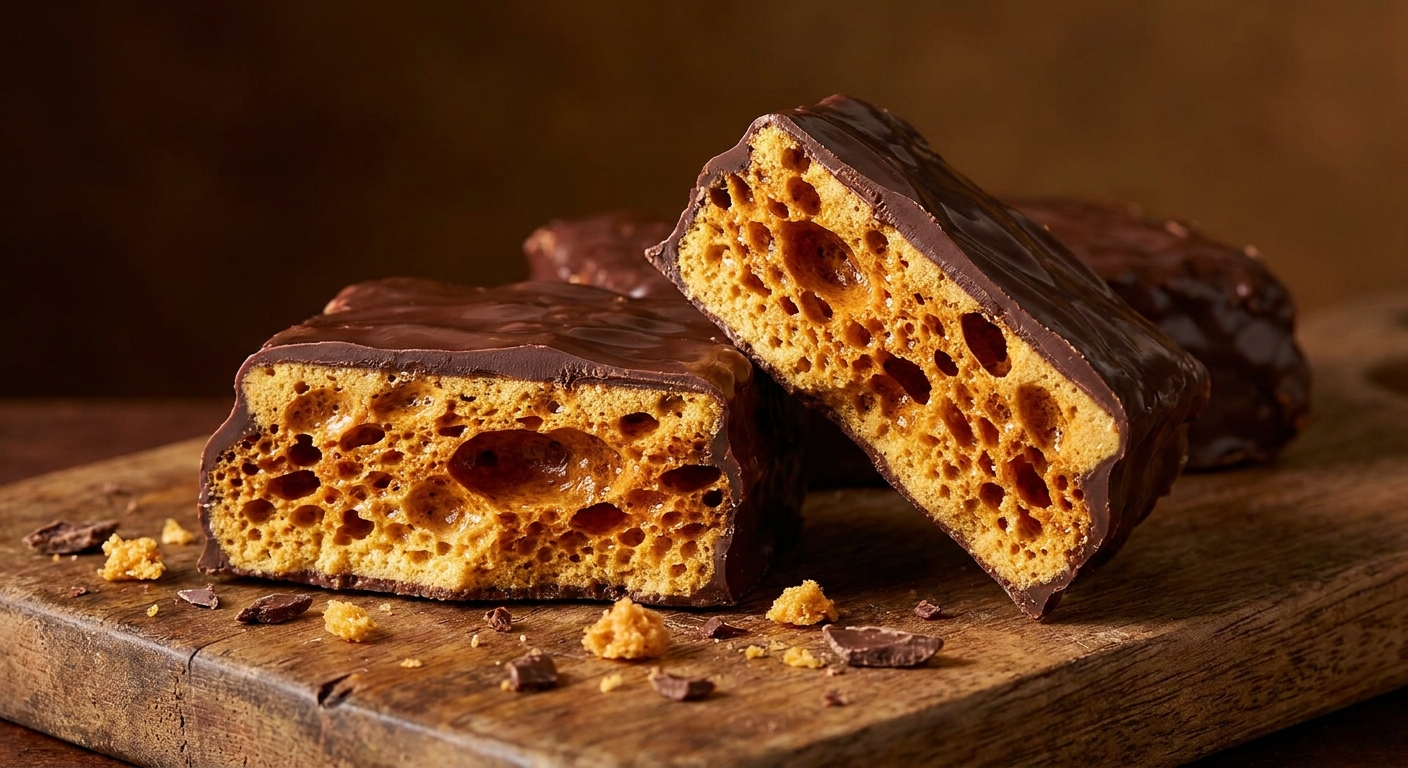
- The bubbles range in size from microscopic specks to massive pockets, giving the final product its signature random, sponge-like visual texture.
- The chocolate coating applied later isn’t just for flavor; it forms a crucial lipid barrier that physically stops ambient humidity from melting the delicate sugar walls of the microscopic bubbles.
- Residual acidity in your syrup (often coming directly from the corn syrup) actively helps neutralize the soapy, metallic taste that too much baking soda can sometimes leave behind.
Step 1: Gathering the Heavy Duty Gear
You absolutely do not want to be running around your kitchen frantically looking for a whisk while your sugar is burning on the stove. Grab a large, heavy-bottomed stainless steel pot. It needs to be significantly taller than you think because the sugar will expand violently upwards. Get a reliable digital candy thermometer, a sturdy wire balloon whisk, and generously line an 8×8 inch baking dish with high-quality silicone or parchment paper. Do not use standard wax paper; the intense heat will melt the wax straight into your candy.
Step 2: The Sugar Syrup Base
Combine your white sugar, corn syrup, and a tiny splash of water directly in the pot. Stir it gently off the heat just until it looks exactly like wet sand. Once you put the pot on the hot burner, stop stirring entirely. If you agitate the sugar crystals while they boil, you risk setting off a chain reaction of crystallization that will completely ruin the entire batch, turning it grainy and cloudy instead of clear and crisp.
Step 3: Hitting Hard Crack Stage
Attach your digital candy thermometer to the side of the pot and crank the heat to medium-high. Watch the surface bubbles closely. They will start fast and frothy, then slowly become thick and lazy as the last bits of water boil off. You are looking for exactly 300 degrees Fahrenheit. The overall color should be a light, beautiful golden amber. The exact second the temperature hits that target number, safely pull the pot off the heat immediately.
Step 4: The Baking Soda Explosion
This is easily the most fun part of the process. Dump your sifted baking soda straight into the aggressively hot syrup and whisk vigorously for no more than three or four seconds. The mixture will foam up furiously, instantly turning opaque and quickly climbing the tall sides of the pot. As soon as you see the baking soda is fully incorporated and no white streaks remain, stop whisking. If you keep stirring, you will violently knock all the precious air out.
Step 5: The Crucial Cooling Phase
Pour the foaming, molten lava immediately into your prepared parchment-lined pan. Do not scrape the bottom of the pot too hard, and absolutely do not attempt to spread the mixture around with a rubber spatula. Just let it flow out organically and settle completely on its own. Leave the pan completely undisturbed at room temperature for a minimum of two full hours. Do not put it in the fridge; the sudden, drastic temperature shift can cause the delicate sugar matrix to collapse or sweat profusely.
Step 6: Shattering the Block
Once the giant sugar block is entirely cool and rock-hard to the touch, carefully lift it out of the baking pan using the edges of the parchment paper. Grab a heavy chef’s knife or the thick handle of a wooden mixing spoon and give the dead center of the block a firm thwack. It should satisfyingly shatter into beautiful, irregular shards, revealing that gorgeous, bubbly interior. Gently brush off any loose sugar dust from the pieces.
Step 7: The Chocolate Enrobing Process
Melt high-quality dark or milk chocolate in a glass bowl set over a simmering double boiler until wonderfully smooth. If you know how to properly temper chocolate, do it, as it will give the candy a highly professional, glossy snap that holds up beautifully at standard room temperature. Dip each individual shard completely into the melted chocolate, using a kitchen fork to lift it out and lightly tap off the excess chocolate back into the bowl. Place the freshly coated pieces onto a clean sheet of parchment paper to set perfectly.
Myths and Realities
Myth: You absolutely need a massive commercial kitchen setup to make this type of candy properly.
Reality: Your standard home stove top, a regular heavy-bottomed cooking pot, and a basic, inexpensive candy thermometer are all the tools you actually need to produce phenomenal, bakery-quality results.
Myth: The recipe contains actual dried sea sponges or massive amounts of raw, organic honey.
Reality: The name is purely based on the visual, porous texture. It looks exactly like a sponge, but it is strictly made from aerated sugar, and while some variations use a tiny bit of honey for a flavor boost, the core recipe is mostly corn syrup and standard white sugar.
Myth: You can just melt regular grocery store chocolate chips for the final dipping phase.
Reality: Standard baking chocolate chips have thick stabilizers added into them that physically prevent them from melting smoothly. You really need high-quality couverture chocolate or premium baking bars to achieve a proper, thin, snappy shell.
Myth: Room humidity doesn’t really matter once the candy is fully cooked on the stove.
Reality: High ambient humidity is the absolute ultimate enemy of all spun sugar work. If you try to make this on a rainy, damp day, the bare sugar will aggressively suck the moisture right out of the air and turn into a sticky, weeping disaster before you can even get the protective chocolate on it.
Why is my candy sticky instead of crunchy?
You likely did not boil the sugar syrup long enough. The mixture absolutely must hit 300 degrees Fahrenheit to successfully evaporate enough water for a hard, totally brittle snap.
Can I use brown sugar instead of white sugar?
Technically yes, but brown sugar contains natural molasses, which burns significantly faster. It is highly recommended to stick to plain white sugar until you fully master the boiling technique.
Why did my batch suddenly collapse in the pan?
You definitely over-mixed the baking soda. You only need three or four quick, aggressive whisks. Excessive stirring mechanically breaks down the incredibly fragile expanding bubbles.
Does the baking soda leave a weird, salty taste?
If measured accurately, the intense chemical reaction actually burns off the harsh alkaline flavor. Always make sure your baking soda is completely fresh and sift it first to avoid gross, unmixed clumps.
How long will the finished candy last in my pantry?
Once the shards are completely encased in their chocolate shells, they can easily last for a few weeks stored in an airtight container at standard room temperature. The chocolate acts as a brilliant protective seal against ambient moisture.
Can I throw the coated pieces into the freezer to make them last longer?
I definitely wouldn’t recommend it. Freezers are inherently humid environments, and as the candy eventually thaws out, the resulting condensation will seep through and ruin the dry sugar interior.
What specific kind of chocolate is best for dipping?
A premium 60% to 70% dark chocolate provides the absolute best flavor contrast to the intense, roaring sweetness of the inner sugar core.
Look, taking the time out of your busy schedule to craft your own massive batch from scratch is wildly rewarding. You literally get to watch actual, explosive kitchen chemistry happen right in front of your own eyes, and the final payoff is a ridiculously addictive treat that easily blows any mass-produced, store-bought versions completely out of the water. Grab your digital thermometer, get all your ingredients perfectly prepped on the counter, and start boiling some sugar. Hit the kitchen and let me know in the comments exactly how your first massive batch turns out!
Leave a Reply