

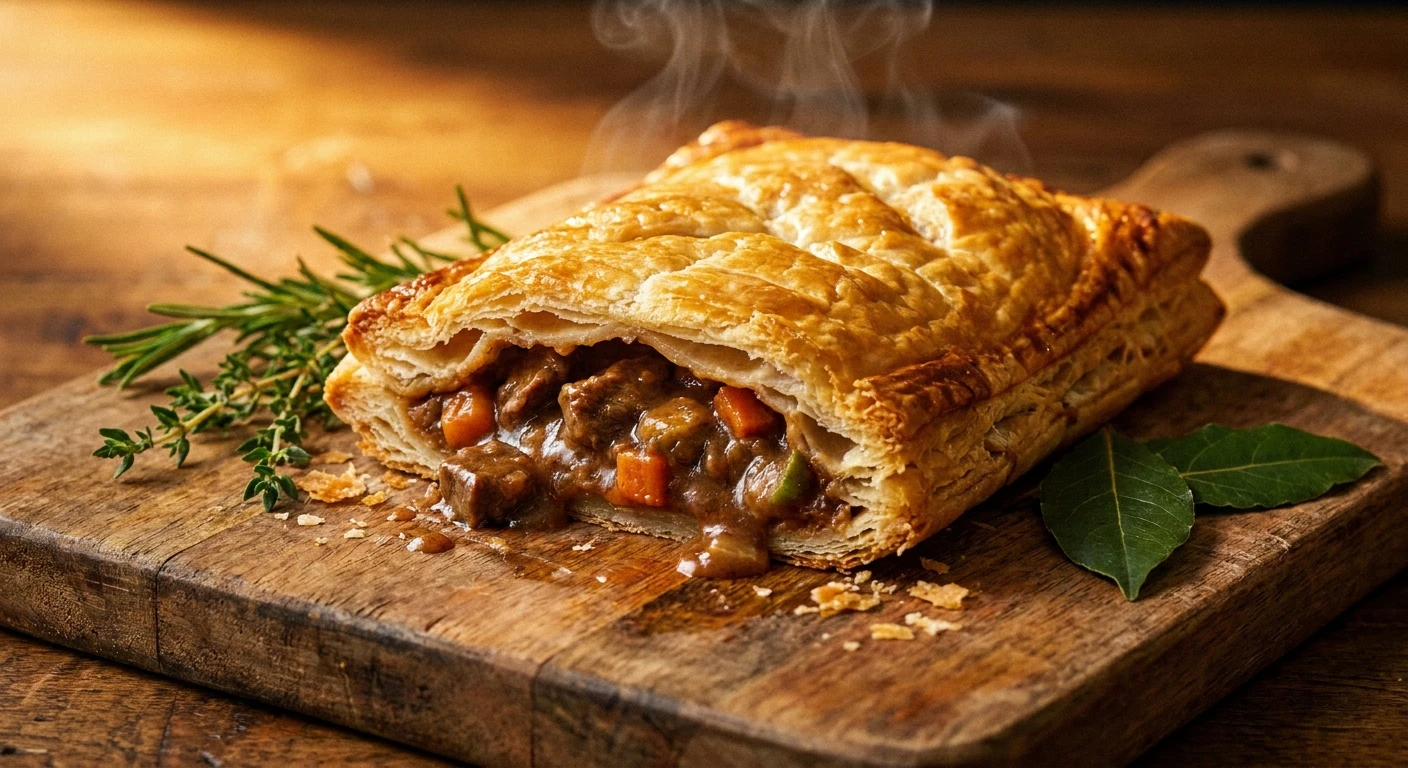
Mastering the Perfect Steak Bake at Home
You know that exact moment when you crave something incredibly rich, hearty, and encased in golden, flaky goodness. A proper steak bake hits every single comfort food craving imaginable, delivering a satisfying crunch that gives way to a thick, deeply savory beef gravy. Making this iconic pastry at home elevates the entire experience from a quick on-the-go snack to a gourmet culinary triumph. When you take control of the ingredients, you get to choose the quality of the beef, the richness of the stock, and the sheer buttery perfection of the dough. The contrast between the delicate, shatteringly crisp exterior and the slow-cooked, tender meat filling is what makes this dish an absolute staple for anyone who appreciates serious comfort food.
Creating a bakery-quality pastry in your own kitchen might sound intimidating, but it is entirely achievable with the right approach. You do not need commercial ovens or professional bakery equipment to achieve that signature golden puff. By understanding the core mechanics of how dough rises and how gravy thickens, you can replicate and even surpass the famous high-street versions. Getting the filling exactly right—thick enough so it does not turn the bottom layer soggy, yet saucy enough to be incredibly moist—is the true secret to success. We are going to break down every single component, ensuring your next batch of savory parcels comes out of the oven looking and tasting absolutely spectacular.
Read also: Classic Old Fashioned Swiss Steak Recipe; Ultimate Guide to Perfect Pizza Bites at Home.
The Core Elements of a Flawless Savory Pastry
Understanding the anatomy of a spectacular pastry requires looking closely at its individual components. A truly excellent homemade version relies on the synergy between the outer shell and the rich interior. When you rely on store-bought versions, you often compromise on the quality of the meat or the butter content of the dough. By crafting it yourself, you gain complete authority over the flavor profile. You can add a splash of dark ale to the gravy for complexity, toss in fresh thyme for aromatics, or use an all-butter puff pastry for maximum flavor. The value proposition of making this at home is undeniable: it is more cost-effective per serving, vastly superior in nutritional transparency, and delivers a taste that mass production simply cannot match. Think about the difference between a hastily microwaved snack and a freshly baked, steaming hot parcel of culinary art.
| Attribute | Mass-Produced Bakery | Premium Artisanal Bakery | Homemade Excellence |
|---|---|---|---|
| Cost Per Serving | Low to Moderate | Extremely High | Highly Economical |
| Pastry Quality | Often uses oil blends | All-butter, flaky | Customizable all-butter |
| Filling Generosity | Often sparse or overly thickened | Generous, high-quality beef | Completely up to you |
To achieve absolute perfection, you must focus your attention on three foundational pillars of the recipe. If you master these three aspects, you are guaranteed a phenomenal result every single time you turn on the oven.
- The Laminated Dough: Whether you make a rough puff from scratch or buy an all-butter commercial sheet, the dough must be kept freezing cold. This ensures the butter layers remain intact, which directly leads to that desirable flaky lift in the oven.
- The Right Cut of Beef: You need a cut that thrives on slow, gentle cooking. Chuck or braising steak is ideal because the connective tissues break down over time, yielding incredibly tender chunks that melt in your mouth without turning dry.
- The Gravy Consistency: The sauce must be thick enough to bind the meat together. If your gravy is too watery, it will immediately soak into the raw dough, resulting in a dreaded soggy bottom and a structural collapse during baking.
Origins of the Savory Pastry
The Medieval Roots of Enclosed Meats
The concept of baking meat inside a dough casing is practically as old as baking itself. In medieval Europe, thick, inedible dough crusts called ‘coffins’ were used purely as baking vessels to preserve the meat inside and protect it from open flames. These hard crusts were often discarded or given to the poor, while the wealthy enjoyed the succulent, slow-cooked meats within. Over the centuries, culinary techniques refined the dough, incorporating fats like lard and butter, transforming the crude protective shell into a delicious, edible component of the meal. The idea of a portable, enclosed meat dish slowly transitioned from grand banquet halls to the working class, setting the stage for the handheld pastries we recognize today.
The Evolution of Hand-Held Pies
During the Industrial Revolution in Great Britain, the need for hearty, portable, and durable food became paramount for the working class. The famous Cornish pasty is the most recognized ancestor of the modern savory bake. Miners needed a calorie-dense meal that they could carry into the tin mines and eat with dirty hands. The thick crimped edge served as a disposable handle. As urbanization spread, the concept of the handheld meat pie evolved. The robust, heavy crusts of the pasty gave way to lighter, flakier puff pastry alternatives in urban bakeries. These lighter pastries were favored by commuters and city workers who wanted a quick, hot, and satisfying lunch without sitting down at a tavern or pub.
The Modern State of the Bakery Classic
Today, the square or rectangular puff pastry parcel has become an absolute titan of the British high street, most notably popularized by massive bakery chains like Greggs. The shift to a standardized, rectangular shape allowed bakeries to maximize baking sheet space and easily identify different fillings through specific decorative scoring patterns on the top crust. What started as a humble working-class necessity is now a cultural phenomenon, consumed by millions every week. The modern iteration balances a delicate, buttery exterior with a highly seasoned, deeply savory gravy. Replicating this modern classic at home pays homage to its long history while allowing for gourmet upgrades that mass-commercial bakeries simply cannot afford to implement.
The Science Behind the Perfect Bake
The Thermodynamics of Flaky Pastry
Creating that beautifully puffed, golden exterior is an exercise in pure culinary physics. Puff pastry is built on the concept of lamination, where hundreds of alternating layers of flour dough and solid butter are folded together. When this freezing cold pastry enters a blazing hot oven, a rapid thermodynamic reaction occurs. The water content within the butter instantly boils, converting into steam. Because the steam is trapped by the gluten network in the dough layers, it forcefully pushes the layers apart. Simultaneously, the fat from the butter melts into the dough, essentially frying it from the inside out. If your dough or butter is too warm before baking, the fat simply bleeds out, the layers fuse, and you are left with a flat, greasy crust.
Maillard Browning and Starch Gelatinization
The rich, savory depth of the beef filling relies heavily on the Maillard reaction. This complex chemical process occurs when amino acids and reducing sugars in the meat are subjected to high heat, typically above 285°F (140°C). Searing the beef chunks fiercely before slow-cooking creates hundreds of new flavor compounds that define that quintessential ‘beefy’ taste. Furthermore, to achieve the correct gravy texture, you must utilize starch gelatinization. When flour or cornstarch is added to the simmering beef stock, the starch granules absorb water and swell. At a specific temperature, these granules burst open, thickening the liquid into a glossy, viscous sauce that perfectly coats the tender meat.
- Steam Expansion: Water turns to vapor at 212°F (100°C), creating the necessary lift in laminated dough layers.
- Maillard Reaction: Occurs intensely at temperatures exceeding 285°F (140°C), browning the beef and creating complex savory notes.
- Gelatinization Range: Cornstarch begins thickening liquids significantly between 144°F and 162°F (62°C – 72°C), stabilizing the gravy.
- Collagen Breakdown: Tough connective tissues in chuck beef convert to tender gelatin when held between 160°F and 205°F (71°C – 96°C) for extended periods.
Actionable Step-by-Step Cooking Plan
Step 1: Selecting the Right Cut of Beef
Your journey begins at the butcher counter. Do not waste money on premium steaks like ribeye or sirloin for this recipe. You need a tough, working muscle that contains ample connective tissue. Chuck steak, braising steak, or beef skirt are absolutely perfect. As these cuts slow-cook, their collagen breaks down into rich gelatin, giving the meat a melt-in-the-mouth texture and adding immense body and stickiness to your gravy. Cut the beef into small, uniform bite-sized cubes, roughly half an inch thick, ensuring they are perfectly sized for a handheld pastry.
Step 2: Searing for Maximum Flavor
Heat a heavy-bottomed pan or Dutch oven until it is smoking hot. Add a small amount of neutral oil. Pat your beef cubes completely dry with paper towels; moisture is the enemy of a good sear. Working in small batches so you do not crowd the pan, sear the beef aggressively until a deep, dark brown crust forms on all sides. This step is non-negotiable for building the foundational flavor of your gravy. Remove the seared beef and set it aside, leaving those glorious browned bits attached to the bottom of the pan.
Step 3: Simmering the Thick Gravy
Lower the heat and soften finely diced onions in the same pan, using their moisture to scrape up the beefy fond. Stir in a tablespoon of flour to create a quick roux, cooking it for a minute to remove the raw flour taste. Pour in high-quality beef stock, a splash of Worcestershire sauce, and a pinch of black pepper. Return the beef to the pan, bring the mixture to a gentle boil, then lower the heat to a bare simmer. Cover and let it cook slowly for about 90 minutes, or until the beef is incredibly tender and the gravy has reduced to a thick, glossy consistency.
Step 4: Chilling the Filling
This is the most critical structural step. You cannot put hot filling onto raw puff pastry. The heat will instantly melt the butter layers in the dough, ruining the lamination and resulting in a disastrously soggy pastry. Transfer your thickened beef mixture to a shallow container, let it cool to room temperature, and then place it in the refrigerator until it is completely cold and the gravy has solidified slightly. Patience here guarantees a flawless final result.
Step 5: Rolling and Laminating the Dough
Lightly flour your work surface and unroll your cold puff pastry. If you are using block pastry, roll it out to a thickness of about an eighth of an inch (3mm). Using a sharp knife or a pastry wheel, cut the dough into even rectangles. You will need a base and a lid for each parcel. Keep the dough moving on the surface to ensure it does not stick, and if it becomes too soft at any point, immediately slide it onto a baking sheet and return it to the fridge for ten minutes to firm up the butter.
Step 6: Assembling the Parcels
Place a generous spoonful of your chilled beef mixture strictly into the center of your base dough rectangles, leaving a clear border around the edges. Brush this exposed border lightly with beaten egg. Carefully drape the top pastry rectangle over the filling, gently pressing down the edges to seal them together. Use the tines of a fork to crimp the edges firmly, ensuring no gravy can escape during baking. Score the top of the pastry lightly with a sharp knife to allow steam to vent.
Step 7: Baking to Golden Perfection
Preheat your oven to 400°F (200°C). Brush the entire surface of your assembled parcels generously with the remaining beaten egg wash; this is what creates that magnificent, shiny golden crust. Place the pastries onto a baking sheet lined with parchment paper. Bake for 25 to 30 minutes. Keep a close eye on them during the final five minutes. You are looking for a deep golden-brown color and a visibly puffed, flaky structure. Let them rest on a wire rack for at least ten minutes before eating, as the internal gravy will be molten hot.
Myths & Reality
Myth: You must make your own puff pastry from scratch for a good result.
Reality: While homemade puff pastry is phenomenal, high-quality, all-butter store-bought puff pastry yields spectacular, bakery-level results and saves hours of intense labor. Just ensure the label says ‘all-butter’.
Myth: Expensive cuts like filet mignon make the best filling.
Reality: Lean, tender cuts dry out and become chalky when slow-cooked. Tough, cheap cuts like chuck are infinitely better as their collagen melts down into gelatin, keeping the meat moist and enriching the sauce.
Myth: You can assemble the pastry while the meat is still warm to save time.
Reality: Warm filling is the absolute ruin of puff pastry. It melts the fat before it hits the oven, destroying the flaky layers and causing the bottom to turn into raw sludge. The filling must be fridge-cold.
Myth: Egg wash is purely for aesthetics and can be skipped.
Reality: Egg wash not only provides a beautiful shine and color, but it also acts as a vital structural glue for sealing the edges. Without it, your pastries are highly likely to burst open in the oven.
Frequently Asked Questions
Can I freeze the baked pastry?
Yes, absolutely. Allow the baked pastries to cool completely, wrap them tightly in foil or plastic wrap, and freeze for up to three months. Reheat them straight from frozen in a hot oven to restore their crispness.
What is the best meat to use?
Beef chuck, braising steak, or skirt steak are the undisputed champions. They contain the necessary fat and connective tissue to survive a long, slow simmer without turning dry, providing maximum flavor and tenderness.
Can I use store-bought dough?
You certainly can, and it is highly recommended for convenience. Always check the ingredients and choose an all-butter puff pastry rather than one made with cheap vegetable oils, as butter provides superior flavor and flakiness.
How do I prevent soggy bottoms?
Three rules: ensure your gravy is adequately thickened, make sure the filling is completely cold before assembly, and bake on a hot, heavy baking tray. A thin, watery sauce will immediately ruin the base.
Is it possible to make it gluten-free?
Yes, you can substitute the flour in the gravy for cornstarch. For the casing, several brands now offer excellent gluten-free puff pastry blocks or sheets in the freezer aisle of major supermarkets.
How long do leftovers last?
Once baked, they can be stored in an airtight container in the refrigerator for up to three days. To bring back the crunch, reheat them in an oven or air fryer rather than using a microwave.
Can I add cheese to the filling?
Adding cheese is a fantastic gourmet upgrade. A sharp mature cheddar or a bit of crumbled blue cheese stirred into the cold filling right before assembly adds an incredible depth of salty, tangy flavor.
Mastering a homemade steak bake is incredibly rewarding, yielding a dish that far surpasses any quick bakery stop. Armed with the science of pastry lamination and meat braising, you are now fully equipped to create golden, bubbling perfection in your own kitchen. Grab your apron, visit your local butcher for some proper chuck steak, and start baking today!



Leave a Reply