

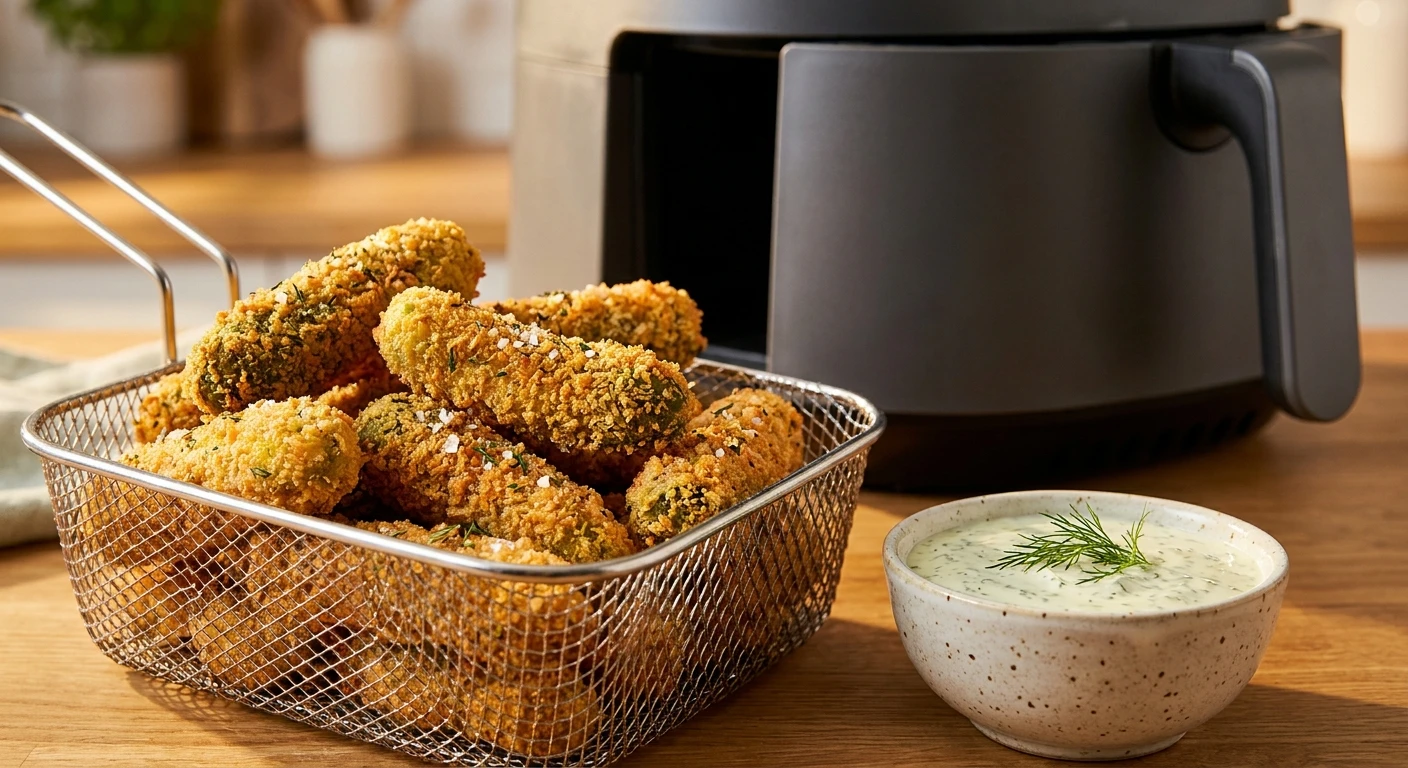
Why You Need to Try This cornichon frit air fryer Recipe
If you want a snack that hits all the right crunchy and tangy notes simultaneously, this cornichon frit air fryer method is exactly what you need right now. Look, I get it. You are craving something salty, something with an aggressive crunch, but you really do not want to deal with a massive pot of boiling oil on your stove. I live in Kyiv, and here, we take our pickled vegetables incredibly seriously. Normally, a jar of tiny, tart cucumbers is opened and immediately consumed alongside dark bread and smoked meats. We eat them straight, no fuss. But one weekend, I wanted pub food. I wanted that rich, satisfying bite of a fried appetizer.
I decided to experiment. I grabbed a jar of tiny French-style cornichons, set up a quick breading station, and tossed them into my countertop convection gadget. The result blew my mind. The exterior was aggressively crispy, locking in the sharp, hot, acidic bite of the mini pickle inside. It completely changed my entire snacking routine. As we navigate 2026, finding fast, healthier snack alternatives that actually taste like a guilty pleasure is a massive win. You get all the comfort of a greasy bar snack, zero guilt, and virtually zero clean-up. Trust me, I am going to walk you through my exact process so you can replicate this crispy masterpiece in your own kitchen tonight.
Read also: Crispy frozen green beans in air fryer; Crispy Mozzarella Cheese Balls: The Ultimate Snack Recipe.
The Core Value: Maximum Flavor, Minimum Mess
The beauty of this method lies in the ridiculous return on investment. You spend ten minutes prepping, and you get a snack that tastes like you ordered it from a trendy gastropub. By utilizing rapid air circulation, we manage to crisp up the exterior breading beautifully without submerging the food in heavy fats. This means you skip the heavy, bloated feeling that usually follows a plate of traditional fried food.
Consider the practical applications. You are hosting a spontaneous weekend gathering. You want to impress your friends with a unique, bite-sized appetizer that pairs perfectly with cold beverages. Serving a platter of these with a side of garlic herb ranch is a guaranteed crowd-pleaser. Or maybe it is just a lazy movie night, and you want something salty and crunchy but refuse to pay for expensive delivery. This recipe solves both scenarios instantly.
| Cooking Method | Crunch Factor | Health & Clean-Up Impact |
|---|---|---|
| Deep Frying | Extremely High | Heavy calories, massive grease mess |
| Air Frying | High | Light calories, simple wipe-down |
| Oven Baking | Moderate | Light calories, can dry out the food |
To guarantee success, you absolutely must follow a few non-negotiable rules. If you skip these, you end up with a soggy disappointment.
- Absolute Dryness: You must pat the pickles completely dry before starting. Any residual brine will steam and blow the breading right off.
- The Three-Station Setup: Flour, egg, and panko. Do not mix them, do not skip a step. The flour creates the glue, the egg binds it, and the panko delivers the crunch.
- Strategic Spacing: Do not overcrowd the basket. The hot air needs room to circulate around every single piece to create that 360-degree crunch.
Origins of the Fried Pickle
Let me give you a bit of context on how this wild snack even became a thing. The concept of frying pickled vegetables did not start in Europe. It actually originated in the southern United States back in the 1960s. Diners and drive-ins would take large, thick slices of standard dill pickles, toss them in a heavy cornmeal batter, and drop them into a deep fryer. It was the ultimate comfort food, usually served alongside burgers and milkshakes. The sheer brilliance of combining hot, fatty batter with cold, acidic vegetables made it an instant classic across the country.
Evolution of Rapid Cooking Technology
Fast forward a few decades, and the culinary landscape shifted dramatically. People started realizing that consuming heavily deep-fried foods every day was taking a toll on their energy and health. Enter the era of rapid air convection technology. This invention fundamentally changed how home cooks approach “fried” foods. Suddenly, you could achieve a very similar textural experience by circulating superheated air around food lightly coated in a microscopic layer of oil. Cooks everywhere began adapting old, heavy diner recipes for this new gadget, testing everything from chicken wings to mozzarella sticks.
The Modern State of the Cornichon Craze
By the time we hit the mid-2020s, the trend evolved again. People got tired of standard, watery pickle chips. They wanted a better crunch-to-pickle ratio. That is when the tiny French cornichon entered the chat. Because they are bite-sized, incredibly firm, and boast a much sharper, vinegary snap than standard dills, they proved to be the ultimate candidate for breading. It is a brilliant fusion of European pantry staples and American comfort food engineering, tailored perfectly for the modern home kitchen.
The Maillard Reaction Explained Simply
You might be wondering how hot air alone can create something that tastes fried. It all comes down to a chemical process known as the Maillard reaction. This is the complex interaction between amino acids and reducing sugars that occurs when food is exposed to high heat. It is the exact same reaction that gives a seared steak its crust or baked bread its golden color. When you place a breaded item into a superheated environment, the rapid circulation accelerates this browning process on the very surface of the food. You get the robust, toasted flavors without needing a liquid fat medium to conduct the heat.
Moisture Control and Crispiness
The single biggest enemy of the Maillard reaction is moisture. If the surface of your food is wet, the heat energy goes into boiling that water away as steam rather than browning the surface. Because pickles are literally stored in liquid brine, they are fundamentally hostile to crispiness. That is why the flour layer is scientifically crucial. It absorbs microscopic surface moisture, gelatinizes slightly, and forms an impermeable barrier that keeps the pickle juices inside while allowing the outer panko layer to dry out and brown.
- Rapid air technology utilizes a mechanical fan to circulate hot air at high speeds, mimicking the convective heat transfer of boiling oil.
- Starch gelatinization in the initial flour dredge creates a protective thermal barrier, locking in the natural acidity of the brine.
- Panko breadcrumbs are structurally different from standard breadcrumbs; they have jagged, irregular edges that provide a vastly larger surface area for heat to attack, resulting in a superior, shattering crunch.
- Aerosolized cooking spray delivers micro-droplets of fat that act as localized heat conductors, ensuring even browning across the jagged panko surface.
Step 1: Drain and Dry
Take your jar of cornichons and pour them into a fine mesh strainer over the sink. Shake off as much liquid as possible. Now, lay out a double layer of heavy-duty paper towels on your cutting board. Place the pickles on the paper towels and aggressively pat them down with another layer of towels on top. You want these completely bone dry. I cannot stress this enough. If they are wet, you fail.
Step 2: The Flour Dredge
Set up your first shallow bowl. Add about half a cup of all-purpose flour. Season this flour aggressively. I am talking garlic powder, smoked paprika, a pinch of cayenne, and black pepper. Toss your dried pickles into the flour. Toss them around until every single crevice is coated in a thin, dusty layer of seasoned flour. Shake off the excess. You want a matte finish, not a thick paste.
Step 3: The Egg Wash
In your second shallow bowl, crack two whole eggs and add a tiny splash of water or milk. Beat this vigorously with a fork until it is completely smooth and homogeneous. You do not want thick strings of egg white clinging to your food. Drop your floured pickles into the egg wash, ensuring they are fully submerged and coated. Let the excess drip off completely before moving to the next stage.
Step 4: The Panko Coating
Your third bowl is for the panko breadcrumbs. Standard breadcrumbs will not give you the shattering texture we are chasing. Drop the egg-coated pickles into the panko. Use your dry hand to bury them in the crumbs, pressing down gently so the panko adheres strongly to the egg layer. Transfer the fully breaded pieces to a dry plate. They should look completely insulated in a fuzzy layer of crumbs.
Step 5: Preheating the Basket
Do not just throw them into a cold machine. Preheat your device to 400°F (200°C) for at least three minutes. You want that initial blast of heat to immediately start setting the egg protein and locking the breading in place. A cold start leads to gummy breading. Once preheated, lightly spray the bottom of the basket with cooking spray.
Step 6: The Cooking Process
Carefully place your breaded snacks into the hot basket in a single, even layer. Make absolutely sure they are not touching each other. Spray the tops of the pickles lightly with your cooking oil spray—this is the secret to getting a golden color. Cook them at 400°F for about 8 to 10 minutes. Halfway through, gently shake the basket or use tongs to flip them over so the underside gets equal airflow.
Step 7: Cooling and Plating
When the timer goes off, they should be a beautiful golden brown. Remove them immediately using tongs and place them on a wire cooling rack. Do not put them directly on a flat plate right away, or the steam escaping from the bottom will make the underside soggy. Let them rest on the wire rack for exactly two minutes. This brief rest period allows the breading to fully set and achieve maximum structural integrity. Serve immediately with a robust, creamy dipping sauce.
Myths vs. Reality
Myth: You can just throw wet pickles right into the breading station to save time.
Reality: If you do this, the flour turns to sludge, the breading slides right off during cooking, and you are left with a bald, warm cucumber.
Myth: Because it is an air fryer, you do not need to use a single drop of oil.
Reality: While you skip the deep fry, you absolutely need a quick spritz of cooking spray. Without that microscopic layer of fat, the panko will just taste like dry, dusty toast instead of a rich, fried coating.
Myth: Cornichons are simply too small and fiddly to bother breading.
Reality: Their small size is precisely what makes them superior. It maximizes the breading-to-pickle ratio, giving you significantly more crunch per bite than a massive, watery dill spear.
Myth: Diet or low-fat cooking methods always result in bland, flavorless food.
Reality: By heavily seasoning your flour dredge with bold spices like smoked paprika and cayenne, you build layers of flavor that completely compensate for the lack of deep-frying grease.
Can I use regular pickle spears instead?
Yes, you absolutely can. The method remains exactly the same. However, spears carry significantly more water. You will need to spend extra time drying them, and the cooking time might increase by two or three minutes to ensure the larger piece gets fully heated through.
How long do they stay crispy?
Honestly, these are a “make it and eat it immediately” kind of food. They hold their premium crunch for about 15 to 20 minutes out of the basket. After that, the internal moisture of the pickle inevitably begins to soften the breading. Eat them hot.
What dipping sauce works best?
You need something creamy and fatty to contrast the sharp acidity of the vinegar. A homemade buttermilk ranch loaded with fresh dill and garlic is top-tier. Spicy mayo or a horseradish-based remoulade also works brilliantly.
Can I freeze them before cooking?
Yes! You can run them through the complete breading process and freeze them in a single layer on a baking sheet. Once frozen solid, transfer them to a bag. When you are ready to eat, cook them straight from frozen, adding an extra 3 to 4 minutes to the cooking time.
Is panko really mandatory?
If you want that loud, shattering crunch, yes. Regular Italian breadcrumbs are too fine and dense; they tend to form a hard, concrete-like shell rather than a light, crispy crust. Stick to panko for the best results.
Why did my batter fall off?
You either did not dry the pickles thoroughly enough in Step 1, or you skipped the flour dredge. The flour is the essential primer that allows the egg to grip the slick surface of the cucumber. No flour, no grip.
Can I make these vegan?
Absolutely. You can substitute the egg wash with a mixture of plant-based milk and a tablespoon of cornstarch. It thickens up and acts as a fantastic, sticky binder for the panko breadcrumbs. Just ensure your chosen panko brand is dairy-free.
There you have it. You now possess the ultimate blueprint for mastering the perfect hot, tangy snack. Stop settling for boring potato chips and elevate your kitchen game today. Grab a jar, fire up your machine, and try this ridiculously good recipe tonight—your tastebuds will thank you!



Leave a Reply