
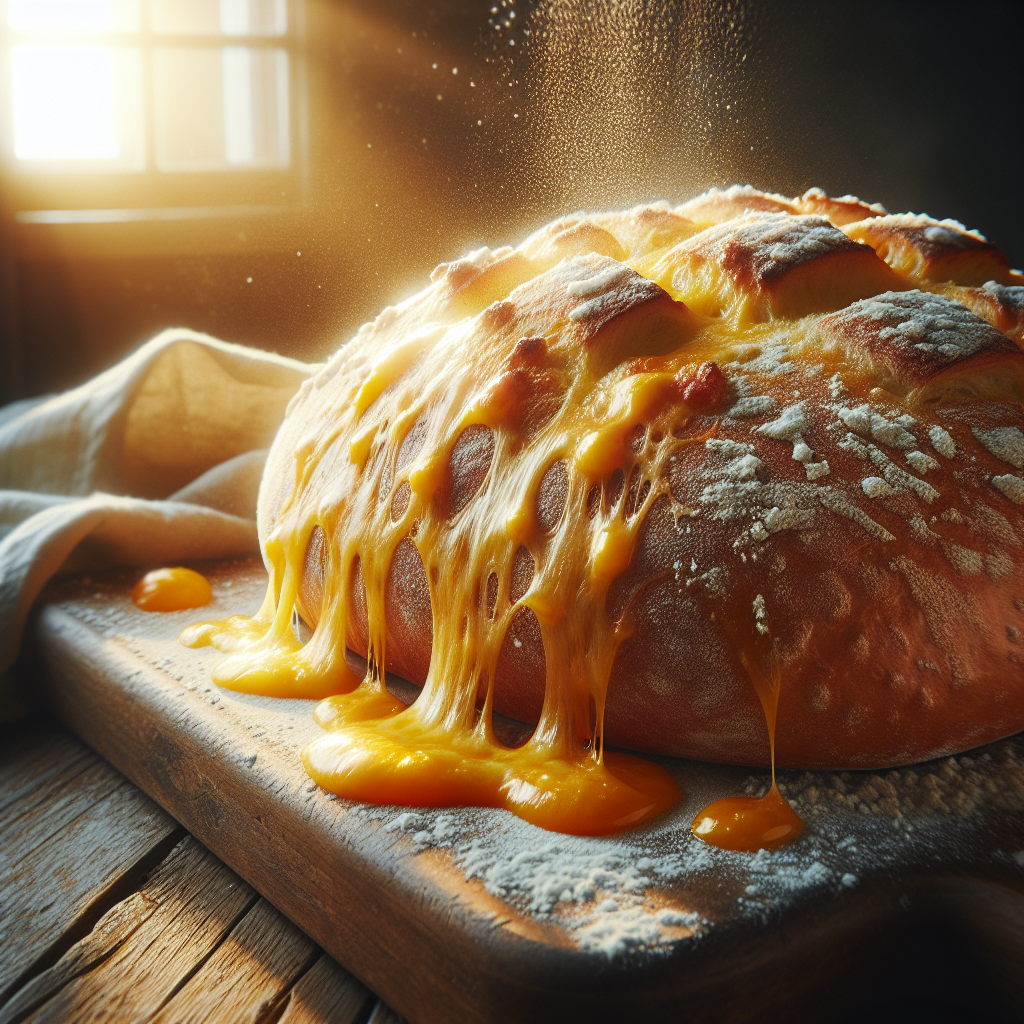
Why You Need These Cheese Buns in Your Life Right Now
Have you ever bitten into freshly baked cheese buns and felt like all your daily stresses just melted away instantly? Perfecting that warm, pull-apart dough packed with sharp cheddar and rich butter is not just a baking project; it is an absolute form of kitchen therapy. Seriously, there is nothing quite like pulling a hot pan of golden carbohydrates out of the oven.
I remember a frosty winter morning in Kyiv back in 2026, the snow piling up outside my small apartment window near the historic Podil district. The chill outside was biting, but inside, my kitchen was a warm haven. I decided to whip up a batch of dough using local organic flour and some aged cheddar I snagged at the bustling Bessarabsky Market. The smell of melting dairy wafting through the tiny apartment was pure magic. It quickly became a mandatory weekend ritual for my friends and me.
Look, I get it. You might think baking bread from scratch is too much work, or you might be intimidated by working with yeast. But honestly, it is way easier than you imagine. Once you try making these bad boys, you will absolutely never buy the stale, lifeless grocery store versions again. You grab a cup of hot coffee, tear into that gooey, savory center, and suddenly your morning is ten times better. Let’s walk through exactly how to master this dough.
The Core: Building the Ultimate Savory Dough
The beauty of this recipe lies entirely in its unmatched versatility. You can adapt these baked goods to fit almost any meal. For instance, pair them with a hearty bowl of roasted tomato basil soup for an incredibly comforting winter dinner. Alternatively, slice them right down the middle, toast them on a hot cast-iron skillet with a little butter, and use them as the ultimate savory foundation for your morning bacon, egg, and avocado breakfast sandwich. The options are basically endless.
Let’s talk about what makes an exceptional batch stand out from an average one. You want an exterior crust that offers a slight, satisfying crunch, completely covered in crispy, caramelized bits. Inside, the crumb should be wildly pillowy, practically dissolving on your tongue. Achieving this specific texture relies entirely on how you handle your dough and the specific ingredients you select.
| Cheese Type | Melting Quality | Flavor Profile |
|---|---|---|
| Aged Sharp Cheddar | High | Bold, salty, slightly tangy |
| Smoked Gouda | Very High | Rich, nutty, aromatic |
| Parmigiano-Reggiano | Low | Intense umami, dry, savory |
| Low-Moisture Mozzarella | Maximum | Mild, extreme stretch |
To really nail the perfect batch, you need to understand the core components of enriched dough. It comes down to three main pillars:
- The Hydration Ratio: Getting the milk-to-flour balance perfectly dialed in. Too much liquid and the dough is an unworkable sticky mess; too little, and you end up with dry, dense bricks instead of soft clouds.
- The Fat Content: Using whole fat milk and real, high-quality unsalted butter is non-negotiable. The fats coat the flour proteins, which directly contributes to the rich, tender mouthfeel.
- The Double Proof: Giving the yeast enough undisturbed time to build complex flavor and solid structure. Rushing the rise is the number one reason homemade bread fails.
Origins of Savory Breads
To truly appreciate what we are baking, we need to look back at the origins of mixing dairy into dough. Centuries ago, early bakers realized that enriching basic water-and-flour mixtures with milk fats created a significantly longer-lasting, softer loaf. In pre-industrial European baking, adding leftover curds into daily rations was a practical way for peasants to stretch their food supplies while adding much-needed calories for intense physical labor. It was rustic, dense, and nothing like the fluffy treats we know today, but it laid the fundamental groundwork.
The Evolution of Cheese Baking
Moving into the Middle Ages and later the Renaissance, techniques became more refined. Travelers and soldiers needed provisions that would not spoil immediately, leading to the incorporation of hard, aged cheeses into travel rations. Fast forward to the 20th century, the commercialization of active dry yeast made fluffy, consistent baking accessible to the masses. Suddenly, regional variations exploded globally. You saw the rise of the Brazilian Pão de Queijo, Eastern European savory rolls, and the classic American cheddar biscuit. Bakers started focusing on texture just as much as preservation.
Modern State of Savory Baking
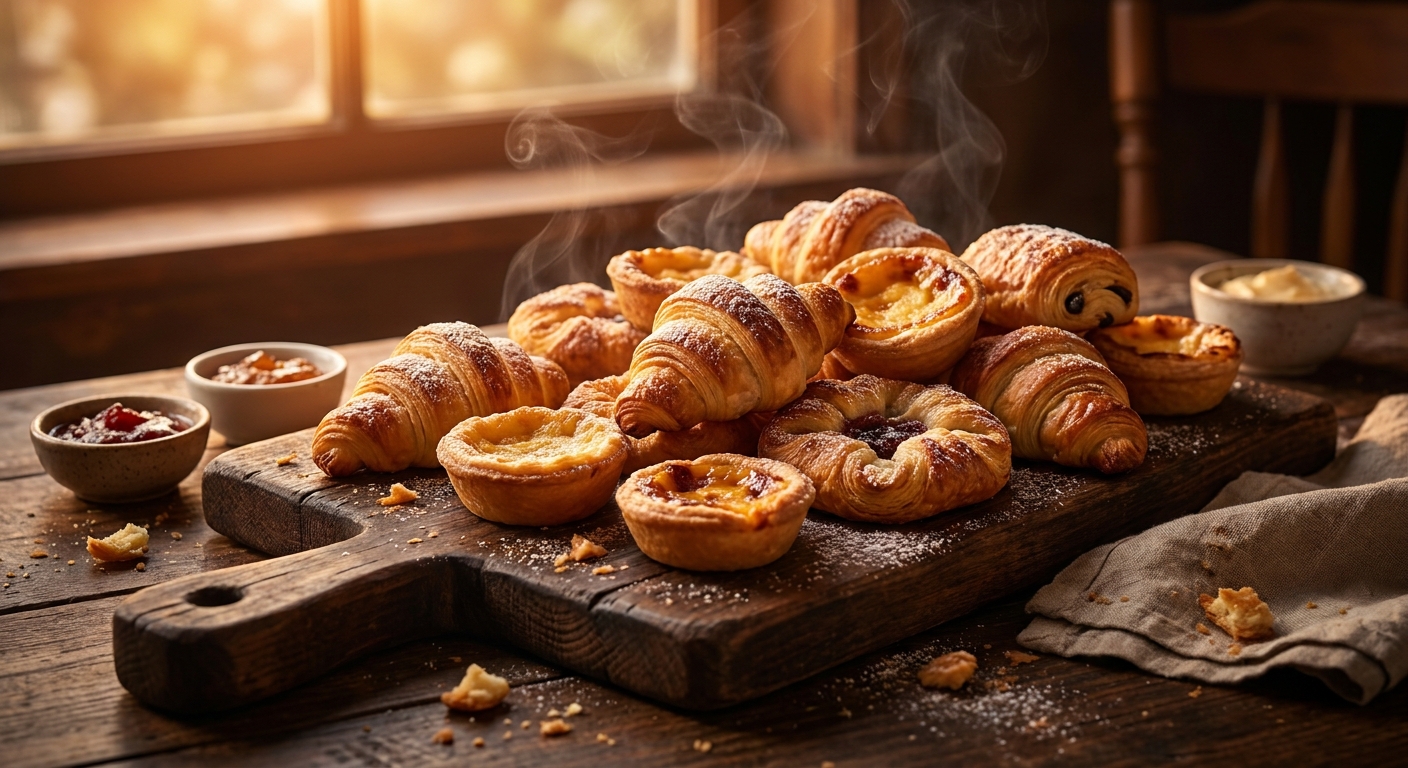
Today, gourmet bakeries have taken these humble beginnings and elevated them into an art form. We are seeing incredible sourdough hybrids, laminated savory pastries, and massive artisan loaves packed with exotic ingredients. The current artisan home baking trend peaking right now in 2026 shows that people crave genuine, hands-on cooking experiences. We are moving away from hyper-processed supermarket aisles and back into our own kitchens, armed with digital scales and high-protein flours, ready to create bakery-level masterpieces on our own countertops.
The Maillard Reaction and Caramelization
Baking is essentially applied chemistry, and understanding it makes you a vastly better cook. When you slide that metal pan into a blistering 400-degree oven, a highly complex cascade of thermal reactions kicks off instantly. The Maillard reaction is the star of the show here. It is a chemical reaction between amino acids and reducing sugars that gives browned food its distinctive, mouth-watering flavor. When the proteins in the cheddar hit high heat, they break down and recombine with sugars, creating hundreds of new flavor compounds. This is exactly why the crispy, slightly burnt bits of cheese stuck to the pan always taste the best.
Gluten Network and Fat Encapsulation
Then we have the physics of the dough itself. Flour contains proteins called glutenin and gliadin. When hydrated and kneaded, they form an elastic network called gluten. However, because we are making an enriched dough, the lipids (fats) from the butter and cheese play a crucial interference role. They literally coat the gluten strands, physically preventing them from linking up too tightly. This process is called shortening, and it is the exact scientific mechanism that ensures your finished bake is tender and fluffy rather than chewy like a traditional artisan baguette.
- Lactic acid bacteria present in aged dairy naturally lower the dough’s pH, which organically acts as a dough conditioner, improving shelf life.
- The optimal proofing temperature for enriched dough sits precisely between 75°F and 80°F (24°C – 26°C) to maximize yeast activity without causing the butter to sweat out of the dough.
- Steam generated from the moisture content within the cheese rapidly expands during the first ten minutes of baking, contributing heavily to the explosive oven spring.
Day 1: Sourcing the Right Ingredients
Great food starts at the grocery store. Do not skimp on your raw materials. You need a high-protein unbleached bread flour to provide enough structural integrity to hold the heavy mix-ins. For the star ingredient, skip the pre-shredded bags entirely. Buy a solid block of sharp, high-quality cheddar and perhaps a small block of gruyere. You also need instant yeast, fine sea salt, unsalted butter, and whole milk. Getting everything prepped and ready sets you up for success.
Day 2: The Yeast Activation Test
Even if you are using instant yeast, I always recommend testing it if your jar has been sitting in the fridge for a while. Warm a half cup of your whole milk to exactly 110°F. Whisk in a teaspoon of sugar and your yeast. Let it sit on the counter for ten minutes. If it foams up and smells intensely like a brewery, you are good to go. If it sits there looking like murky water, throw it out and buy fresh yeast. Dead yeast equals flat, depressing dough.
Day 3: Mixing and Kneading Mechanics
Combine your wet and dry ingredients in a large bowl. You can use a stand mixer with a dough hook for convenience, but doing it by hand teaches you how the dough should actually feel. Knead aggressively for about ten minutes. You are looking for the windowpane test: grab a small piece of dough and stretch it gently between your fingers. If you can stretch it thin enough to see light through it without tearing, the gluten is perfectly developed.
Day 4: The First Fermentation Phase
Form your smooth dough into a tight ball, place it in a lightly oiled bowl, and cover it tightly with plastic wrap or a damp towel. Put it in a warm, draft-free spot. Now, you wait. This bulk fermentation phase should take about one to two hours, depending on your room temperature. You want the dough to double in volume. Do not rush this; the yeast is currently producing carbon dioxide and vital organic acids that build the foundational flavor.
Day 5: Shaping and Cheese Incorporation
Gently punch down the risen dough to degas it. Turn it out onto a lightly floured surface. Here is the fun part: gently stretch it out into a rectangle, cover it generously with your freshly grated cheese (save some for the topping!), and fold it onto itself like a letter. Divide the dough into equal pieces—I usually aim for around 100 grams per piece for a substantial serving. Roll them into tight, tension-filled balls and place them in a lined baking dish.
Day 6: The Final Proof and Baking
Cover the dish and let the shaped balls rise for another 45 minutes until they are incredibly puffy and touching each other. Preheat your oven to 375°F (190°C). Gently brush the tops with a simple egg wash (one egg beaten with a splash of milk) and pile the remaining shredded cheddar right on top. Bake for 25 to 30 minutes until deeply golden brown. The internal temperature should hit 190°F. Let them cool slightly before tearing into them.
Day 7: Storage and Reheating Protocols
If you somehow have leftovers, proper storage is paramount. Keep them in an airtight plastic bag at room temperature for up to three days. Do not put them in the refrigerator, as the cold environment accelerates starch retrogradation, making them stale much faster. To revive them, simply wrap a bun in a damp paper towel and microwave for 15 seconds, or better yet, throw them in a 350°F oven for five minutes to get that crispy crust back.
Myths vs. Reality of Dough Making
Myth: Pre-shredded cheese works just as well as block cheese for baking.
Reality: Bagged, pre-shredded cheese is heavily coated in anti-caking agents like potato starch and cellulose to prevent clumping in the bag. These powders actively interfere with the melting process, leaving a strange powdery residue and preventing that perfect gooey stretch we all desperately want.
Myth: You absolutely must have a $400 stand mixer to make good enriched bread.
Reality: Hand-kneading is entirely effective and wildly rewarding. It just takes a little more physical elbow grease and gives you a much better tactile feel for the dough’s hydration levels. People have been making perfect bread by hand for thousands of years.
Myth: Adding more yeast means faster, fluffier, and better bread.
Reality: Over-yeasting your dough aggressively leads to a sharp, unpleasant alcoholic flavor and a structurally weak crumb that is highly prone to collapsing in the oven. Patience always yields significantly better flavor and texture.
Can I freeze the unbaked dough?
Yes, absolutely. The best time to freeze is right after you shape them into balls. Place them on a baking sheet to freeze individually, then transfer them to a freezer-safe bag. When you want to bake, let them thaw and rise on the counter until doubled in size.
What flour is genuinely the best?
Bread flour is top-tier because the higher protein content (usually around 12-14%) gives the dough the strength to hold up the heavy dairy fats. However, standard all-purpose flour works perfectly fine; the final result will just be slightly softer and slightly less chewy.
Why are my baked goods dense and heavy?
This almost always boils down to under-proofing or accidentally killing your yeast with extremely hot milk. Make sure your liquid is lukewarm (around 110°F max) and ensure you let the dough fully double in size during both rising phases.
Can I use fresh mozzarella?
You can, but be careful. Fresh mozzarella has a massive water content that can make your dough incredibly soggy. If you want a mozzarella pull, use low-moisture, whole-milk mozzarella blocks instead.
Do I really need to use an egg wash?
While technically optional, an egg wash is highly recommended. It promotes even browning, creates a beautiful, professional glossy sheen, and acts as a fantastic glue to keep the extra topping adhered to the crust.
How long do they stay fresh?
Because of the high fat content, they retain moisture better than lean breads. They will stay incredibly soft for about 2 to 3 days stored in an airtight container at normal room temperature.
Can I add fresh garlic and herbs?
Absolutely. Roasted garlic cloves folded into the dough, along with fresh chopped rosemary or thyme, elevate the flavor profile exponentially. Just ensure the garlic is fully cooled before mixing it with the yeast.
There you have it. You now possess the ultimate knowledge to create the most spectacular, mouth-watering cheese buns right in your own kitchen. Do not wait around—grab your flour, grate that cheddar, and start your baking journey today! I promise you won’t regret it. Drop a comment below with your absolute favorite savory add-ins and let’s get baking!

Leave a Reply