

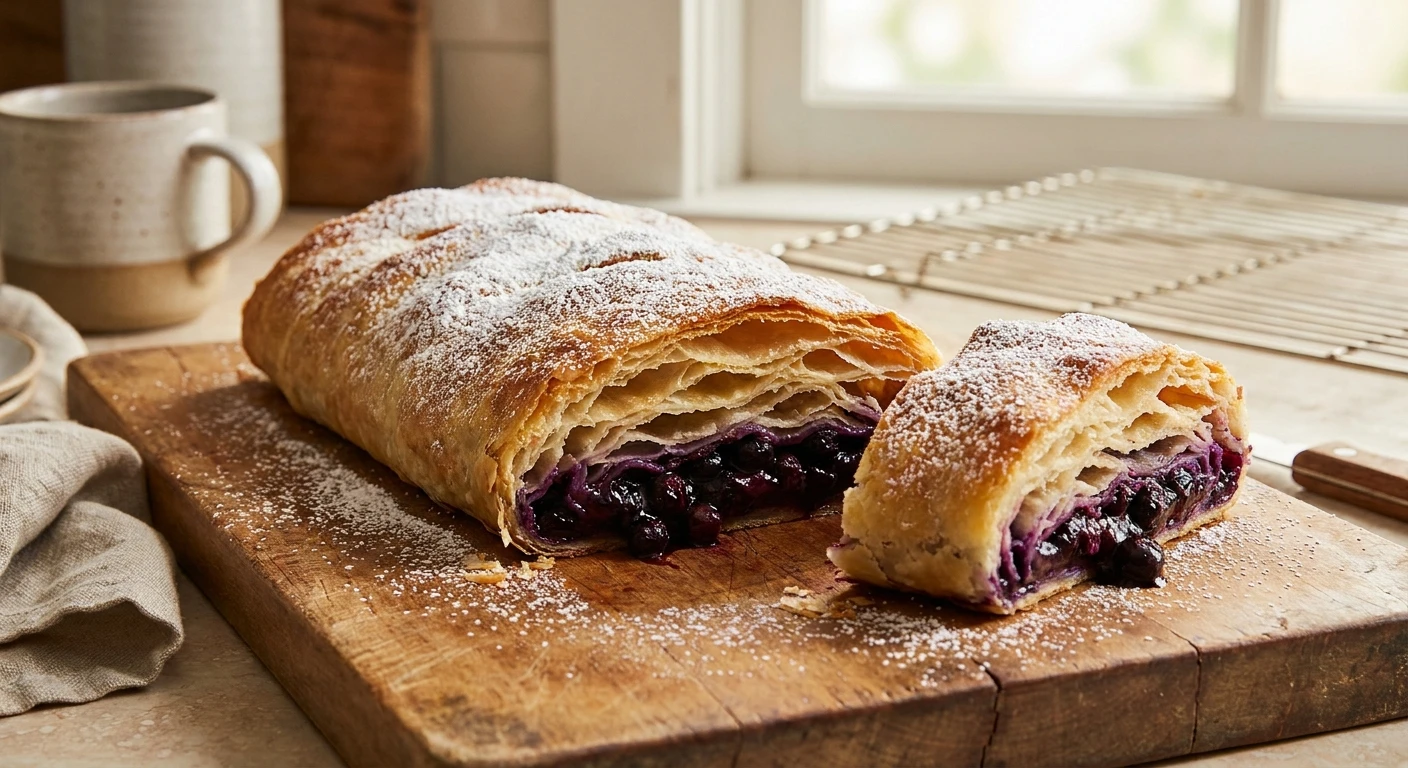
How to Bake the Ultimate Blueberry Strudel
Hey there, let’s talk about baking. Have you ever attempted to make a real blueberry strudel from scratch? I finally tackled it last weekend, and honestly, the process completely shifted how I view homemade pastry. Mastering the delicate, flaky dough and perfectly balancing the sweet and tart berry filling gives you a foolproof, show-stopping dessert. It looks incredibly fancy, but once you break down the steps, it is totally manageable for a home baker.
Growing up in Kyiv, my grandmother was legendary for her apple pastries. But when summer arrived and the markets were suddenly overflowing with fresh wild berries from the Carpathian Mountains, she would immediately pivot. Her kitchen would smell like vanilla, butter, and bubbling dark fruit. Standing on a stool next to her while she stretched the dough paper-thin across the dining table is a core childhood memory. Now that we are well into 2026, finding an excuse to put down the screens and work with my hands feels more necessary than ever. Making this pastry is therapeutic. You get to slow down, feel the ingredients, and create something beautiful from scratch.
We are going to cover everything you need to know to get that bakery-level crunch on the outside and a jammy, perfectly sweetened center. Trust me, once you pull this out of your oven, you will never want to buy the frozen stuff again.
The Mechanics of a Perfect Pastry
If you want to understand why this dessert is universally loved, you have to look at the contrast in textures. It is all about the shatteringly crisp exterior giving way to a warm, soft fruit center. Achieving that requires a little bit of technique and knowing your ingredients. There is a huge value in making this at home: you completely control the sweetness, you can use premium butter for better flavor, and honestly, bringing a freshly baked pastry to an office potluck or a weekend dinner party makes you look like an absolute culinary genius.
For example, imagine hosting a Sunday brunch. Instead of the usual pancakes, you pull a massive, golden-brown strudel out of the oven. Or picture making a smaller version just for yourself to enjoy with a strong cup of coffee on a rainy afternoon. The effort-to-reward ratio is incredibly high.
Let’s look at the different ways you can approach the outer shell, because you have options depending on how much time you have:
| Dough Type | Crunch Factor | Prep Difficulty |
|---|---|---|
| Traditional Hand-Stretched | Exceptional (delicate & shattering) | High (requires patience & resting time) |
| Store-Bought Phyllo | Very High (crispy & flaky) | Low (just thaw and brush with butter) |
| Puff Pastry | Medium (more tender and buttery) | Low (unroll and bake) |
If you are going the traditional route, there are a few strict rules you have to follow to avoid a disaster. Here is exactly what determines success or failure when baking this dessert:
- Moisture Control: Berries hold a ton of water. If you don’t thicken the filling properly, you will end up with a soggy bottom that ruins the delicate dough.
- Dough Thinness: The classic dough must be stretched so thin you can read a newspaper through it. Thick spots become chewy and tough instead of crispy.
- Fat Distribution: Brushing melted butter or oil evenly between the rolled layers is non-negotiable. The fat creates steam pockets that separate the layers as it bakes.
When you nail these three elements, you get a masterpiece.
Origins of the Classic Pastry
You cannot really appreciate this dessert without knowing where it came from. The technique of stretching dough paper-thin has deep roots in the Middle East, heavily influenced by Turkish Baklava. As the Ottoman Empire interacted with the Habsburg Empire, these culinary techniques migrated into Austria. By the 18th century, Vienna had essentially perfected the strudel, turning it into a cornerstone of Central European cafe culture. The oldest surviving recipe actually dates back to 1696 and sits in the Vienna City Library.
Evolution of Fruit Fillings
While apples were the undisputed king of fillings for a long time, the dessert quickly evolved as it spread eastward into Hungary, Poland, and Ukraine. Bakers started using whatever was abundant in their local regions. Cherries, sweet cheese, and eventually wild blueberries became massive hits. The tartness of the dark berries provided a brilliant counterpoint to the rich, buttery pastry. In Eastern Europe, foraging for wild berries is practically a national sport, so incorporating them into elevated Austrian-style pastries was a natural evolution.
The Modern State of Strudel Making
Today, the recipe has adapted to fit modern lifestyles. While purists still stretch their own dough by hand over a flour-dusted tablecloth, many home bakers achieve stellar results using high-quality commercial phyllo dough. We also see fantastic vegan adaptations now, swapping traditional butter for high-quality plant-based fats like refined coconut oil or vegan butter blocks. Even air fryers are being used to bake mini-versions for quick weeknight treats. The core concept remains unchanged, but the accessibility is better than ever.
The Science of Flaky Layers
Baking is just tasty chemistry, right? When you make the traditional dough, you are relying heavily on gluten development. By kneading flour, water, and a little bit of oil, you are aligning the proteins (glutenin and gliadin) into a strong, elastic network. This elasticity is what allows you to stretch the dough so incredibly thin without it tearing. But you cannot stretch it right away; the dough must rest in a warm spot. Resting allows the gluten strands to relax. If you skip this, the dough will snap back like a rubber band.
Controlling Berry Moisture
The filling is where the real food science happens. When blueberries heat up, their cell walls break down, releasing a flood of juice. If you just roll up raw berries in dough, it will turn into soup. You need a thickening agent. Cornstarch or tapioca starch works by undergoing a process called gelatinization. When the starch granules hit a specific temperature in the presence of liquid, they swell and absorb the water, turning that runaway juice into a thick, luxurious gel.
- Fact 1: Gluten networks require hydration and physical agitation (kneading) to form correctly.
- Fact 2: Starch thickeners like cornstarch only activate and thicken when they reach a near-boiling temperature (around 203°F / 95°C).
- Fact 3: The steam generated by the water in the butter causes the extremely thin layers of dough to puff up and separate during baking, creating flakiness.
- Fact 4: An acidic environment (like adding a squeeze of lemon juice to the berries) actually enhances the fruit flavor and balances the sweetness on your palate.
The Foolproof Action Plan
Alright, you are ready to bake. Here is a comprehensive step-by-step guide to making this beautiful dessert from scratch. If you take your time and follow these phases, you cannot mess it up.
Step 1: Gathering High-Quality Ingredients
Start by sourcing the best ingredients you can find. You need high-protein flour (bread flour works great for elasticity), warm water, neutral oil, and a pinch of salt for the dough. For the filling, grab fresh or frozen blueberries, granulated sugar, a lemon for zest and juice, cornstarch, and some breadcrumbs. Do not skip the breadcrumbs—they act as a sponge to catch any extra juice.
Step 2: Preparing the Berry Filling
In a large bowl, toss your blueberries with the sugar, lemon zest, a splash of lemon juice, and the cornstarch. Mix it gently so you don’t smash the berries. Set this aside. As it sits, the sugar will draw out some liquid, which mixes with the starch to form the base of your gel. If you are using frozen berries, do not thaw them completely; just toss them frozen with extra cornstarch.
Step 3: Mixing and Kneading the Dough
Combine your flour, warm water, oil, and salt in a stand mixer or knead by hand. You want to work this dough until it is incredibly smooth and elastic. It usually takes about 10 minutes of solid hand-kneading. You will know it is ready when you poke it and it springs back quickly.
Step 4: The Crucial Resting Phase
Form the dough into a smooth ball, brush the outside lightly with oil so it doesn’t dry out, and cover it with a warm, damp towel. Let it rest for at least an hour at room temperature. Use this time to clean your kitchen, prep your baking sheet with parchment paper, and melt some butter for brushing.
Step 5: Stretching the Dough Paper-Thin
Cover your kitchen table with a clean cotton tablecloth and dust it generously with flour. Place your rested dough in the center. Start rolling it out with a pin, then switch to using your hands. Put your hands under the dough, palms down, and gently pull outward using the backs of your hands. Keep moving around the table, stretching carefully until the dough is thin enough to see the pattern of the tablecloth through it.
Step 6: Rolling and Sealing
Brush the entire stretched surface with melted butter. Sprinkle your breadcrumbs over the lower third of the dough. Spoon your berry mixture over the breadcrumbs, leaving a border at the edges. Fold the side edges inward, then grab the tablecloth and use it to lift and roll the pastry away from you, creating a tight log. Transfer it carefully to your baking sheet.
Step 7: Baking to Golden Perfection
Brush the entire outside with more melted butter. Bake in a preheated oven at 375°F (190°C) for about 35 to 45 minutes. You are looking for a deep, golden-brown crust. When it is done, let it cool for at least 30 minutes before dusting with powdered sugar and slicing. If you cut it too hot, the filling will pour out.
Myths and Reality of Pastry Making
People get really intimidated by baking, usually because of bad information. Let’s clear up some common misconceptions.
Myth: Making hand-stretched dough from scratch is impossible for a beginner.
Reality: As long as you knead the dough enough to build gluten and let it rest in a warm environment, the dough practically stretches itself. Patience is more important than skill here.
Myth: You need expensive specialty equipment to make a proper pastry.
Reality: The best tools are your bare hands and a clean bedsheet or tablecloth. Your grandmother didn’t need a fancy machine, and neither do you.
Myth: Frozen fruit ruins the texture and makes the dough soggy.
Reality: Frozen berries are picked at peak ripeness and work wonderfully. Just toss them with a little extra cornstarch and do not thaw them beforehand to prevent excess bleeding.
Myth: It must be served instantly out of the oven.
Reality: Slicing a boiling hot pastry results in a messy puddle. It actually needs to rest and cool so the fruit gel can set properly.
Frequently Asked Questions
Can I freeze the unbaked pastry?
Yes, you can assemble it, wrap it tightly in plastic wrap, and freeze it. When you are ready to eat, just bake it straight from frozen, adding about 10-15 extra minutes to the baking time.
How long does it stay fresh?
It is best eaten on the day it is made for maximum crispness. However, it will keep in the fridge for up to 3 days. Reheat it in a dry oven or air fryer to bring back the crunch.
Should I serve it warm or cold?
Room temperature or slightly warm is the absolute best way to enjoy it. The flavors of the fruit are most pronounced when it isn’t overly hot or freezing cold.
What is the best sauce or topping to pair with it?
A scoop of high-quality vanilla bean ice cream is classic. A drizzle of warm vanilla custard (Crème Anglaise) or a dollop of lightly sweetened whipped cream also works perfectly.
Can I use a mix of different berries?
Absolutely. Mixing raspberries or blackberries into the fold adds great complexity. Just keep the total volume of fruit and the amount of cornstarch the same.
Is it possible to make it gluten-free?
Making traditional stretched dough gluten-free is incredibly difficult because you lack the protein structure. Your best bet is to buy a commercial gluten-free puff pastry from the store.
Why did my filling leak out everywhere?
This usually happens if you didn’t use enough thickener, or if you didn’t roll the ends tightly enough. Make sure to tuck the side edges in firmly before you do the main roll.
Do I really need to use breadcrumbs?
Yes, they are a secret weapon. The breadcrumbs act as a buffer between the wet fruit and the delicate bottom layer of dough, keeping everything crisp.
Listen, baking at home doesn’t have to be stressful. Taking an afternoon to craft something delicious by hand is one of the best ways to unwind. Now that you have the techniques, the science, and the step-by-step plan, you are completely ready to handle this. Get in your kitchen, gather your ingredients, and give it a shot. I promise the results will blow your mind. Leave a comment below with your results and share your baking success today!



Leave a Reply