

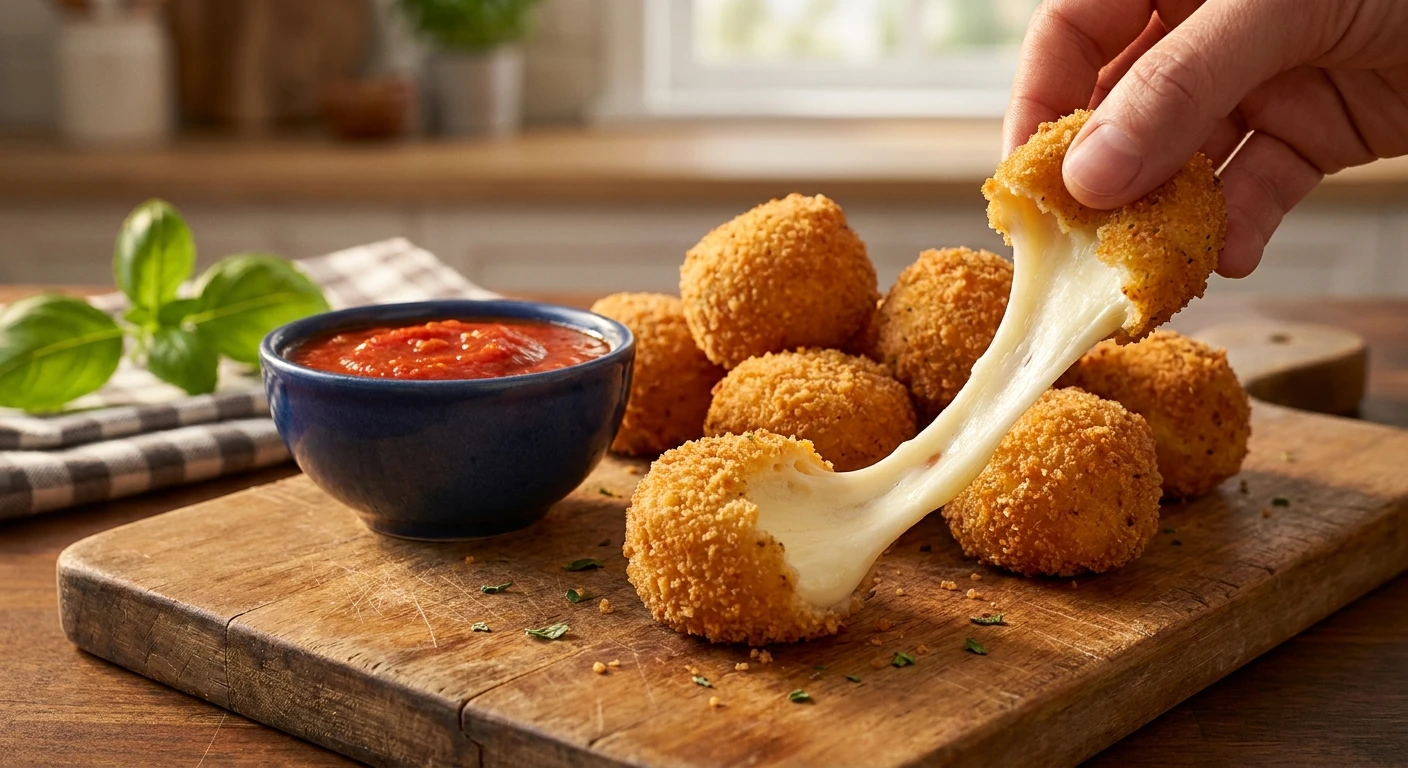
The Ultimate Guide to Crispy Mozzarella Cheese Balls
Look, if you haven’t bitten into freshly made mozzarella cheese balls while they are still steaming hot, you are seriously missing out on one of life’s greatest savory pleasures. I am talking about that spectacular moment when the golden, crunchy exterior gives way to a seemingly endless stretch of gooey, melted perfection. Getting that exact texture right at home might seem tricky, but I promise you it is incredibly straightforward once you know the core techniques.
I distinctly remember wandering through a bustling street food market in Kyiv a couple of autumns ago. It was freezing, and a local vendor was frying up these massive portions of cheese bites coated in crushed garlic croutons. That specific crunch, followed by the epic cheese pull against the chilly Ukrainian air, practically changed my entire snacking standard forever. I knew I had to replicate that magic in my own kitchen.
Making these bites at home isn’t just about saving cash on takeout; it is about completely controlling the crunch factor and getting that molten center flawless every single time. By the time you finish reading this, you are going to be a complete natural at whipping up this crowd-pleasing appetizer.
Now, let’s talk about why mastering this recipe is an absolute game changer for your culinary repertoire. The beauty of this dish lies in its insane versatility and the unbeatable contrast in textures. When you bring a plate of these to a table, they disappear in seconds. You are essentially offering a bite-sized value proposition: a premium appetizer experience right from your own stovetop. For example, you can serve them at a noisy game night where everyone needs grab-and-go finger food, or you can plate them up nicely alongside a fancy basil marinara sauce for a more sophisticated dinner party starter.
| Cooking Method | Pros | Cons |
|---|---|---|
| Deep Frying | Ultimate crunch, even golden color, quickest cooking time. | Requires more oil, heavier on calories, messy cleanup. |
| Air Frying | Less messy, lower calorie count, very easy to manage. | Crust can sometimes be slightly dry, uneven browning. |
| Oven Baking | Great for huge batches, hands-off cooking process. | Highest risk of cheese leaking before the crust browns. |
Achieving that flawless execution requires understanding exactly what happens during the cooking process. You cannot just throw raw cheese into hot oil and hope for the best. To get that restaurant-quality result, you must follow a few non-negotiable rules. Here is a quick breakdown of the three fundamental pillars for success:
- Moisture Control: Using low-moisture block cheese instead of fresh mozzarella prevents the bites from turning into a soggy, watery mess in the pan.
- The Double Coating: A single layer of breading simply is not strong enough to hold back boiling lava-hot cheese. You absolutely must dip, coat, dip, and coat again to build a sturdy wall.
- Temperature Shock: The breaded bites need to be frozen solid before they hit the heat. This ensures the crust browns beautifully just as the center reaches the perfect melting point.
The Humble Origins of Fried Cheese
You might think of fried cheese as a purely modern bar food invention, but people have been throwing dairy into hot fat for centuries. Historical texts show that medieval Europeans frequently fried various firm cheeses as quick, calorie-dense meals during colder months. While they were not using the exact breading techniques we use today, the fundamental desire for warm, melted dairy wrapped in a crisp exterior has been ingrained in human culinary history for a very long time.
Evolution Across the Atlantic
The specific iteration of the snack we know and love today owes its existence to Italian immigrants arriving in the United States. They brought traditional ingredients like mozzarella and adapted them to the abundant, fast-paced American food culture. Originally, mozzarella sticks were the primary format, utilizing the string cheese style that was easy to manufacture and portion. However, chefs quickly realized that the spherical shape offered a much better ratio of crispy breading to molten center, leading to the creation of the bite-sized spheres.
The Modern State of Cheese Bites
Fast forward to the current year, 2026, and the landscape of appetizers has completely exploded with innovation. We are seeing incredible variations globally, from spicy flamin’ hot crusts to centers stuffed with pesto and prosciutto. The basic spherical shape has become a canvas for global flavor experiments. Despite all these wild modern variations, the classic Italian-herb breadcrumb coating over a simple, high-quality dairy center remains the undisputed king of the appetizer menu. It is comfort food boiled down to its purest, most accessible form.
The Anatomy of a Perfect Cheese Pull
Let’s get a bit technical about why mozzarella behaves the way it does. The famous “stretch” is entirely dependent on the specific protein structure of the dairy. Mozzarella is rich in casein proteins, which form a complex, tangled network. When you apply heat, the fat trapped within this casein network begins to liquefy, acting as a lubricant. The proteins relax and align, allowing them to stretch out into those long, satisfying strings without immediately breaking. Fresh varieties have too much water, which disrupts this network, while aged varieties are too acidic and their protein chains are too tightly bound to stretch.
Maillard Reaction and the Golden Crust
The exterior crunch relies heavily on the Maillard reaction, a chemical reaction between amino acids and reducing sugars that gives browned food its distinctive flavor. When the breadcrumbs hit the 350°F (175°C) oil, the moisture on the surface rapidly evaporates, allowing the temperature of the crust to spike. This rapid heating creates thousands of microscopic flavor compounds and physically hardens the starches in the breading, creating the shell that traps the melting core.
- Optimal Melting Point: Low-moisture mozzarella begins to liquefy optimally at around 130°F (54°C).
- Thermal Conductivity: Breadcrumbs act as an insulator. They slow down the heat transfer to the center, which is why freezing them first is critical to prevent premature explosions.
- Calcium Phostphate’s Role: The exact stretchiness is regulated by intact calcium bridges between the casein molecules. Overheating breaks these bridges, resulting in a liquid puddle rather than a stretchy string.
Step 1: Selecting the Right Block
Your journey begins at the grocery store. Ignore the tubs of fresh mozzarella sitting in water. You want the firm, yellowish block labeled “low-moisture, part-skim” or “whole milk.” Whole milk gives a richer flavor, while part-skim holds its shape slightly better. Grab a standard 16-ounce block.
Step 2: Cubing and Portioning
Take your block and cut it into perfectly even 1-inch cubes. Precision here matters because varying sizes mean uneven cooking times. If you have some cubes that are too small, they will burst in the oil before the larger ones are even warm inside. Take your time with the knife.
Step 3: The Standard Breading Station
Set up three shallow bowls. In the first bowl, put half a cup of all-purpose flour seasoned with a pinch of salt. In the second bowl, vigorously whisk three large eggs until perfectly smooth. In the third bowl, mix two cups of seasoned Italian breadcrumbs with half a cup of grated parmesan cheese.
Step 4: The Double Dip Technique
Take a cube, roll it completely in the flour, and shake off the excess. Drop it into the egg wash, ensuring it is fully coated. Move it to the breadcrumb bowl and press the crumbs firmly into the surface. Now, take it out of the crumbs, put it back into the egg wash, and then back into the breadcrumbs for a second coat. Press firmly to pack the crust.
Step 5: The Crucial Freezing Phase
Place all your heavily coated cubes onto a baking sheet lined with parchment paper. Ensure they are not touching each other. Slide the tray into the freezer and leave them there for an absolute minimum of two hours. Do not rush this step, or you will end up with an empty shell of breading in your frying pan.
Step 6: Frying to Golden Perfection
Pour neutral cooking oil (like canola or vegetable) into a heavy-bottomed pot until it is about two inches deep. Heat the oil to precisely 350°F (175°C). Use a thermometer. Carefully drop 4 to 5 frozen pieces into the oil. Fry them for about 2 to 3 minutes, turning them occasionally until they are a deep, rich golden brown.
Step 7: Draining and Immediate Serving
Use a slotted spoon to remove them from the oil and transfer them instantly to a wire cooling rack set over a paper towel. Sprinkle them with flaky sea salt while they are still glistening with oil. Serve them within five minutes alongside a bowl of warm, robust marinara sauce.
People carry around a lot of bizarre misconceptions about frying dairy at home. Let’s clear the air so you don’t make rookie mistakes.
Myth: Pre-shredded cheese can be squished together to make these bites.
Reality: Pre-shredded products are coated in anti-caking agents like potato starch. They will never melt together properly and will just fall apart into a greasy mess in the oil.
Myth: You can skip the freezing step if your oil is hot enough.
Reality: If you drop a room-temperature dairy cube into hot oil, it will turn to liquid and burst through the breading in less than 30 seconds, long before the crust has time to brown.
Myth: Baking yields the exact same texture as frying.
Reality: While baking is a decent, healthier alternative, it will never give you that uniform, shatter-crisp exterior. Frying surrounds the food with even heat, sealing the exterior instantaneously.
Myth: Any cooking oil works fine.
Reality: Extra virgin olive oil has too low of a smoke point and will burn. You need refined, neutral oils with high smoke points like peanut, canola, or sunflower oil.
Can I use fresh mozzarella balls (bocconcini)?
No, they hold far too much water. When the water turns to steam in the hot oil, it causes violent splattering and the breading will completely blow out. Always stick to low-moisture blocks.
How long do they last in the freezer?
You can keep the breaded, uncooked bites in an airtight freezer bag for up to three months. They are fantastic to have on hand for surprise guests.
What is the absolute best dipping sauce?
A classic, slightly spicy tomato marinara is traditional, but a creamy garlic ranch or a hot honey drizzle creates an incredible flavor contrast.
Can I cook these in an air fryer?
Yes. Spray them generously with cooking oil and air fry at 390°F (200°C) for about 6-8 minutes. Keep a close eye on them to prevent blowouts.
Why did my cheese leak into the oil?
Either you did not freeze them long enough, your double-breading had patches/holes, or your frying oil temperature was too low, which required you to leave them in the pot too long.
Is there a gluten-free option for the breading?
Absolutely. Swap the regular flour for almond flour or a gluten-free blend, and use crushed gluten-free cereal or certified gluten-free panko crumbs for the exterior.
How do I reheat leftovers safely?
Never use the microwave, as it makes the crust soggy. Reheat them in an oven or air fryer at 350°F (175°C) for a few minutes until they are warmed through.
Can I add spices to the breading?
Definitely. Adding garlic powder, smoked paprika, or dried oregano to the breadcrumbs is a brilliant way to customize the flavor profile.
There you have it—your complete roadmap to creating the absolute best appetizer ever conceived. Don’t settle for mediocre, hollow frozen snacks from the supermarket aisle anymore. Grab a block of quality dairy, fire up the stove, and experience the ultimate crunch for yourself. Make this recipe tonight and let that incredible cheese pull speak for itself!



Leave a Reply