

Why You Need This 4 ingredient yogurt cake In Your Life Right Now
Making a 4 ingredient yogurt cake is honestly the ultimate cheat code when you want something sweet but absolutely refuse to spend hours dealing with a messy kitchen. I remember this one incredibly gloomy weekend back in Lviv. The rain was pouring down the cobblestone streets, every single bakery nearby was shut tight for a holiday, and I had a fierce craving for a proper dessert. All I had in my tiny kitchen were eggs, a tub of plain yogurt, sugar, and self-raising flour. I just started mixing things together on a whim. That spontaneous baking session resulted in the softest, most pillowy sponge I had ever tasted. I realized right then that simplicity is the true hallmark of genius baking.
We are flying through 2026, and our schedules are more chaotic than ever. Nobody wants to hunt down rare extracts or temper chocolate on a random Tuesday night. The core thesis here is straightforward: limiting your pantry pulls to just four basic staples forces the raw quality of those items to shine, giving you a foolproof, elegant dessert. Trust me, you do not need a twenty-item grocery list to impress your friends. You just need the right ratios, a reliable oven, and the confidence to let basic chemistry do the heavy lifting.
The Core Mechanics Behind Minimalist Baking
Listen, I get it. The idea that a cake can be spectacular with just a handful of items sounds a bit suspicious if you are used to elaborate layer cakes. But the value proposition of this dessert is unmatched. For one, you are saving money. Second, you are saving your sanity. Imagine you suddenly have friends dropping by in an hour. Example one: You panic and buy a stale store-bought cake. Example two: You calmly whisk together a 4 ingredient yogurt cake, and the whole house smells like a warm, European patisserie by the time they knock on the door.
Let us break down exactly what goes into this magical batter and why each piece matters. Understanding your components is half the battle when you strip away the extras.
| Ingredient | Core Purpose | Acceptable Swap |
|---|---|---|
| Whole Milk Yogurt | Provides moisture, fat, and lactic acid for tenderness. | Sour cream or Greek yogurt (adjust hydration). |
| Self-Raising Flour | Builds the structure and provides the leavening agent. | All-purpose flour + 1.5 tsp baking powder. |
| Granulated Sugar | Sweetens the crumb and aids in browning. | Cane sugar or caster sugar. |
| Large Eggs | Acts as the binder and adds richness. | No direct 1:1 swap for this specific minimal recipe. |
Here is how you execute the core process without overthinking it. Just follow this fundamental flow:
- Prepare your environment: Preheat that oven to 350°F (175°C) and aggressively grease your loaf or round pan so nothing sticks.
- Combine the wet and dry: Vigorously whisk your eggs and sugar until pale, then fold in the yogurt, followed gently by the self-raising flour.
- Bake to perfection: Slide it into the center rack and leave it undisturbed until a wooden skewer comes out completely clean.
You literally cannot mess this up if you stick to those three pillars. It is robust, forgiving, and wildly rewarding.
The Humble Origins of Minimalist Baking
To really appreciate what we are making, you have to look back at the grandmothers of Europe. Long before we had stand mixers and endless aisles of specialty baking goods, resourcefulness was the name of the game. In France, the gâteau au yaourt became legendary precisely because it was built around the tiny glass jars that yogurt was sold in. You didn’t even need a measuring cup; you just used the empty yogurt container to measure the flour, sugar, and oil. Our four-ingredient version strips that classic down even further, removing the oil and relying entirely on the fat content of a good, rich yogurt to do the job.
The Evolution Through European Kitchens
As this style of baking migrated across borders, every culture adapted it. In Eastern Europe, particularly in Ukraine where dairy quality is absolutely pristine, bakers realized that high-fat, locally cultured dairy could replace butter entirely in certain sponge recipes. It was a revelation for postwar generations who had to make delicious family treats with heavily rationed ingredients. By simplifying the ingredient list, bakers accidentally perfected the crumb texture. The evolution proved that fat from cultured milk creates a tighter, softer crumb than standard butter or oil could ever achieve on its own.
The Modern State of Quick Desserts
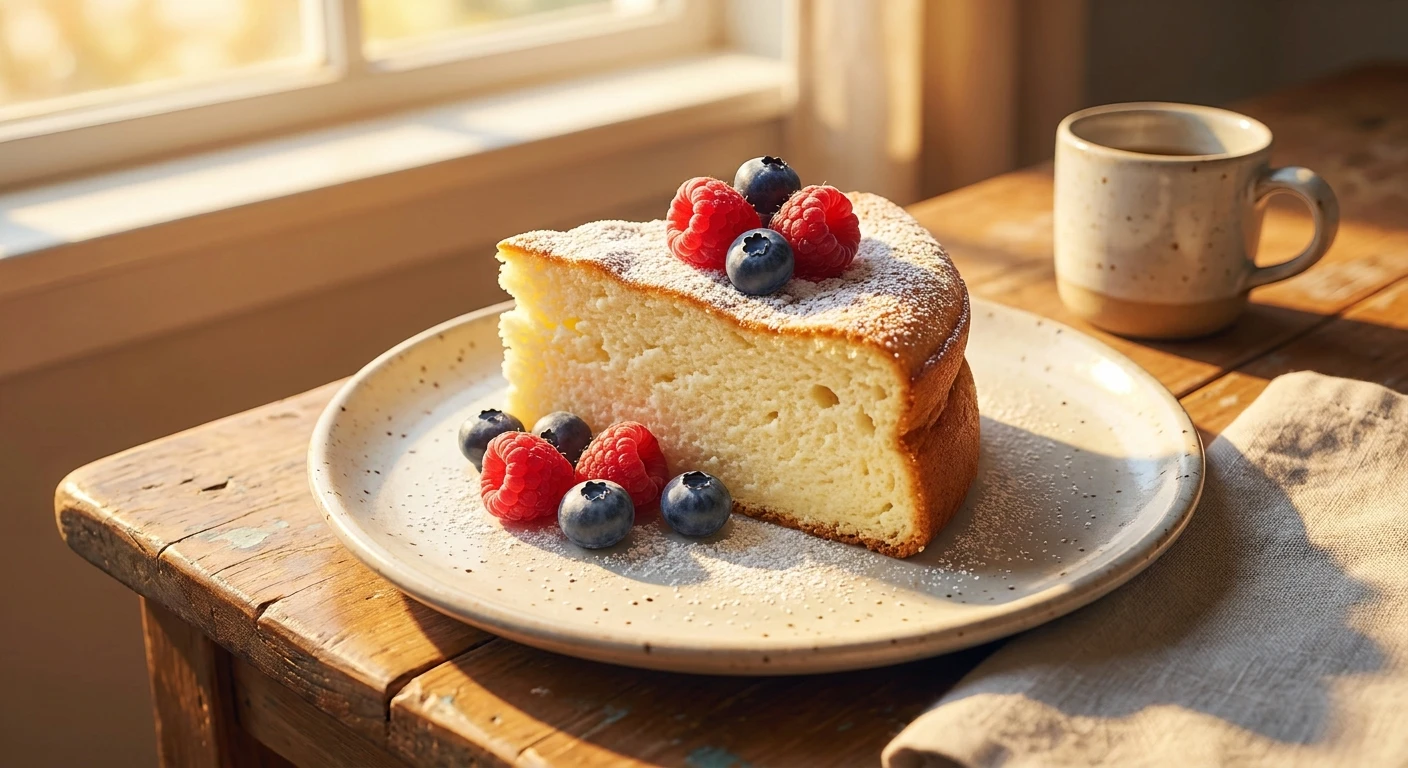
Fast forward to right now. The modern baking landscape is having a massive reaction against over-complicated, viral TikTok recipes that take three days to prep. People are tired. We want maximum flavor for minimum effort. The revival of the four-ingredient cake aligns perfectly with the aesthetic of modern minimalism. You take a beautiful slice, serve it on a minimalist ceramic plate with perhaps a quick dusting of powdered sugar, and it looks like it belongs in a high-end cafe. It is the ultimate flex of culinary confidence.
The Maillard Reaction Made Simple
Alright, let us talk about the actual science happening inside your oven, because it is fascinating. When you bake this cake, the edges turn a beautiful, deep golden brown. This isn’t just drying out; it is the Maillard reaction. This is a complex chemical reaction between amino acids (from the eggs and yogurt protein) and reducing sugars. Because our batter is relatively simple and lacks heavy, dense fats like butter, the sugar and proteins have direct access to each other under high heat. This creates that slightly caramelized, deeply fragrant crust that contrasts perfectly with the pale, snowy interior of the sponge.
Acid and Leavening Synergy
The real hero of this dessert is the lactic acid present in the yogurt. Baking is basically edible chemistry, and acid is your best friend when it comes to texture. Self-raising flour contains baking powder, which needs both moisture and a bit of heat to activate fully. However, when you introduce the naturally acidic environment of yogurt, you supercharge that reaction.
- Gluten Tenderization: The lactic acid actively works to shorten gluten strands as you mix the flour, ensuring the cake doesn’t become tough or rubbery, even if you accidentally overmix it a tiny bit.
- Maximum Lift: The acid reacts with the leavening agents instantly, creating millions of tiny carbon dioxide bubbles that get trapped in the thick batter.
- Protein Coagulation: The acidity slightly alters the temperature at which the egg proteins set, giving the cake a custardy, melt-in-your-mouth feel rather than a dry, bread-like texture.
Step 1: Gather the Fab Four
First things first. Clear your counter. You need one cup of full-fat plain yogurt, two large eggs, one cup of sugar, and one and a half cups of self-raising flour. Do not try to substitute the flour unless you are manually adding baking powder to all-purpose flour. Precision at this step saves you headaches later.
Step 2: Bring Ingredients to Room Temp
I cannot stress this enough. If you take freezing cold eggs and cold yogurt and try to mix them, your batter will look clumpy and sad. Leave them on the counter for 45 minutes before you start. Room temperature ingredients emulsify smoothly, trapping more air during the whisking phase.
Step 3: The Gentle Fold Technique
Crack your eggs into a bowl with the sugar. Whisk them until they are slightly frothy and pale yellow. Stir in your yogurt until combined. Now, sift your self-raising flour over the top. Put down the whisk. Grab a rubber spatula and gently fold the mixture from the bottom up. Stop the absolute second you no longer see dry flour streaks.
Step 4: Preparing the Vessel
Grab an 8-inch round cake pan. Rub a tiny bit of butter or spray oil along the bottom and sides, then line the bottom with a circle of parchment paper. This batter is sticky because of the sugar and yogurt content, and the parchment paper is your insurance policy against the cake tearing when you flip it out.
Step 5: The Precise Bake
Place the pan into the middle rack of a preheated 350°F (175°C) oven. The middle rack ensures even heat distribution. Set your timer for 35 minutes, but start checking at 30. You are looking for a dome that springs back slightly when you press it gently with your finger.
Step 6: The Crucial Cool Down
When you pull it from the oven, do not attempt to take it out of the pan immediately. The structural integrity is still fragile while piping hot. Let it sit on a wire rack in the pan for exactly 15 minutes. This allows the proteins to set firmly.
Step 7: The Final Garnish
Once cooled, run a butter knife around the edge and invert it onto a plate. Peel off the parchment. While it is delicious entirely bare, a quick dust of powdered sugar or a dollop of extra yogurt on the side elevates the presentation immensely.
Myths vs. Reality of Minimalist Baking
Myth: A cake without butter or oil will be incredibly dry and taste like cardboard.
Reality: The high moisture and fat content from a quality whole-milk yogurt provides more than enough lipid structure to keep the crumb ultra-soft and moist for days.
Myth: You absolutely need a stand mixer to get enough air into a sponge cake.
Reality: Because we are relying on chemical leavening (self-raising flour + acid) rather than mechanical leavening (creaming butter and sugar for 10 minutes), a simple hand whisk is actually preferred to avoid overworking the gluten.
Myth: A 4 ingredient yogurt cake is basically just sweet bread.
Reality: The egg-to-flour ratio combined with the acidity of the dairy creates a distinct, delicate, and velvety cake crumb that fractures beautifully on a fork, completely unlike the chewy structure of bread.
Can I use Greek yogurt instead of plain?
Yes, but Greek yogurt has less water. You might need to thin it out with a splash of milk so the batter isn’t excessively thick.
Does it need to be refrigerated?
No, store it in an airtight container at room temperature for up to three days. The fridge will actually dry out the crumb faster.
Can I add fresh fruit like blueberries?
Absolutely. Toss the berries in a tiny pinch of flour before folding them in so they don’t sink straight to the bottom.
What if I only have sweetened or flavored yogurt?
You can use it! Just reduce the amount of granulated sugar by about a quarter cup to prevent it from becoming overly cloying.
Can I freeze the baked cake?
Yes, tightly wrap the completely cooled cake in two layers of plastic wrap and freeze for up to two months. Thaw overnight on the counter.
How long does the prep actually take?
If you have your ingredients on the counter, active mixing time is genuinely under seven minutes.
Do I need an electric hand mixer?
Not at all. A simple balloon whisk and a silicone spatula are all the tools you need for a perfect texture.
What size pan is best?
An 8-inch round pan or a standard 9×5 inch loaf pan both work beautifully with these proportions.
To wrap things up, mastering this simple, elegant dessert is going to save you so much stress in the kitchen. Whether you are baking for a sudden craving or unexpected guests, this recipe delivers maximum comfort with minimal cleanup. Stop putting it off, go check your fridge right now, grab your whisk, and start baking today!



Leave a Reply