
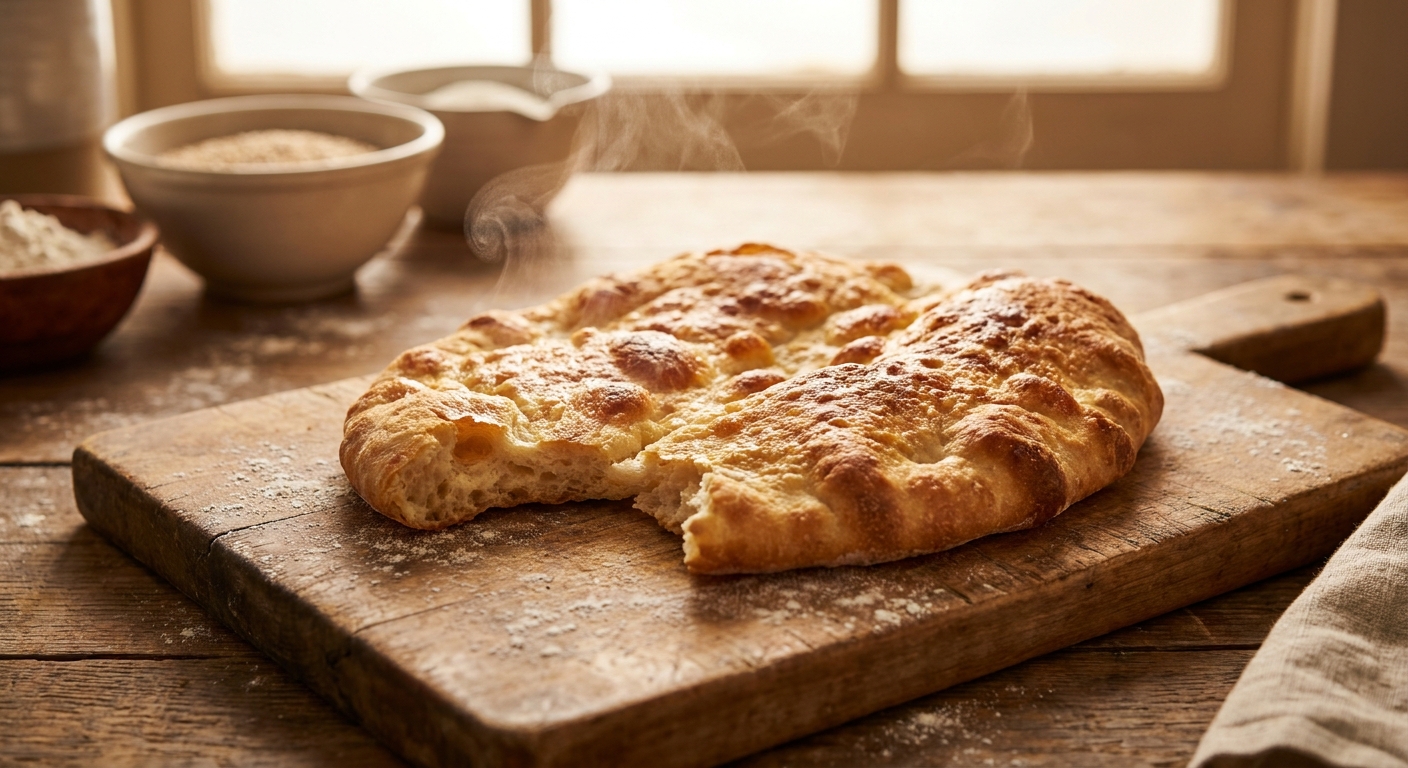
Why Homemade Oven Bannock is the Ultimate Comfort Food You Need Right Now
If you want to bake something incredibly satisfying and quick today, making oven bannock is the easiest and most rewarding choice you can make. You know that specific craving for fresh, warm bread right out of the stove, slathered in melting butter, but you absolutely dread the idea of waiting hours for yeast dough to rise? This rustic, indigenous-inspired quick bread is your ultimate savior. Listen, as someone who grew up in Ukraine surrounded by the deep, rich traditions of baking dense, hearty palyanytsia in massive stone hearths, I always felt an immediate, magnetic connection to traditional, unpretentious breads. When I first moved to North America and tasted a properly baked slice of this indigenous classic, it instantly felt like home. It possessed that exact same honest, rustic soul, yet it was entirely unique in its fast preparation. I quickly realized that baking it at home, right in a standard modern kitchen, creates that exact same culinary magic without needing an open campfire. You just need a hot baking sheet, a reliable technique, and a love for golden, buttery crusts. As we push forward through 2026, the global movement toward simplifying home cooking has skyrocketed, and this beautifully straightforward bread fits flawlessly into that mindset. It requires zero yeast, zero frustrating resting periods, and absolutely zero complicated kneading techniques. It is straight-up, honest food that fills your entire living space with the most incredible, comforting aroma imaginable.
The Core Mechanics of Baking the Perfect Loaf
Getting the texture exactly right comes down to understanding the delicate balance between your fat, your hydration, and your oven temperature. People constantly ask me why their quick breads turn out like dense hockey pucks, and the answer almost always lies in how they handle the dough. You want a tender, crumbly interior that aggressively soaks up soups, stews, or sweet jams, while maintaining a firm, structured exterior that holds its shape. When you choose your fat, you are essentially choosing your flavor profile and crumb structure. Here is a breakdown of how different fats drastically alter your final bake.
| Type of Fat Used | Impact on Final Texture | Resulting Flavor Profile |
|---|---|---|
| Cold Unsalted Butter | Highly tender, flaky layers, soft crumb | Rich, milky, traditionally comforting |
| Traditional Lard | Extremely crisp crust, structurally firm | Savory, neutral, perfect for heavy stews |
| Vegetable or Canola Oil | Dense but moist, slightly chewier | Very neutral, allows sweet toppings to shine |
When you provide incredible value to your family dinner table, you need to follow the absolute best practices. For instance, pairing a lard-based loaf with a rich beef stew elevates the entire meal, whereas a butter-based loaf shines brightest with wild berry jams and clotted cream. To master this versatile side dish, you must memorize these three golden rules of dough handling:
- Keep your ingredients freezing cold: Warm fat will melt into the flour prematurely, ruining the flaky pockets of air you desperately want.
- Hydrate gently and cautiously: Pour your liquid in stages. Flour absorbs moisture differently depending on your kitchen’s humidity.
- Stop mixing immediately once it forms a shaggy mass: Overworking the dough develops tough gluten strands, which is the mortal enemy of a tender quick bread.
Origins and Indigenous Roots
The story of this incredible bread is a massive intersection of cultures, survival, and resourcefulness. Originally, Indigenous peoples of North America crafted traditional unleavened breads using incredibly diverse native ingredients. They utilized flour derived from bracken ferns, cattail roots, camas bulbs, and even finely ground corn. These early iterations were incredibly dense, nutrient-packed, and completely adapted to the fierce local environments. They baked these early breads on hot stones directly in the fire, wrapped them around green sticks over open flames, or baked them in earth ovens dug deep into the soil. The ingenuity of these original recipes remains awe-inspiring today.
Evolution Through the Fur Trade Era
Everything shifted dramatically with the expansion of the fur trade across the continent. Scottish fur traders and explorers brought with them their own traditional oat-based flatbreads, famously called “bannuc.” They also introduced vast quantities of refined wheat flour, baking powder, and heavy cast-iron cookware to the Indigenous communities they traded with. A fascinating culinary synthesis occurred. Indigenous cooks brilliantly adopted these new, shelf-stable ingredients and applied their traditional cooking methods. Wheat flour provided a lighter texture, and the introduction of chemical leavening agents like baking powder created the distinct, fluffy interior we recognize immediately today.
Modern State of Rustic Breads
Fast forward to the present day, and this bread stands as a powerful symbol of Indigenous resilience, culinary pride, and widespread comfort food. From high-end urban restaurants serving elevated versions alongside braised wild game, to grandmothers quickly whipping up a batch for Sunday morning breakfast, the recipe has solidified its place as a cornerstone of North American heritage cooking. Modern variations now include incredible additions like aged cheddar cheese, finely chopped jalapeños, wild blueberries, or fragrant roasted garlic. Yet, the purest, unadulterated baked version remains the undisputed champion of fast, soul-warming baking.
The Chemistry of Baking Powder Activation
Baking is fundamentally an edible science experiment, and quick breads rely heavily on swift, predictable chemical reactions. Unlike traditional sourdoughs that utilize biological fermentation over many hours, this recipe depends entirely on the immediate acid-base reaction provided by double-acting baking powder. When you mix the dry powder with a liquid, the first chemical reaction occurs, creating tiny bubbles of carbon dioxide gas throughout your sticky dough. The second, more explosive reaction happens the moment that dough hits the blazing heat of your stove. This rapid expansion is what gives the bread its signature fluffy lift.
Gluten Development and Heat Transfer
Heat transfer in a home kitchen dictates the quality of your crust. The intense, radiating heat from a preheated cast iron pan or dark baking sheet triggers the Maillard reaction almost instantly upon contact. This browning process breaks down proteins and sugars, creating hundreds of new, complex flavor compounds on the surface. Meanwhile, managing gluten is a delicate dance. You actually want minimal gluten development here. Let us break down the exact scientific facts making your bake successful:
- Double-acting baking powder requires both hydration and high heat to fully release its 100% leavening potential.
- The Maillard reaction accelerates drastically at surface temperatures exceeding 300°F (150°C), producing the golden-brown visual appeal.
- Wheat flour contains glutenin and gliadin proteins that link together forcefully when hydrated and agitated; minimizing agitation keeps the crumb perfectly tender.
- Cold fats create distinct physical barriers between flour particles, drastically shortening the gluten strands for a superior, biscuit-like bite.
Step 1: Sifting Your Dry Ingredients Perfectly
Begin by meticulously measuring out three cups of high-quality all-purpose flour, two generous tablespoons of baking powder, and a solid teaspoon of kosher salt. You must sift or vigorously whisk these dry elements together in a large, wide mixing bowl. Unevenly distributed baking powder results in horribly bitter metallic pockets in your baked loaf, which completely ruins the eating experience. Take your time here; aerating the flour ensures a lighter final product.
Step 2: Cutting in the Cold Fat
Take one-quarter cup of ice-cold butter or lard and cut it into small, uniform cubes. Drop these cubes into your dry mix. Using a pastry blender or merely your freezing cold fingertips, rapidly snap the fat into the flour. You are aiming for a coarse, sandy texture with visible, pea-sized chunks of butter remaining. These tiny pockets of fat will violently steam during the baking process, forcefully pushing the dough upward and creating magnificent flaky layers.
Step 3: Hydrating the Dough Gently
Create a deep well in the center of your flour mixture. Pour in one and a half cups of extremely cold water or milk. Using a wooden spoon or your hands, gently fold the dry edges into the wet center. Do this with a light, forgiving touch. You are simply trying to moisten the flour, not conquer it. The dough should look terribly shaggy, wet, and decidedly imperfect. This exact state of chaos is precisely what you want.
Step 4: Shaping the Loaf Without Overworking
Turn the shaggy, sticky mess out onto a generously floured work surface. With floured hands, gently pat the dough down into a large, rough circle about one inch thick. Do not use a rolling pin under any circumstances; the heavy pressure will aggressively destroy the delicate air bubbles you just created. Just pat, coax, and gently shape the edges until it looks like a rustic, beautiful disk.
Step 5: Preparing the Baking Surface
While you were mixing, your stove should have been aggressively preheating to 400°F (200°C). Grab a heavy-duty baking sheet and line it with parchment paper, or better yet, grab a seasoned cast-iron skillet. If using cast iron, place it inside during the preheat so it gets ripping hot. Carefully transfer your gently patted dough disk onto your chosen surface. Take a sharp knife and score a deep cross into the top. This allows steam to escape efficiently and prevents the center from remaining gummy.
Step 6: The High-Heat Baking Phase
Slide the pan directly into the center rack. The intense blast of heat will immediately hit the baking powder, causing the loaf to dramatically puff up within the first ten minutes. Let it bake undisturbed for roughly 25 to 30 minutes. You are looking for a deeply toasted, golden-brown crust. If you tap the bottom of the loaf with your knuckles, it should produce a hollow, deeply satisfying thud. That sound is the universal indicator of perfectly baked bread.
Step 7: Cooling and Serving Etiquette
Remove the magnificent, fragrant loaf from the heat and immediately transfer it to a wire cooling rack. I know the temptation to tear into it right now is overwhelmingly agonizing, but you must let it rest for at least ten minutes. The internal steam needs this brief window to finish cooking the starches. Once rested, do not slice it with a knife; simply tear off large, rustic chunks with your bare hands, smother them in salted butter, and enjoy pure culinary bliss.
Myths vs. Reality of Quick Breads
There is a shocking amount of misinformation floating around about this rustic staple. Let us clear the air and permanently debunk the worst offenses right now.
Myth: You can only cook this authentically over an open, roaring campfire in the wilderness.
Reality: While campfire cooking is incredibly nostalgic and deeply traditional, a modern home stove consistently provides much more even, controlled heat, resulting in a significantly more uniform and fully baked interior crumb.
Myth: You need to add yeast and let it rise overnight for it to taste like real bread.
Reality: This is strictly a quick bread relying purely on chemical leavening. Adding yeast entirely changes the fundamental DNA of the recipe, turning it into a standard sandwich loaf rather than the dense, biscuit-like classic it is meant to be.
Myth: The final product is supposed to be heavy, hard, and excessively dense.
Reality: A heavy, rock-hard loaf is simply the result of over-kneading the dough or using exhausted, expired baking powder. A properly executed batch is surprisingly light, beautifully tender, and incredibly flaky on the inside.
Myth: It is only meant to be eaten as a savory side dish with dinner.
Reality: The base dough is wonderfully neutral. By slightly increasing the salt for dinner or adding sugar and cinnamon, it effortlessly transforms into a brilliant breakfast pastry or a decadent dessert base.
Can I freeze the leftover dough?
Absolutely. If you want to prep ahead, shape the dough into a disk, wrap it tightly in a double layer of plastic wrap, and freeze it. When you are ready to eat, you can bake it straight from frozen, simply adding an extra ten to fifteen minutes to your total baking time. Do not thaw it first, or the chemical leavening agents will activate prematurely and leave you with a flat loaf.
What is the absolute best flour to use?
Standard all-purpose unbleached wheat flour is genuinely your best friend here. It strikes the perfect protein balance, providing enough structure to hold the heavy loaf together without making it overly chewy. You can certainly experiment by substituting up to half of it with whole wheat flour for a nuttier flavor, but going 100% whole wheat will result in a much denser, heavier crumb.
Why did my bread turn out completely flat?
Your baking powder is almost certainly expired. This is the number one culprit. Baking powder loses its explosive lifting power after sitting open in the pantry for over six months. Always test your powder by dropping a small spoonful into hot water; if it bubbles violently and instantly, it is good to go. The second culprit is an oven that was not fully preheated.
Can I make this entirely dairy-free?
Yes, incredibly easily. Swap the traditional butter for cold vegetable shortening, refined coconut oil, or high-quality lard. For the liquid, replace regular cow’s milk with icy cold water, unsweetened almond milk, or oat milk. The texture remains exceptionally flaky, though you will lose a tiny bit of the rich browning that milk proteins provide on the top crust.
How long does it realistically stay fresh?
Because this recipe lacks the commercial preservatives found in store-bought sandwich bread, it truly is best consumed on the exact day it is made. However, it will keep reasonably well in an airtight container at room temperature for up to two days. If it starts getting slightly stale, simply slicing it horizontally and toasting it in a hot skillet with butter immediately revives its magic.
Should I use cold water or cold milk?
Both work brilliantly, but they yield different results. Using pure, icy water produces a slightly crisper, more rugged crust with a cleaner, more pronounced wheat flavor. Using cold milk adds fat and natural sugars to the dough, resulting in a slightly softer, richer interior crumb and a darker, softer top crust. Try both and see which matches your personal preference.
What are the greatest toppings to serve with it?
The possibilities are literally endless. Savory lovers should aggressively apply salted butter, sharp cheddar cheese, thick gravy, or use it to mop up the bottom of a chili bowl. Sweet enthusiasts should lean heavily toward fresh whipped cream, wild blueberry compote, maple syrup, or a thick layer of raw honey. It acts as the perfect, sturdy vehicle for whatever flavors you currently crave.
Can I fry this dough instead?
Yes! While baking is wonderfully hands-off and significantly less messy, taking this exact same dough, cutting it into smaller wedges, and shallow-frying it in half an inch of hot canola oil yields traditional fried bread. It puffs up beautifully and gets a deeply crunchy exterior that is absolutely legendary at community gatherings.
Final Thoughts on Your Baking Journey
Baking at home does not have to be a stressful, multi-day affair involving sourdough starters and precise hydration percentages. Sometimes, the most deeply satisfying food comes from the oldest, simplest, and most reliable traditions. By mastering this incredibly fast, utterly delicious bread, you empower yourself to create warm, comforting food out of thin air in less than forty-five minutes. You have learned the history, you understand the simple chemistry of the crumb, and you have a foolproof step-by-step strategy. Grab your mixing bowl, preheat your stove, and experience the immense satisfaction of tearing into a fresh, steaming loaf. Don’t wait another minute—start baking your beautiful oven bannock right now and fill your kitchen with the best smell on earth!

Leave a Reply